Tabs – Oklahoma Sound #PRC 250 User Manual
Page 7
7
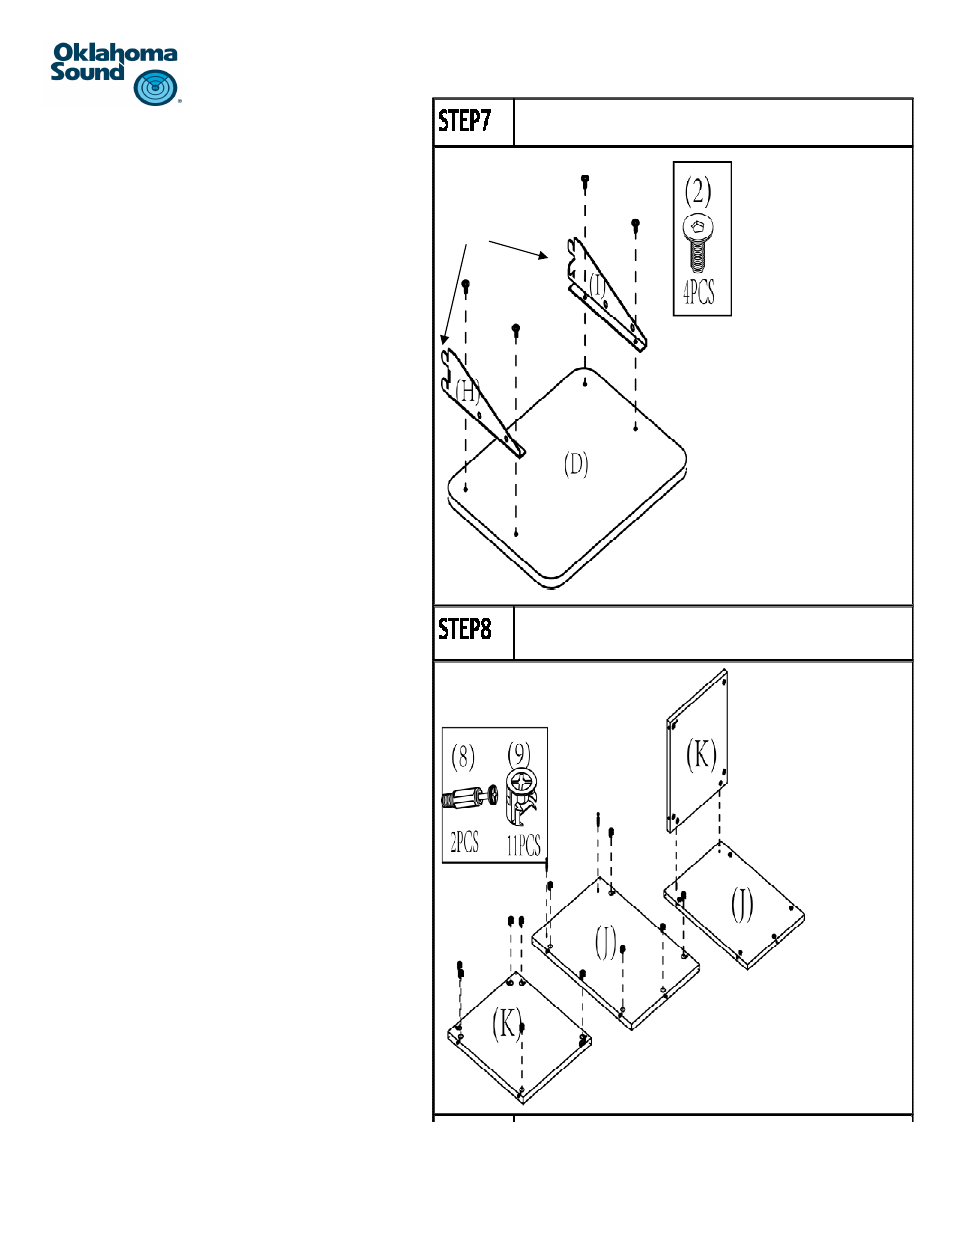
Step: 7
a) IdenƟfy panel #D and lay it on a clean, soŌ surface
facing down with the holes facing upwards.
b) Locate the two supporƟng brackets #H and #I and lay
them over the panel as shown. The two tabs at the
end of the bracket should be at the edge of the pan-
els as shown. The two brackets should be facing in-
wards as shown.
c) Align the two holes on the brackets with the embed-
ded t-nuts in the panel.
d) Once they are aligned use four bolts #2, two for each
bracket and thread them through the holes on the
bracket and into the t-nuts.
e) Use the hex key to Ɵghten the bolts .
f)
To aƩach the adjustable shelf to your unit, align the
two tabs on each bracket with the slots on the edge
of each side panel. One aligned slip it in and gently
push the shelf downwards to lock in place.
Step 8:
a) IdenƟfy panels #J and #K and lay them down on a
clean and soŌ surface with the holes facing upwards.
b) Using a Phillips screwdriver insert two cam bolts #8
into the plasƟc inserts on panel #J .
c) Insert five cam locks #9 into panel #J and six cam
locks into panel #K.
d) Important: Be sure to always insert the cam locks
with the arrow facing the edge of the panel so the
cam bolt can be inserted with ease.
Assembly:
a) Align the two cam bolts on panel #J with the two
cam locks at the edge of panel #K as shown.
b) Once the holes are aligned, lower panel #K so the
cam bolts are inserted into the cam locks.
c) Once panels #K and #J are flush, use a Phillips screw
driver to turn the cam locks so the two panels lock
together.
d) Place these panels on the side for a future step.
Tabs