Oklahoma Sound #PRC 250 User Manual
Page 4
4
Before you begin the assembly open all the panels
from their individual wrapping to idenƟfy the pan-
els properly . Be sure to open them in a way that
will not scratch the panels.
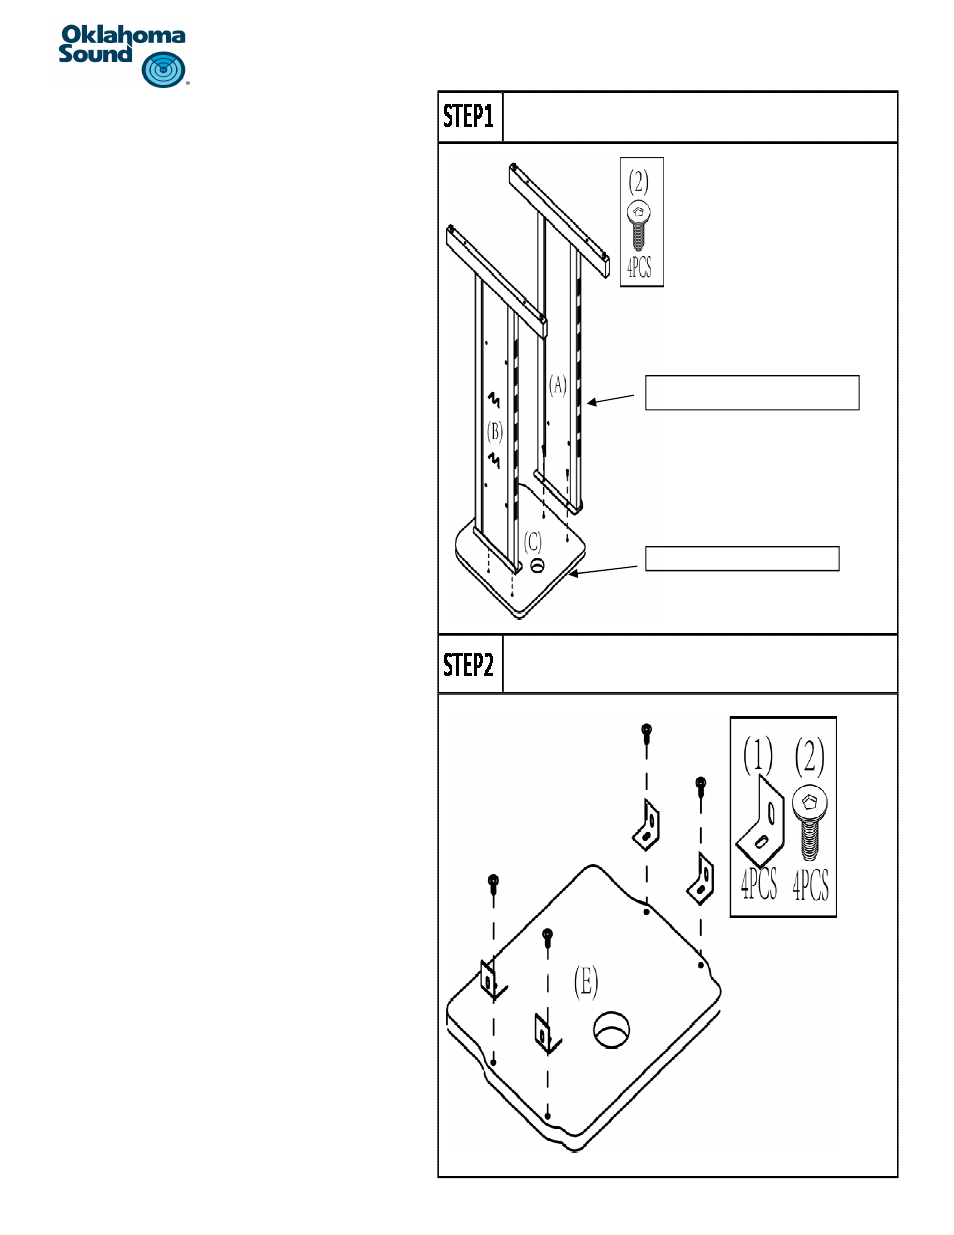
Step 1:
a) Begin by taking surface panel #C and lay it on a clean,
soŌ surface facing down with the holes facing up-
wards.
b) Locate side panels #A and #B.
c) Make sure that both panels are facing inwards with
the sloƩed end of the side panel at the straight edge
of panel #C as shown.
d) Use four bolts #2, two for each panel, to secure the
side panels to the surface panel as shown. Screw the
two bolts through the holes on the top of the side
panels and into the embedded T-nuts on panel #C.
e) Use the provided hex key, part #20 to Ɵghten the
bolt in place.
Step 2:
a) Locate the projector shelf panel #E and lay it down on
a clean surface facing down with the holes facing up-
wards.
b) AƩach four “L” brackets part #1 to the two sides of
the panel as shown. Make sure that the verƟcal side
is at the edge of the panel as shown.
c) Use four bolts #2 to aƩach the brackets by inserƟng
the bolt through the hole on the bracket and into the
embedded T-nuts in the panel.
d) Use the provided hex key, part #20 to Ɵghten the
bolt in place.
SloƩed edge of side panels
Straight edge of panel #C