Oklahoma Sound #PRC 250 User Manual
Page 6
6
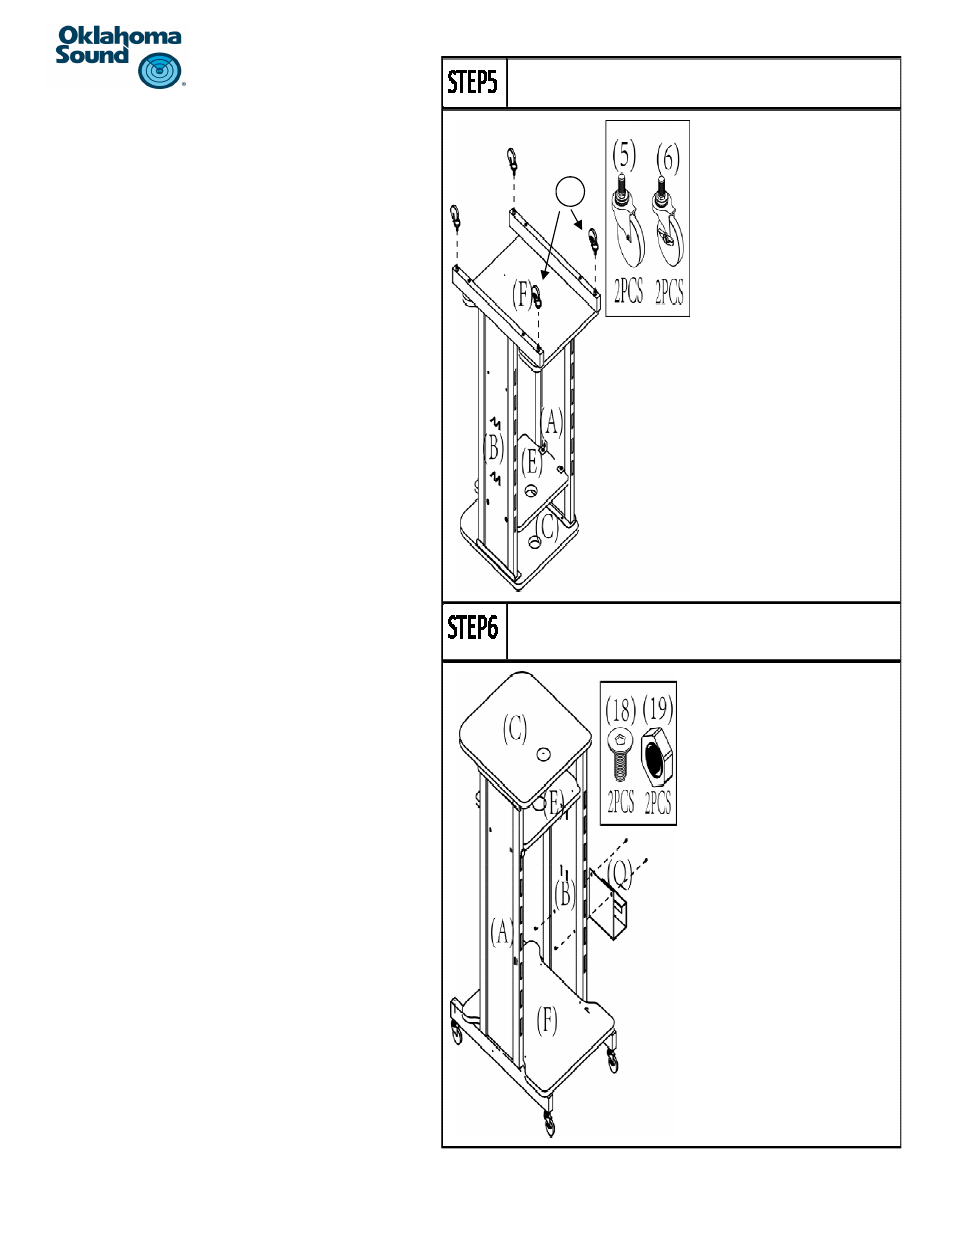
Step 5:
a) IdenƟfy the four caster wheels, two locking
part #6 and two non –locking, part #5.
b) Be sure to aƩach the two locking casters #6 at
the correct side of the unit as shown in the
illustraƟon for easier access while operaƟng
the cart.
c) Thread the stems of the casters through the
caster nuts located at each corner as shown.
d) Use the open wrench part #21 to Ɵghten the
caster to the unit.
e) Repeat this process to aƩach the two non-
locking casters #5 into the holes on the other
end of the side panels.
Step 6:
a) Gently turn the cart right side up and Ɵghten
all the bolts and nuts aƩached in step #1 and
#3.
b) Lock the locking casters to prevent the unit
from sliding during assembly.
c) IdenƟfy the power cord winder part #Q and
align the two holes on the corners with the
two holes on the lower secƟon of side panel
#B.
d) Once aligned , use two bolts #18 and two nuts
#19 to secure the power cord winder in place
by threading the bolt from the outside of the
unit and securing it in place with the nut on
the inside of the unit.
e) Use a Phillips screw driver to Ɵghten the
screws in place.
(6)