Oklahoma Sound #PRC 250 User Manual
Page 10
10
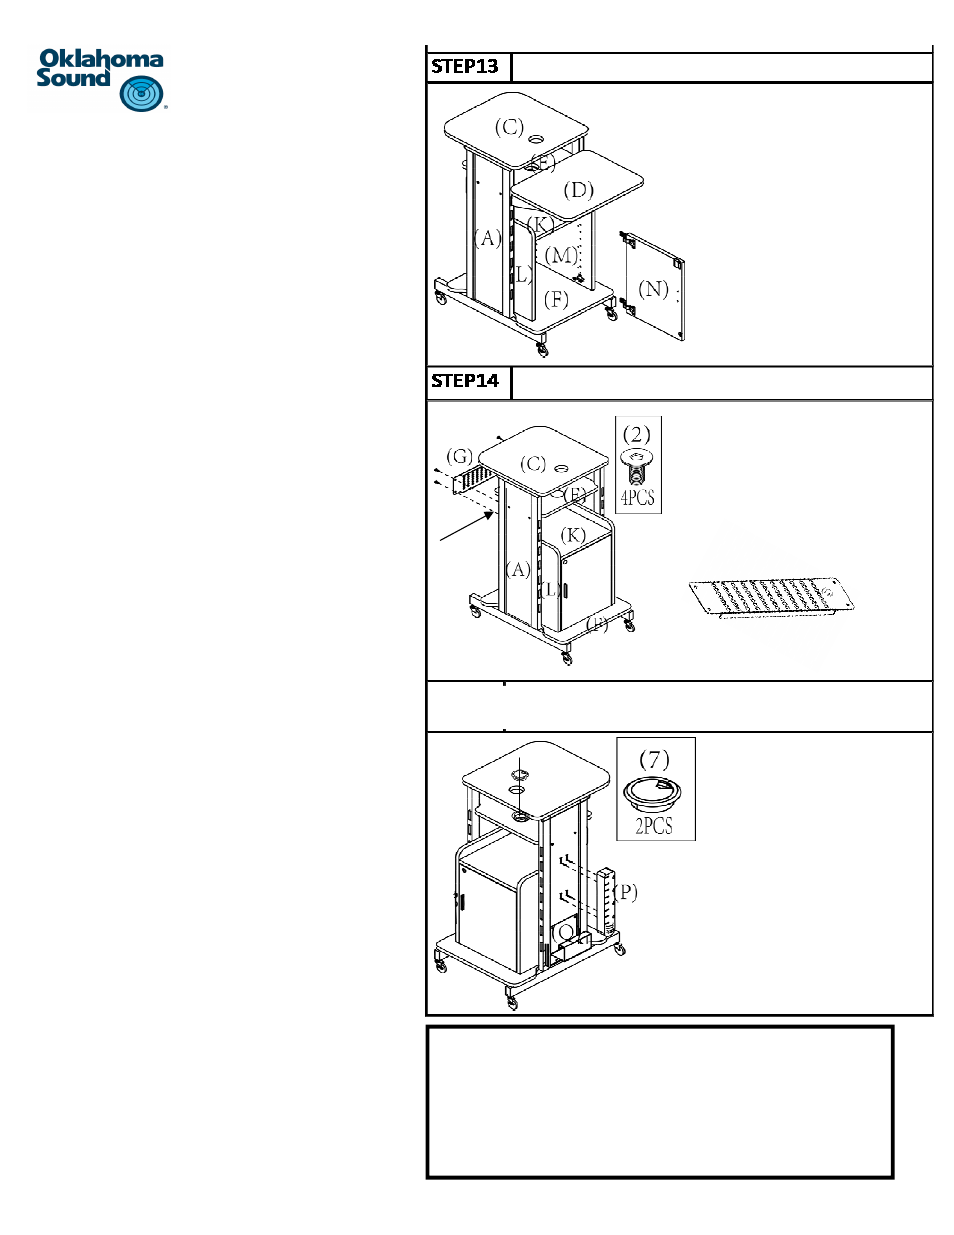
Step 13:
a) Take the assembled door part #N and align the male
hinges to the female part of the hinges that is located
on the side wall of the cabinet (panel #M) as shown.
b) Once aligned place the male hinge over the female end
and slip the open end of the male hinge into the pre-
aƩached screw on the female end.
c) Once the two parts of the hinges are aƩached, Ɵghten
the pre-aƩached screws on each hinge to secure the
two parts of the hinges together.
d) Insert twelve shelf pins #17 to the inside of the cabinet
at the desired height of the three adjustable shelves.
e) Insert the three shelves panel #O into the cabinet to
rest on the three levels of support pins.
Step 14:
a) IdenƟfy part #G and locate the four holes, two located
at each side of the panel.
b) Panel #G will be aƩached to the front of the unit right
below the projector shelf #E as shown.
c) On the edge of the two side panels right below the
projector panel #E you will noƟce four holes, two on
each side, which will correspond with the four holes on
panel #G.
d) AƩach Panel #G using four bolts #2. Use the provided
hex key to Ɵghten all the bolts.
Step 15:
a) IdenƟfy the two plasƟc grommets part #7 and insert
one in the surface panel #C and one in the projector
shelf #E.
b) IdenƟfy the power strip part #P.
c) The power strip is aƩached to the side panel above the
power winder by aligning the slots on the back of the
power strip to the metal tabs on the side panel above
the winder part #Q.
d) The power strip should be mounted with the cord com-
ing out from the top of the strip.
e) Slip the tabs into the grooves and pull gently down-
wards and the power strip will be secured in place.
f)
Proceed to wrap the cord around the cord winder part
#Q to store it properly.
(G)
STEP 15
CongratulaƟons!!! Your PRC 250 is
now fully assembled!!