KBC Networks WES User Manual
Page 9
Wireless Ethernet PtP & MP System Operations Manual
WEM INSTALLATION & OPERATION (CONTINUED)
C. CONFIGURE CABLE
Determine the length of Cat5 cable that will be needed and where the PIM will
be located. The total length of cable from the WEM to the Ethernet device
cannot exceed 100 meters (325 feet), however, the PIM can be located
anywhere along the overall 100m of cable.
Slide the weatherproof connector over the cable jacket before crimping the
connector. See below for color-code standards to configure the correct type of
Ethernet cable.
Ethernet standard straight-through cable configurations used must be
configured to one of the Ethernet standards (568-A or 568-B) in order for the
WES system to operate efficiently. Any deviation from one of the two standard
configurations can lead to undesired activity.
Pin out for color codes 568-A and 568-B:
568-A
568-B
1- Green/White
1- Orange/White
2- Solid Green
2- Solid Orange
3- Orange/White
3- Green/White
4- Solid Blue
4- Solid Blue
5- Blue/White
5- Blue/White
6- Solid Orange
6- Solid Green
7- Brown/White
7- Brown/White
8- Solid Brown
8- Solid Brown
A cable configured with the 568-A color code on one end and the 568-B color
code on the other end is an Ethernet standard crossover cable.
Connect the RJ-45 connector into the WEM’s LAN port. Slide the strain relief
back up the cable to the threaded port in the case and screw it into the
Host/Client and tighten. Tighten the clamping nut until the CAT5 cable is
sealed in the connector. The weatherproof strain relief should be tight to the
case but the opening should remain loose enough to enable condensation
release.
D. CONNECT HOST AND CLIENT(s)
Verify antenna alignment and LED status. See page 5 for applicable LED
activity. Ensure the green power LED on the PIM is illuminated. The WEM red
power LED should be on provided the cable into the LAN port is seated in
properly. If multiple Clients connect to one multipoint Host, verify all Clients
are on the same frequency as the MP Host and pointed in its direction.
E. ESTABLISH LINK
Follow above steps, A through D, for all WEMs of the system to be established.
NOTE: In some cases, depending on the physical and RF environment, a
useable throughput rate may not be possible. Contact KBC for more
information – 888-366-4276 or [email protected].
8
Wireless Ethernet PtP & MP System Operations Manual
ADVANCED OPERATION
WEB BROWSER INTERFACE
Each Host and Client has a web browser interface to access the advanced setup
functions. If changing advanced settings, be sure to connect and power the radios
individually. To access this interface, connect the WES to the Ethernet port on a
computer, launch the web browser and type in the default IP address at
for the Host and
for the Client. The
configuration of the computer used to access the WEM may need to be changed
depending on its IP settings. The IP address of the computer should be set to
192.168.1.xxx. The xxx setting can be any address 2 – 254 excluding 200/201 or
any other IP address(s) you wish to use for a WEM on that subnet (or
Encoder/Decoder/WES Mesh/ThruLink product if applicable). The Subnet mask
should be 255.255.255.0. If you have any questions or concerns about changing
these settings, please contact your network administrator.
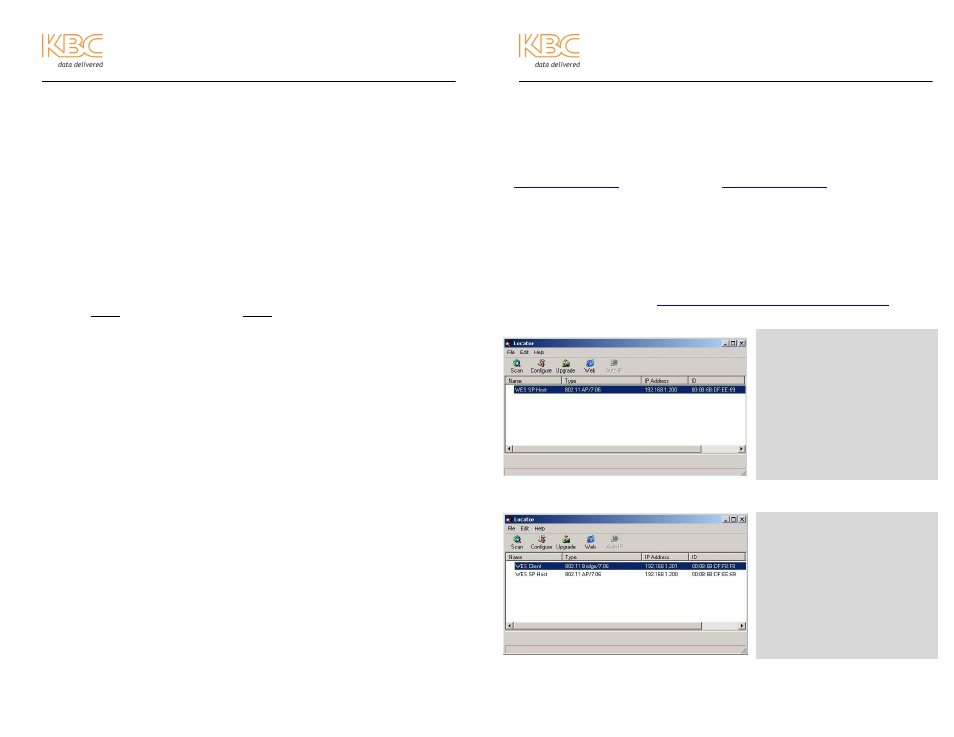
LOCATOR SOFTWARE TOOL – AVAILABLE FOR DOWNLOAD ONLINE
Available on our web site at
is a tool
that can search for the WES unit IP address. The tool can locate the WEM regardless
of the subnet setting of the computer on which it is running.
Connect to the Host and click “Scan”. Upon wireless connection to the Client, the
remote unit will appear after the clicking “Scan” again.
Click “Web” or double-click any of the WES devices to access the internal GUI
interface.
9
FAQ: What does the yellow
icon next to the “WES Client”
or “WES SP/MPHost” device
indication mean?
An
<
<
!
!
>
>
icon next to the device
indicates an Ethernet issue. If
your computer’s static IP address
is set to a different subnet than
the WEM, the icon will appear.
Duplicate IPs, network loops, low
signal strength and several other
reasons are other possibilities.
FAQ: What is the “AutoIP”?
If the yellow
<
<
!
!
>
>
icon appears,
the “AutoIP” button will be
available. Click the icon to hi-
light in blue. Then click “AutoIP”.
This function will change the IP of
the WEM to match the subnet of
the connected computer. After
approximately 10 seconds, click
“Scan” and the new IP address
should appear without the icon.