d&b Vi User Manual
Page 28
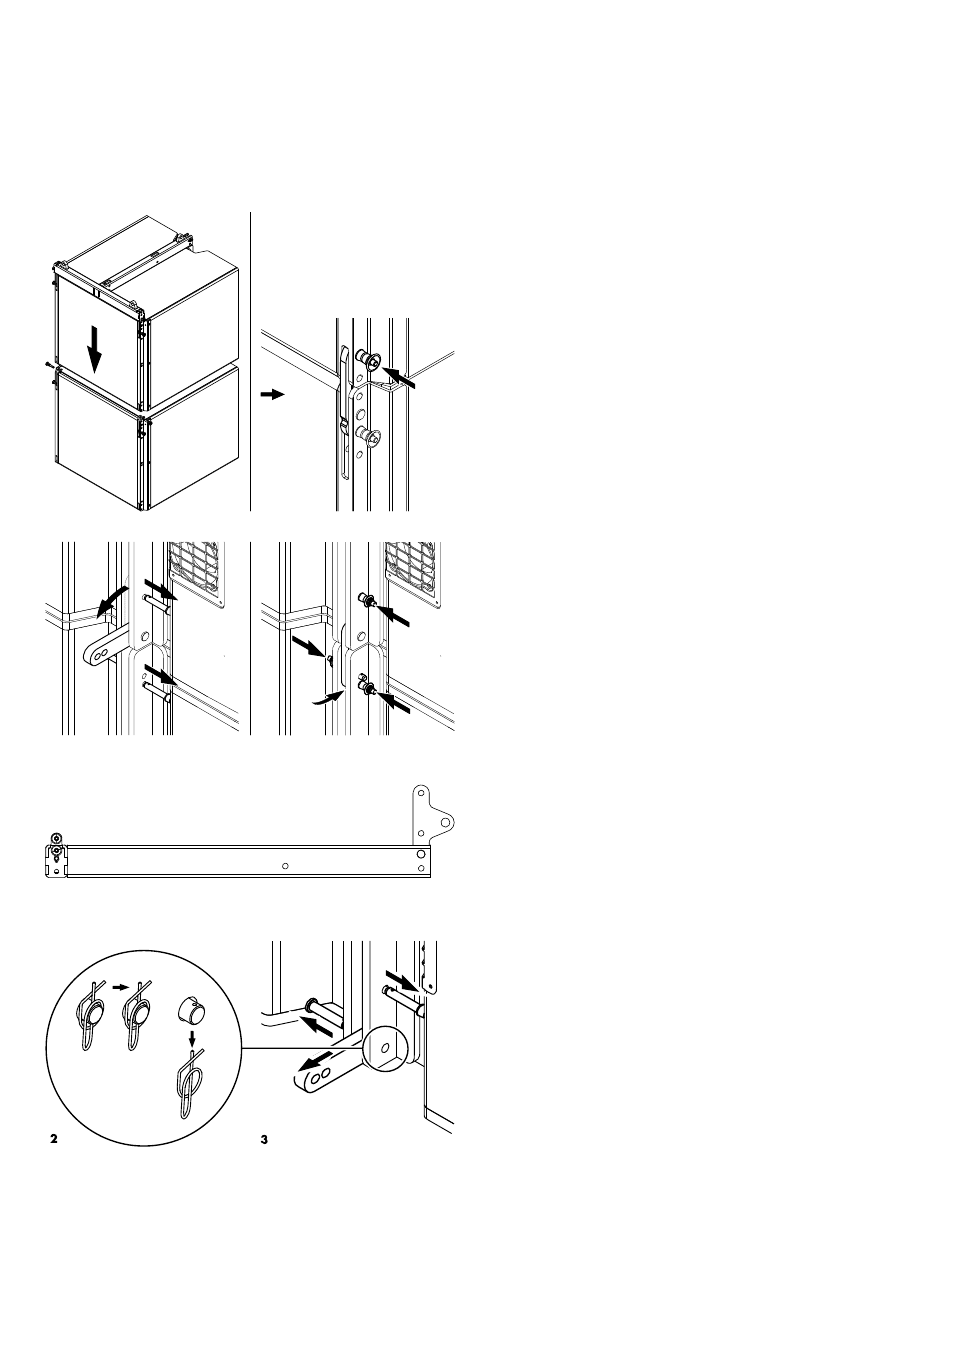
4. Add further SUB cabinet(s)
If you want to add further SUB cabinets, proceed as follows:
1. Prepare the Front links of the next cabinet as described in
Þ Chapter 2. "Rigging concept and components",
Þ "Cabinet's rigging mechanism" on page 16.
2. Lift the current assembly to a suitable working height.
3. Position the next cabinet below the assembly.
4. Lower the assembly onto the cabinet until the Front links of the
bottom cabinet fit into the slots of the upper cabinet.
5. Insert the second Locking pins of the cabinet's Front links on
both sides.
6. On the rear rigging strand, release the Locking pins of both
cabinets.
7. Fold out the Rear link of the upper cabinet.
8. Reinsert the Locking pin on the upper cabinet.
9. Fold the Rear link into the rigging strand of the bottom cabinet.
10. Reinsert the two Locking pins on the bottom cabinet.
5. Attach the Vi Mounting frame bottom
The Rear link of the bottom frame must be attached to the SUB
position. Check the position and alter it if necessary as described in
Þ Chapter 2. "Rigging concept and components", Þ 2.4. "Rear/
Note: Observe the direction of attachment as shown in the
graphic opposite.
5a. Remove the Rear link of the (lowest) SUB cabinet
To enable the attachment of the frame, the Rear link of the lowest
SUB cabinet must be removed.
1. Unlock and remove the ring cotter of the fixing bolt.
2. Pull out the fixing bolt and take out the Splay link.
Note: Keep the fixing bolt and the ring cotter aside. The items
are required to fix the Rear link of the frame on the rear
rigging strand of the cabinet.
d&b Vi Rigging manual (1.2 EN)
28