CRU RAX840-XJ User Manual
Page 3
RTX220 QR - Manual
2. Installation Steps
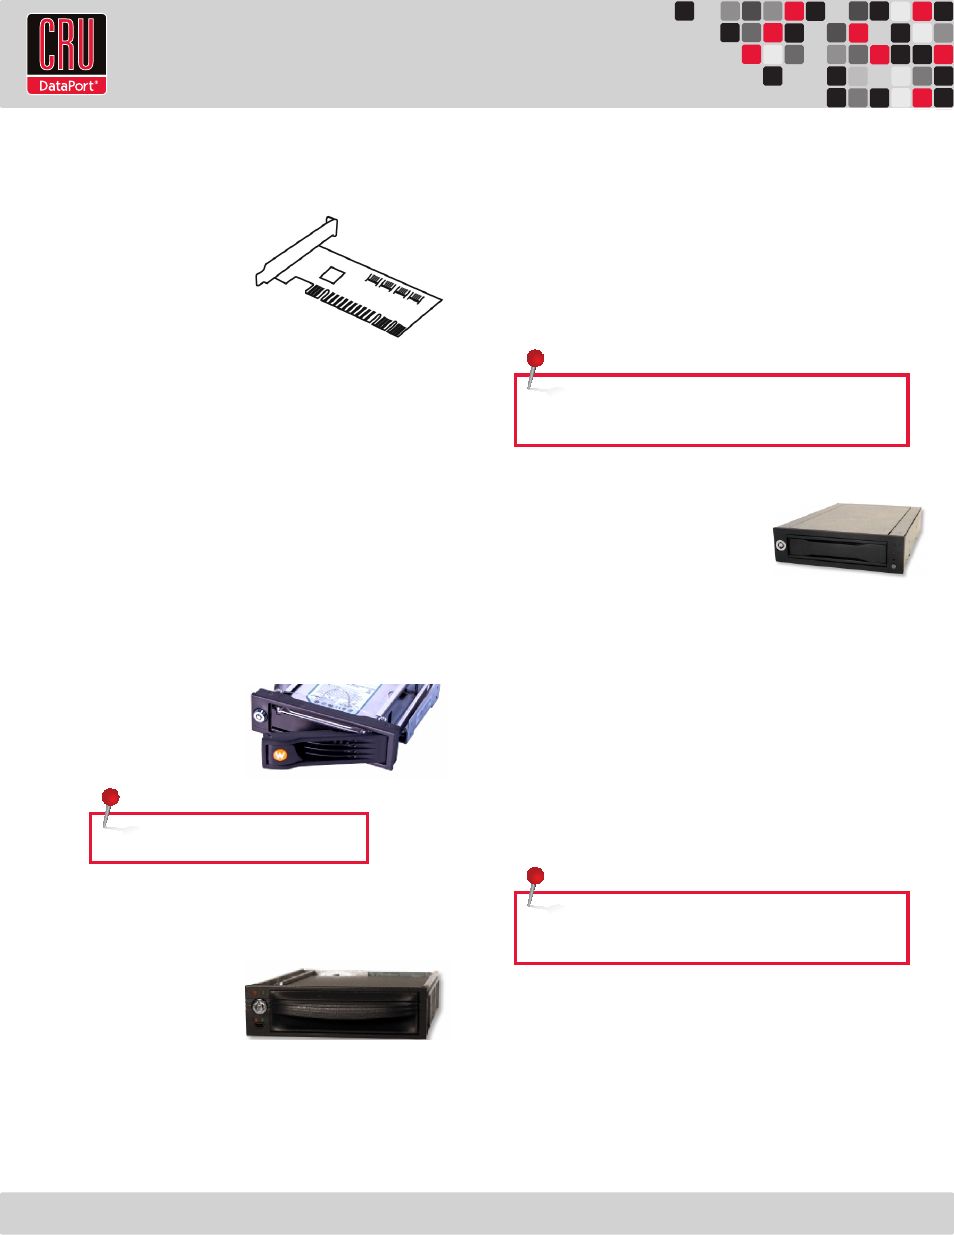
2.1 Installing a Host Bus Adapter (HBA)
(Optional) Install a host bus
adapter (HBA) with multi-lane
SAS/SATA ports into an empty
expansion slot inside your com-
puter. The following general
steps will work for most cards.
Instructions for individual cards
may vary, so consult your card’s
user manual.
a. Power down the computer system.
b. Insert the PCI card into an available PCI slot. Do not force it, but it
will take firm pressure to fully seat the interface. It may help to
gently rock the card back and forth as you apply pressure.
c. Once the card is fully seated in the slot, secure it in place with
a screw.
d. Turn the computer back on.
2.2 Installing Hard Drives
2.2.1 HDD Installation for RAX840-XJ
a. Pull on the ejection
handle and open the door.
b. Slide in your SATA hard
drive, connector-end first.
c. Shut the door.
2.2.2 HDD Installation for RAX841-XJ
a. Slide the drive carrier out
of the RAX.
b. The carrier’s cover is held
in place by a screw on the
rear of the carrier. Remove the screw, then remove the cover.
c. Slide the drive in from the front of the carrier.
d. Mate the connection on the drive with the connection on the
drive carrier circuit board.
e. Flip the drive/carrier assembly over, and secure the drive in
place with the provided screws.
f. Attach the Temperature Control Cooling Sensor to the top of
the drive with an adhesive strip.
g. Replace the carrier cover and secure the screw on the rear of
the carrier.
h. Slide the carrier into the RAX.
2.2.3 HDD Installation for RAX845-XJ
a. Slide the drive carrier out of the
frame.
b. The carrier’s cover is held in place by
two screws—one on either side of
the carrier. Remove these screws, then remove the cover.
c. Insert the drive into the carrier.
d. Mate the connection on the drive with the connection on the
drive carrier circuit board.
e. Flip the drive/carrier assembly over, and secure the drive in
place with the provided screws.
f. Replace the drive cover and secure the screw on the rear of the
carrier.
g. Slide the carrier into the frame assembly.
2.3 Connecting and Powering RAX 8-Bay-XJ
Connect the SFF-8088 data cable to the RAX and your host computer.
Plug in the power cord(s) to the unit and into a grounded electrical
outlet. With hard drives in the unit, turn on the power.
• For the RAX840-XJ the drives will begin to spin up automatically.
Page 2
NOTE: The drive’s label should be facing up.
NOTE: A flashing green LED on the bay indicates bay fan failure.
Call CRU technical support for assistance.
NOTE: A flashing red LED on the bay indicates bay fan failure.
Call CRU technical support for assistance.