Connecting to the pc using rs-232, Regeneration led, 10 bluac5 s/q hardware manual – Applied Motion BLuAC5-Q User Manual
Page 10
10
BLuAC5 S/Q Hardware manual
920-0049 Rev. C
12/8/2014
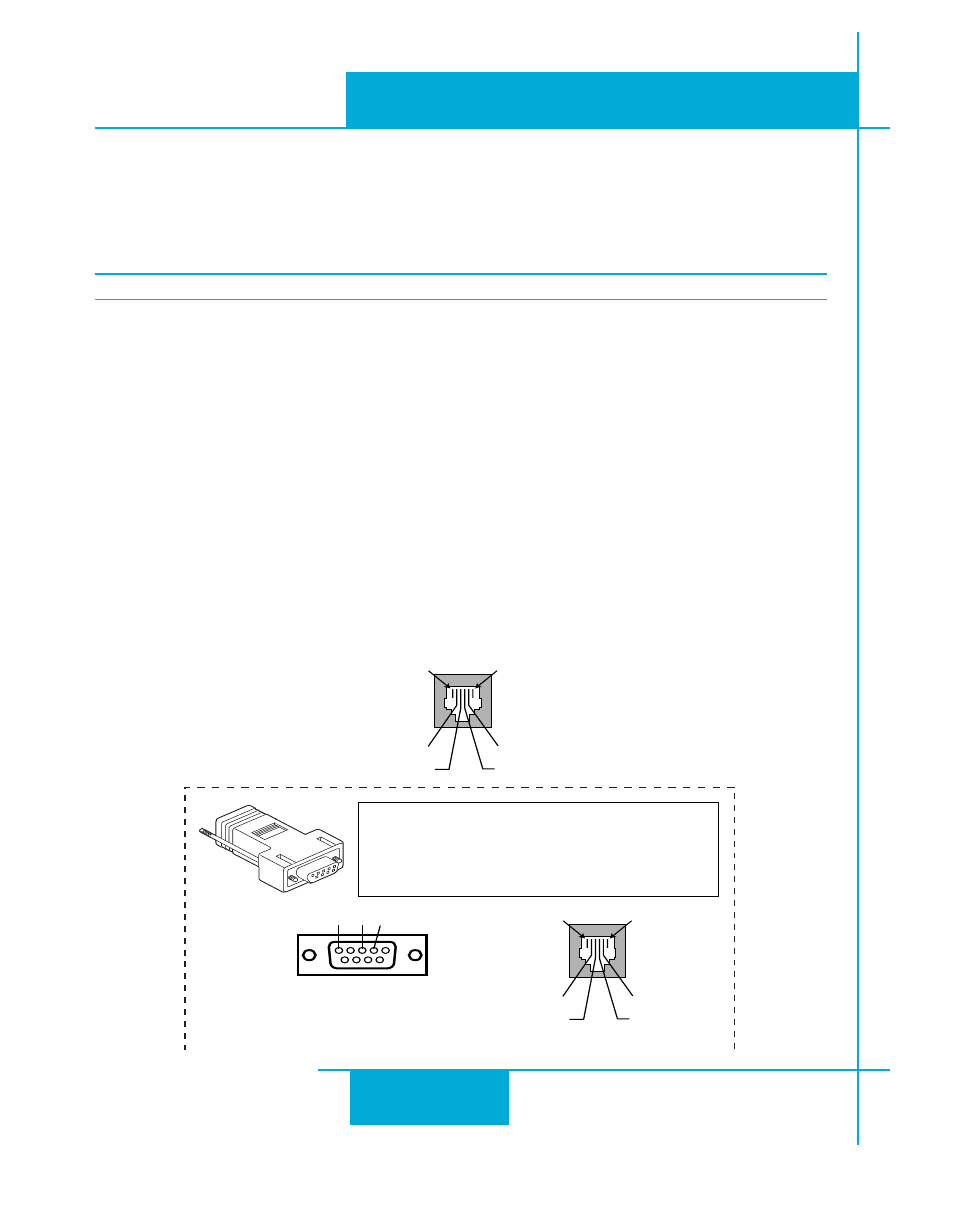
(5) GND
(4) Drive TX
(3) +5 Volt output for MMI & HUB
(2) Drive RX
2
3
5
6
DB9 to RJ11 Adaptor Pin assignments
DB9 female
Signal Name RJ11
Signal Name
2
RX
4
TX
3
TX
2
RX
5
GND
5
GND
Servo Drive RJ11
1
(2) PC TX
(3) No Connection
(4) PC Rx
(5) PC Ground
1
Adaptor RJ11
6
Adaptor DB9
Front View
Front View
Front View
PC DB9 to
Servo Drive RJ11 Adaptor
NOTE: Pins 1 & 6 are not connected
Connecting to the PC using RS-232
• Locate your computer within 6 feet of the BLU servo drive.
• Your drive was shipped with a communication cable. Plug the large end into the serial port
of your PC and the small end into the RS-232 jack on your drive. Secure the adapter to the
PC with the screws on the sides.
Never connect a BLU servo drive to a telephone circuit. It uses the same connectors and cords as
telephones and modems, but the voltages are not compatible.
If your PC does not have a serial port, you should purchase a “USB Serial Converter”. We
have had good results with the Port Authority “USB Serial DB9”
For laptops, a PCMCIA converter card is a good choice. Our applications engineers use the
from Sewell Direct.
Regeneration LED
This LED indicates when the drive is actively applying the regeneration clamp. The clamp is
the internal circuitry that shunts the DC bus to a power resistor. The power resistor can be
either internal or external. (See “
” in this manual for more details)