Heritage, Vintage, Laminated asphalt shingles phillipsburg, ks – TAMKO HERITAGE VINTAGE User Manual
Page 4
Central District
220 West 4th St., Joplin, MO 64801
800-641-4691
09/14
Northeast District
4500 Tamko Dr., Frederick, MD 21701
800-368-2055
Southeast District
2300 35th St., Tuscaloosa, AL 35401
800-228-2656
Southwest District
7910 S. Central Exp., Dallas, TX 75216
800-443-1834
Western District
5300 East 43rd Ave., Denver, CO 80216
800-530-8868
Visit Our Web Site at
tamko.com
HERITAGE
®
VINTAGE
®
LAMINATED ASPHALT SHINGLES
Phillipsburg, KS
4
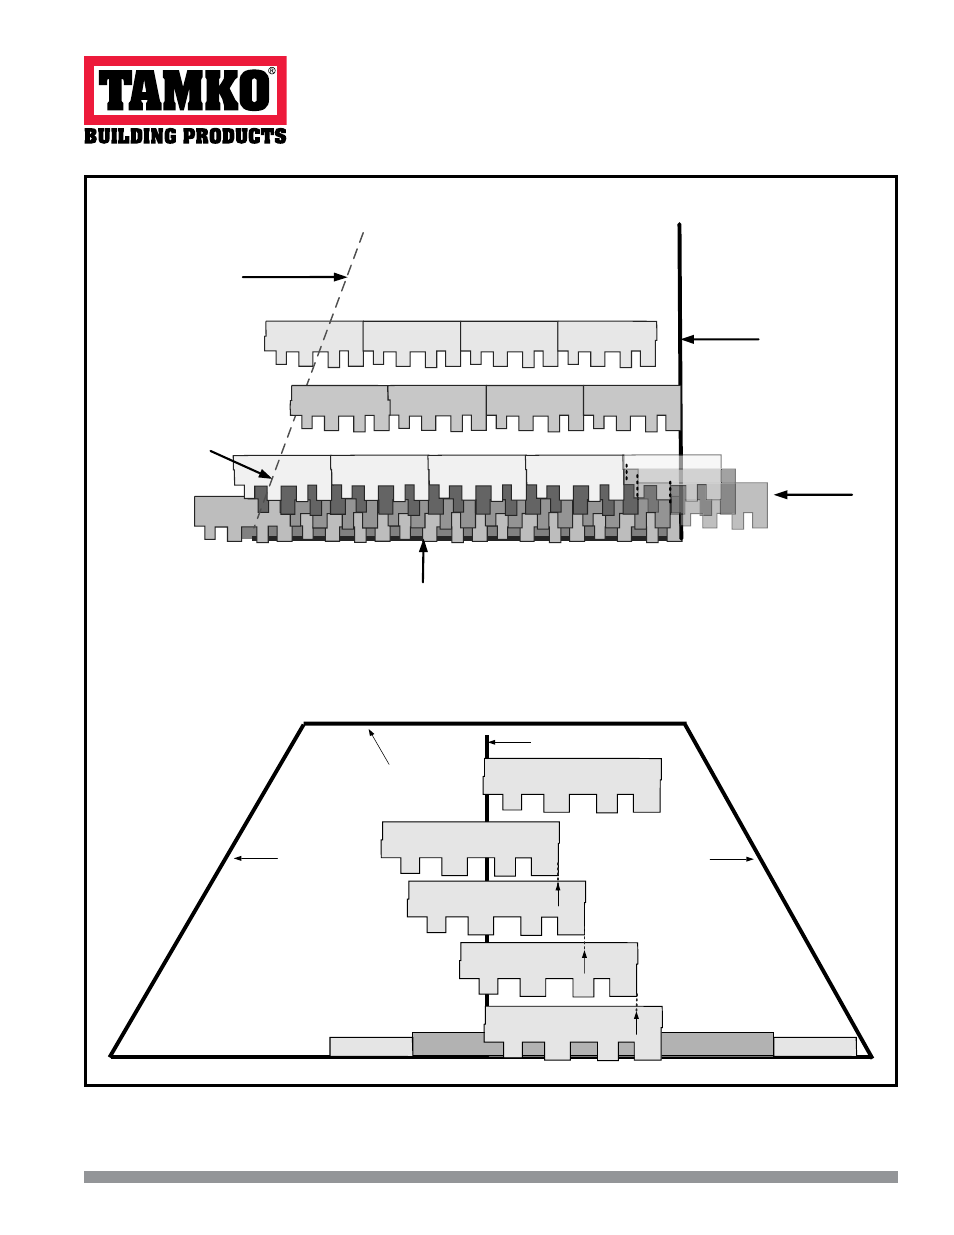
RIGHT RAKE EDGE
EAVE
Cut shingles at
right rake edge
5
Cut shingles at
valley or hip ridge
Valley line
or Hip
Ridge line
6
th
course begin step 2 and
repeat 3 - 5
6
1
2
3
5
4
5
course apply next to rake edge as in step 1
th
SHINGLE APPLICATION FOR RIGHT TO LEFT INSTALLATION CONTINUED:
IMPORTANT: USE
ALIGNMENT NOTCHES TO START SHINGLE COURSES, DO NOT MEASURE IT.
CHALK LINE
STARTER COURSES
5
th
COURSE repeat step 1 – 4
2
ND
LAYER IS VINTAGE STARTER
ALIGNMENT
NOTCH 2
ST
1 STARTER LAYER
NOTCH 1
ALIGNMENT
ALIGNMENT
NOTCH 1
HIP EDGE
HIP EDGE
RIDGE
NOTCH 2
ALIGNMENT
SHINGLE APPLICATION ON A HIP ROOF:
IMPORTANT: USE
ALIGNMENT NOTCHES TO START SHINGLE COURSES, DO NOT MEASURE IT.
For shingle application on a hip roof, strike a chalk line from the top point of the hip roof (at the ridge) down to the eave. This will be the reference
line to shingle from, starting on the right side of the line using the left to right instructions. Fill in the left side of the chalk line applying shingles right
to left. Install both sides of the chalk line as shingle courses go up the roof. As you work across the roof, install full size shingles taking care to align
the exposure notches to maintain the correct offsets. Trim the last shingle in each course along the hip edge and finish with Heritage Vintage Hip
and Ridge shingle products to complete the ridge.
Refer to Hip and Ridge Fastening Detail in Section 8 to complete the ridge.
(CONTINUED from page 3)
(Continued)