Vortech 1997-2004 C5 Corvette User Manual
Page 29
P/N: 4GR020-010 v1.7, 2009-11-25
©2009 Vortech Engineering, LLC
All Rights Reserved, Intl. Copr. Secured
17
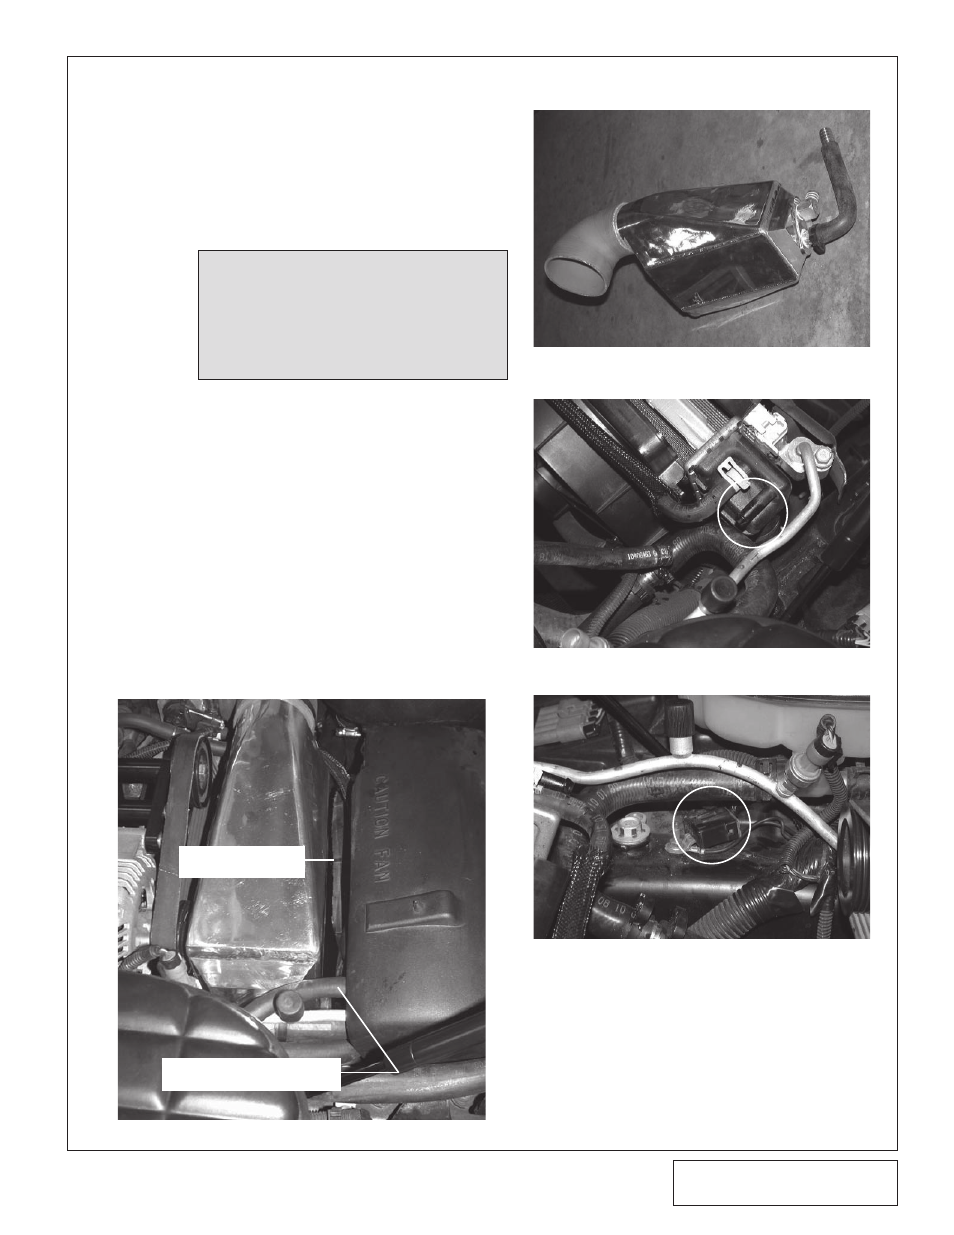
4. Temporarily disconnect the small radia-
tor bleed hose from the radiator. (See
Fig 13-l.) Loosen the nut securing the
factory harness plug to the front passen-
ger’s side frame rail. Rotate the plug
toward the outside of the vehicle for
cooler clearance. Tighten the nut. (See
Fig. 13 -m.)
5. Install the cooler in the vehicle and
attach the rubber elbow loosely to the
throttle body. (See Fig 13-n)
6. Connect the hose running from the CAC
water pump discharge to the 90° fitting
installed in the cooler end tank.
7. Using the supplied 3/4" hose mender
and straight hose, connect the molded
90° hose, coming from the CAC, to the
remaining fitting on the cooler radiator.
(See Figs. 13-c, 13-k.)
8. Verify that all hose connections have
tightened clamps installed.
9. Remove cap from surge tank and slowly
fill system with 25%/75% coolant/water
mix.
Fig. 13-l
13. CHARGE AIR COOLER INSTALLATION, cont’d
Fig. 13-k
Fig. 13-m
Fig. 13-n
diSCOnnECT FROM RAdiATOR
dURinG COOLER inSTALLATiOn
TRiMMEd RAdiATOR
FAn SHROUd
NOTE: If there is insufficient space for the CAC (all
automatic cars with clutched alternator pul-
leys), trim the upper edge of the radiator fan
shroud. Make sure not to contact the radiator
fan while cutting. (See Fig. 13-n.) Vehicles
equipped with a clutched alternator pulley
will require the maximum amount of clear-
ance possible.