Vortech 1994-1995 Ford 5.0 Mustang User Manual
Page 13
P/N: 4FG020-010
© 2008 Vortech Engineering, Inc.
All Rights Reserved. Intl. Copr. Secured
04NOV08 V2.0(94-95 5.0 Mus.(4FG V2.0))
5
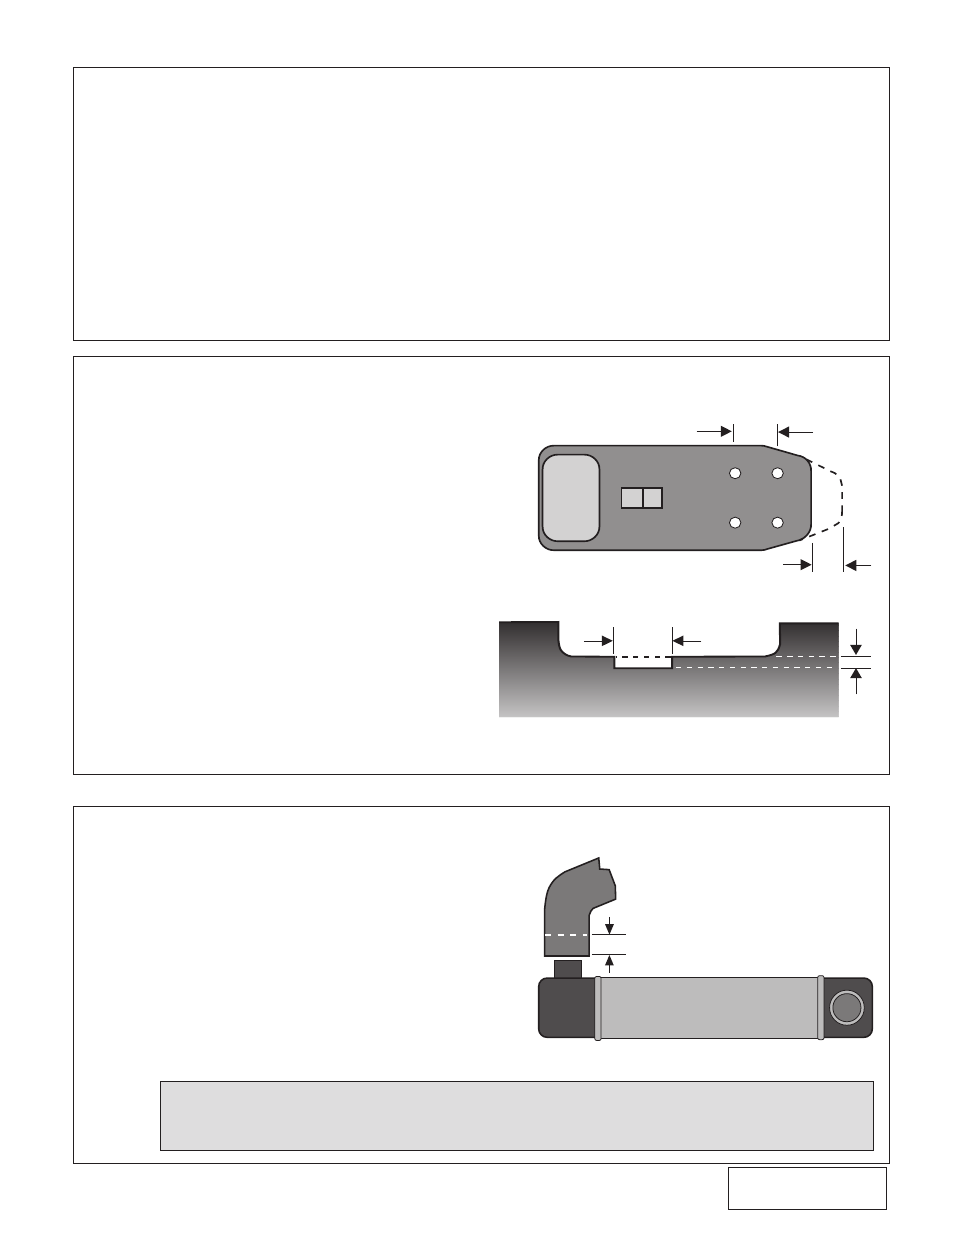
5. FAN RELAY BOX RELOCATION
A. Modify the relay mount by removing 1/2"
from the front end of the bracket that mounts
to the radiator core support. Mark and drill
two 1/4" holes located 5/8" towards the
back of the original mounting holes (see
Fig. 5-a).
B. Trim a 2" x 1/2" section off of the plastic ra-
diator cover piece to clear repositioned relay
(see Fig. 5-b). Align relay and shroud.
C. Reroute the electrical fan and coolant
overflow wiring underneath the fan relay
processor bracket for belt clearance.
A. Trim 1-1/4" of hose from the radiator end of the
upper radiator hose (straight portion) (see Fig.
6-a).
B. Remove the air conditioning line support clamps
near the radiator outlet so that the air condition-
ing lines may be bent. Reconnect the mounting
tabs.
C. Slightly bend the high pressure air conditioning
line (the line with the pressure switch located on
it) towards the radiator and around the radiator
hose for clearance of the supercharger pulley and
belt system. (See Figs. 6-b, 6-c.)
6. RADIATOR HOSE/AIR CONDITIONING LINE
C. Install replacement ring (with the notched part
facing down) around the four screws inside
the FMU.
D. Place the new disk inside the ring on top of
the piston.
E. Install the new diaphragm and carefully line
up holes to the body.
F. Reinstall the FMU cover with the six allen head
screws.
Do not overtighten the screws. The
correct torque is 24 in/lbs (2 ft/lbs).
Fig. 5-a
Fig. 5-b
Fig. 6-a
4.1 FUEL MANAGEMENT UNIT RECALIBRATION, cont'd.
NOTE: Air conditioning lines are under high pressure and the fluid is highly toxic; therefore, use extreme caution
when bending the line to avoid kinking or breaking the line. Support the assembly as much as possible
while bending for clearance.
1/2”
PLASTIC RADIATOR COVER
2”
DRILL 1/4" HOLES 5/8" BACK FROM EXISTING HOLES
5/8"
1/2"
REMOVE 1/2"
1-1/4"
RADIATOR