Vortech Ford Driver's Side Renegade System User Manual
Page 8
P/N: 007062
©2003 Vortech Engineering, LLC
All Rights Reserved, Intl. Copr. Secured
28JAN03 v2.0
(DS Rngde S/C Sys(7062 v2.0))
A. Make sure the harmonic balancer mounting
surface is clean.
B. Place the crank pulley onto the balancer (with-
out using bolts) to check balancer-to-pulley fit. If
any slop exists (up and down/side to side), use
feeler gauges or shim stock to temporarily cen-
ter the pulley onto the hub. (Due to tolerance
variations of different aftermarket balancer
manufacturers, Vortech has found that this im-
portant exercise may be necessary on some,
but not all applications to achieve minimal pulley
runout.) If the pulley is not centered on the hub
correctly, it may create an out-of-balance condi-
tion which will directly affect the engine and
supercharger bearing life. Proceed with the next
step and remove the feeler gauge/shim stock
after the bolts have been torqued.
C. Using the supplied 3/8-16 bolts and 3/8" AN
washers, (a small drop of blue Loctite on the
threads of each bolt should be used) attach the
Vortech crank pulley to the balancer. Torque to
35 ft/lbs.
3.
OIL FEED LINE
A. Remove the oil pressure sender and mounting
boss fitting from the engine.
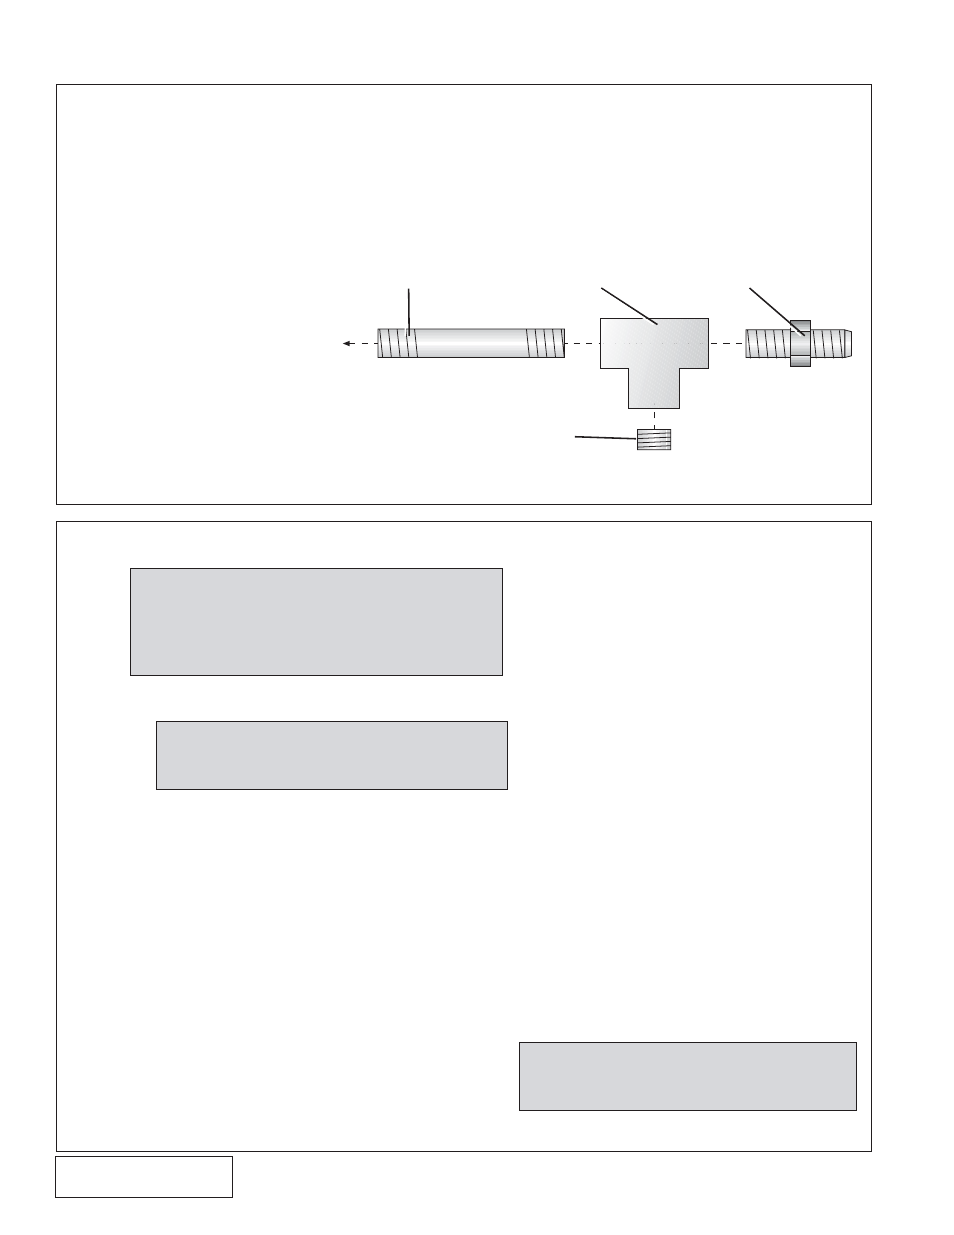
B. Assemble the supplied 1/4" NPT fittings as
shown. Teflon tape, paste or other sealant is not
recommended as it might loosen and cause
blockage of the oil feed orifice, resulting in
supercharger failure.Thread the assembly into
the block.
2
Fig. 3-a
4.
CRANK/WATER PUMP PULLEY MOUNTING
IMPORTANT
: Check the crank pulley and super-
charger alignment after installaltion. If
a Ford Motorsport balancer and spacer
are used, the Motorsport spacer MUST
be machined down to .615" thick (in
most cases).
NOTE
: Tighten bolts progressively and evenly
in a crisscross pattern so that the pul-
ley will seat properly.
NOTE
: It is HIGHLY recommended that an NHRA
approved aftermarket balancer be used.
C. Connect the red oil
feed line to the #4
flare fitting. Cover
the end of the hose
from dirt and debris
until hose can be
attached to the su-
percharger.
D. Install a new oil filter
and refill the engine
with oil. DO NOT
OVERFILL.
1/4” NPT x 3” NIPPLE
1/4” NPT TEE
1/4” NPT x -4 FLARE
1/4” NPT PLUG
(IF NEEDED)
ENGINE
BLOCK