Replacing a power supply, Figure b-8: replacing a power supply – StorCase Technology DS500 User Manual
Page 37
DS500 User's Guide - Rev. E00
StorCase Technology, Inc.
Appendix B - Optional Accessories
29
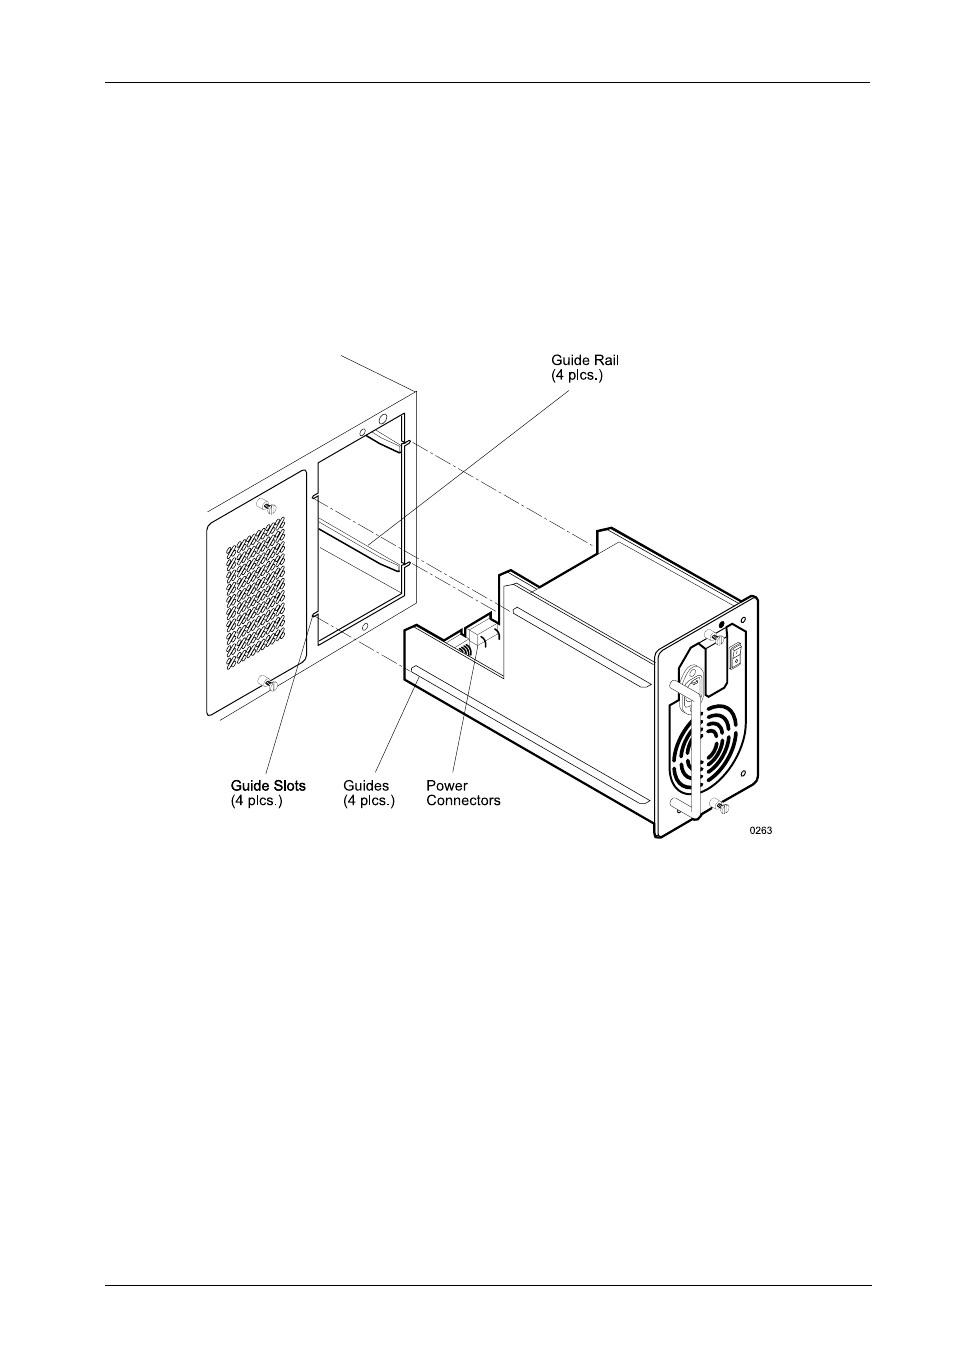
Replacing a Power Supply
The DS500 comes equipped with two (2) power supply units. This allows the DS500 chassis
to run in Shared Mode, thus enabling both power supplies to operate at a reduced wattage
and lower operating temperature. If one power supply should fail, the other will carry the full
load without interruption.
Figure B-8: Replacing a Power Supply
1.
To remove the power supply to be replaced, loosen the thumbscrew fasteners and
slide it out.
2.
Slide the new power supply into place through the DS500 rear panel by aligning the
guides of the power supply module with the slots in the chassis back panel. Make
certain that no wires are pinched between the back panel and the power supply
module.
3.
Push the power supply tightly against the DS500 chassis back panel and tighten the
thumbscrew fasteners.
4.
Install the power cable.
5.
Turn on A/C power.
6.
If replacing a failed power supply and the error light is still flashing, press the reset
button on the front panel to turn it off.