Drive installation – StorCase Technology DS400 User Manual
Page 19
10
Installation
StorCase Technology, Inc.
DS400 User's Guide - Rev. E01
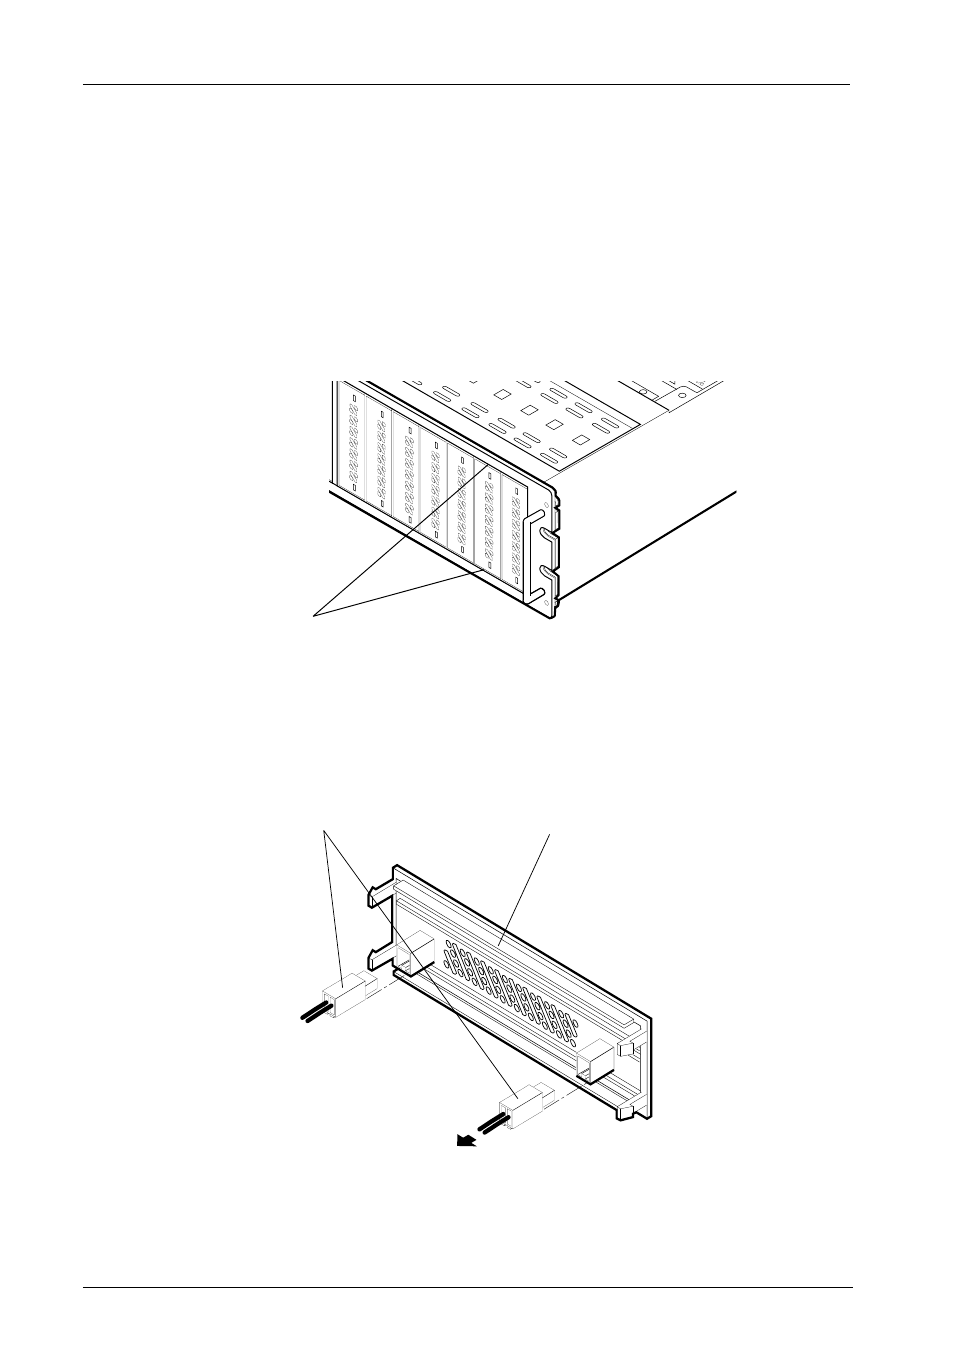
Gently Pry with
Screw Driver On
Sides of Filler Panel
0580
Device Filler Panel
(back side)
Flat Side of Connector
Faces Up
0581
To 2mm Device
Connector
Figure 9: Installing the LEDs into the Filler Panel
Figure 8: Removing the Filler Panel
Drive Installation
1. Remove the filler panels from the DS400 by gently prying the left or right edge of each
filler panel with the tip of a flat blade screwdriver (Figure 8).
2. If installing fixed media devices, install the device activity and device fault LEDs into
the appropriate front filler panels. Gently push each LED into the rear of the filler panel
as shown in Figure 9.
See also other documents in the category StorCase Technology Computer Accessories:
- DE100i-SW (35 pages)
- DE110 (27 pages)
- DE50 (33 pages)
- DE50 (27 pages)
- DE110 (33 pages)
- DE110 (2 pages)
- DE110 (31 pages)
- DX115 (25 pages)
- DE75i-A (31 pages)
- DE75i-A66 (29 pages)
- DE75i-A100 (31 pages)
- SATA DE75 (28 pages)
- DE75i-S (31 pages)
- DE75i-SW (33 pages)
- DE75i-SWC (33 pages)
- DE75i-SW160 (29 pages)
- S20A114 (29 pages)
- DE75i-SWC160 (29 pages)
- DE90i-A (29 pages)
- DE90i-A66 (23 pages)
- DE90i-A100 (23 pages)
- DE90i-S (25 pages)
- DE100i-A (33 pages)
- DE100i-A66 (29 pages)
- DE100i-A100 (29 pages)
- DE100i-CSWTN (2 pages)
- DE100i-S (39 pages)
- DE100i-SWD (33 pages)
- DE100i-SWU2 (37 pages)
- DE100i-SWCU2 (33 pages)
- DE100i-SWU2X (35 pages)
- DE100i-SW160 (35 pages)
- S20A102 (33 pages)
- DE100i-SWC160 (39 pages)
- Ultra320 DE100 (31 pages)
- DE110 (31 pages)
- DE110 (29 pages)
- DE110 (27 pages)
- DE150i-SWC (33 pages)
- DE200i-S (33 pages)
- DE200i-CSWTN (2 pages)
- DE200i-SW (35 pages)
- DE200i-SWU2 (37 pages)
- DE200i-SWCU2 (35 pages)
- S20A108 (33 pages)