Ds350 installation, Installing the drive(s) into the ds350, Removing the access panel – StorCase Technology DS350 User Manual
Page 15
6
Installation
Kingston Technology Company
DS350 User's Guide - Rev. A00
DS350 INSTALLATION
Installing the Drive(s) into the DS350
While performing the steps in this section, work on a soft surface to prevent excessive shock
to the drive(s) being installed. Also refer to the manufacturer's documentation provided with
the drive(s).
A #2 Phillips and a flat blade screwdriver will be required.
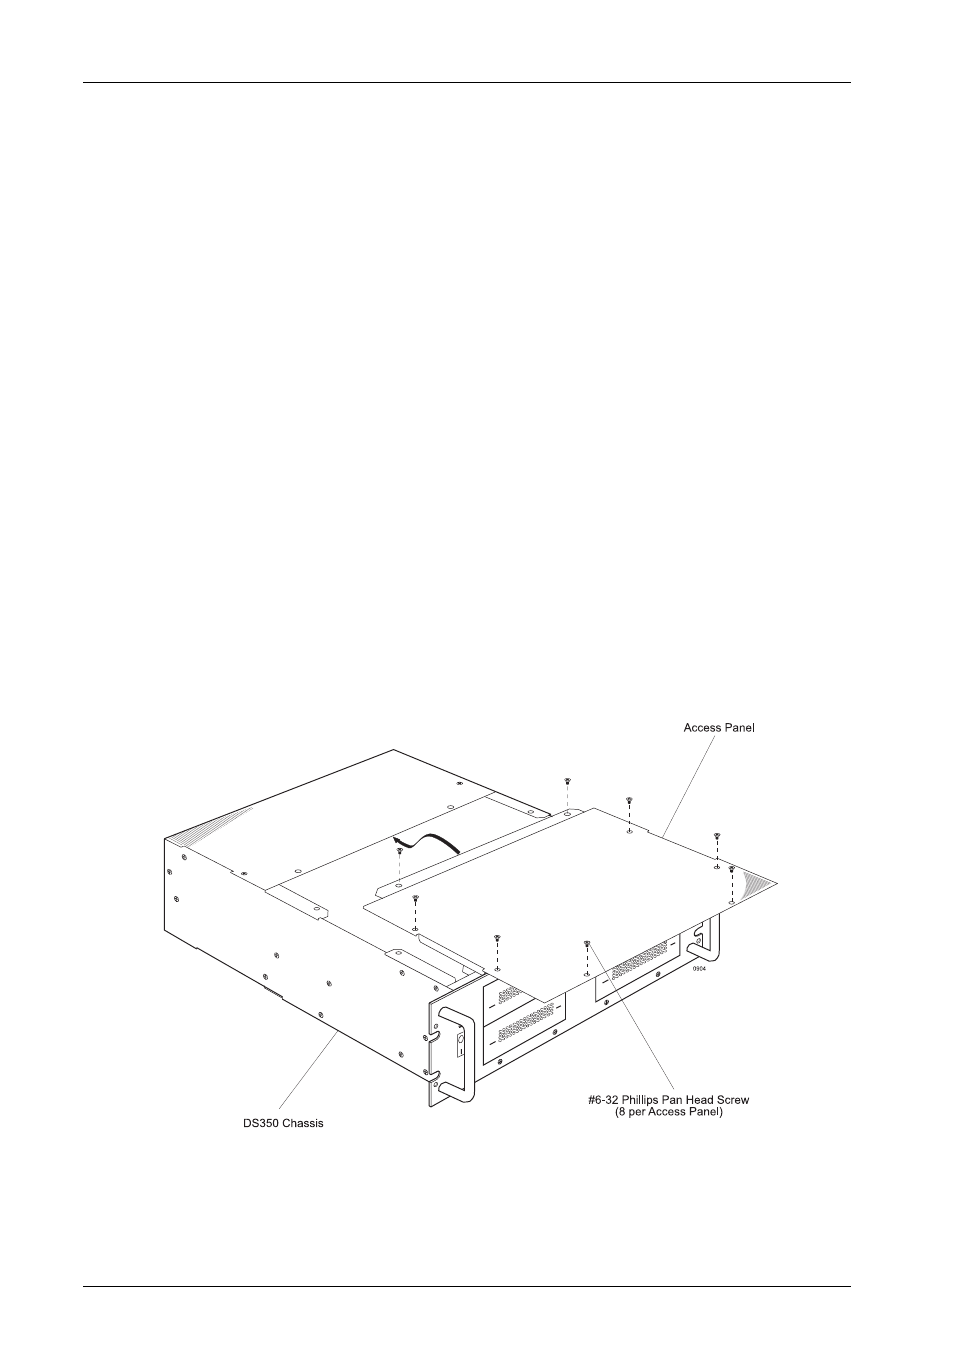
Removing the Access Panel
WARNING: Remove ALL power from the DS350 before removing the access panel. The
DS350 contains NO USER SERVICEABLE PARTS inside the unit.
1. Unplug the DS350 and verify that all cables have been disconnected.
2. Place the DS350 on a soft clean surface to protect finish of the chassis.
3. Remove the eight (8) screws located on the top of the unit (Figure 5).
4. Remove access panel by carefully lifting the front of the panel and sliding forward off
the chassis (Figure 5).
5. To reinstall panel, simply reverse the above mentioned steps.
Figure 5: Access Panel