StorCase Technology DS100 User Manual
Page 23
14
Installation
StorCase Technology, Inc.
DS100 User's Guide - Rev. F02
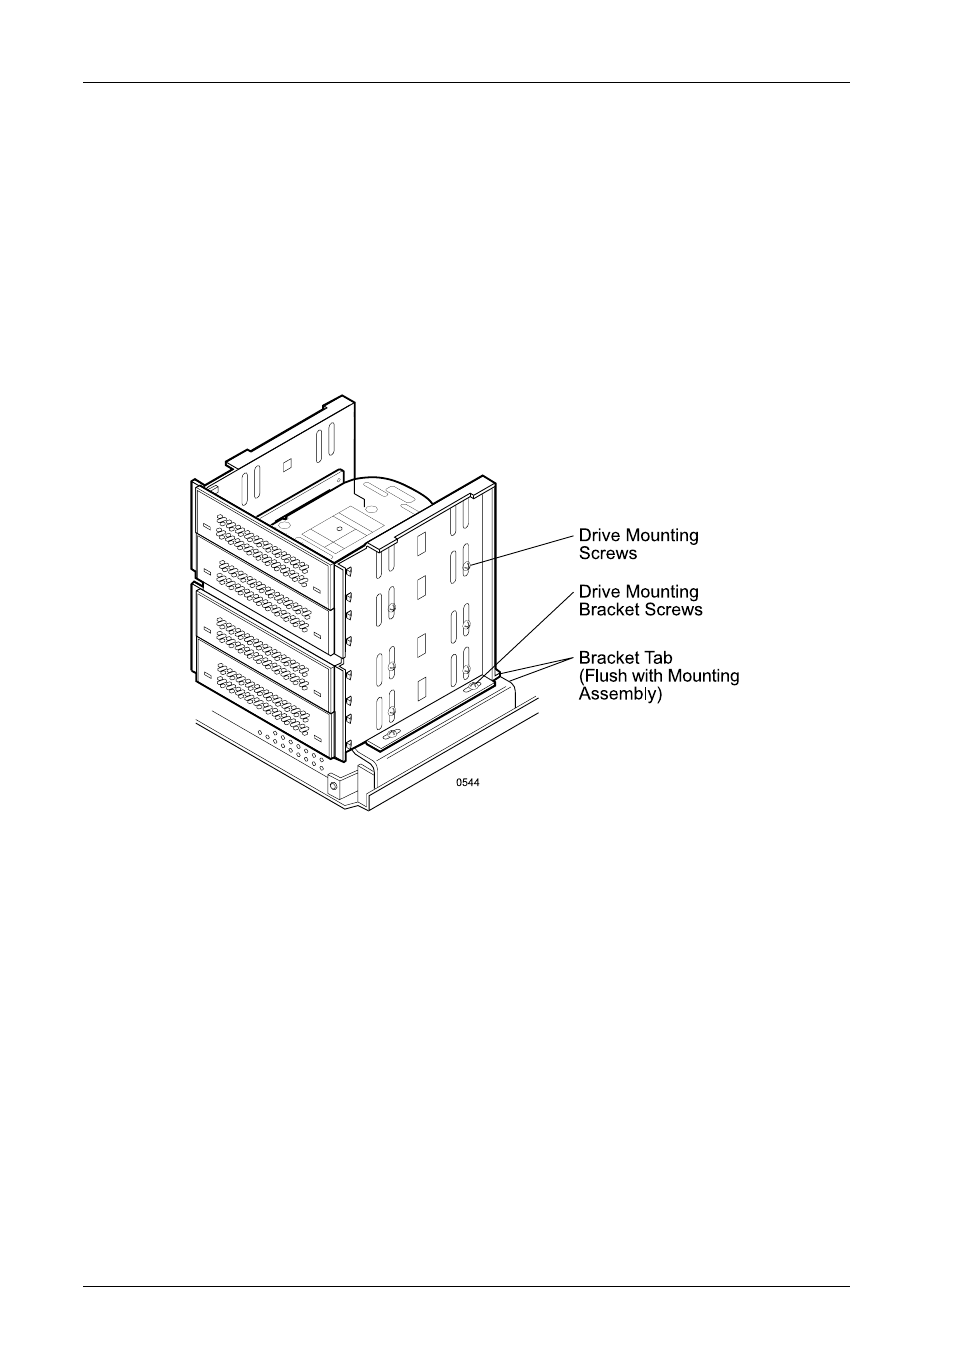
Figure 14: Installing the Drive into the DS100 4-Bay Drive Mounting Bracket
SCSI ID
FACT
OR
Y
NEW
WARNING
NOTE:
Do not fully tighten the screws that fasten removable media devices into the drive
mounting bracket at this point. The screws will be tightened after the drive bezel
clearance has been checked with the cover.
4. Adjust the drive bracket and drive clearances. In most cases, if the bracket tab (Figure
14) is flush with the DS100 mounting base, no bracket adjustment will be necessary
for the drive bezel or filler panel to align with the DS100 cover.
5. If necessary, reinstall the DS100 cover to check for proper drive bezel/cover alignment
and make any necessary adjustments to the drive(s)/mounting brackets.
6. Tighten the screws that fasten any removable media device(s) into the mounting
bracket.
IF INSTALLING A DRIVE INTO THE DS100 4-BAY:
1. If installing 3.5" devices into the DS100, attach the 3.5 inch adapter brackets (included)
to the drives before installing them into the drive bracket (Figure 11). The adapter
brackets can be attached to the drive with four (4) #6-32 Phillips screws.
2. Attach the drive activity and drive fault LED cables to the appropriate drive pins (refer
to the device manufacturer's documentation for the location of these pins).
3. Install the drive(s) into the drive mounting bracket using four (4) #6-32 Phillips screws
(Figure 14). Do not fully tighten the screws on removable media devices.