StorCase Technology DS100 User Manual
Page 21
12
Installation
StorCase Technology, Inc.
DS100 User's Guide - Rev. F02
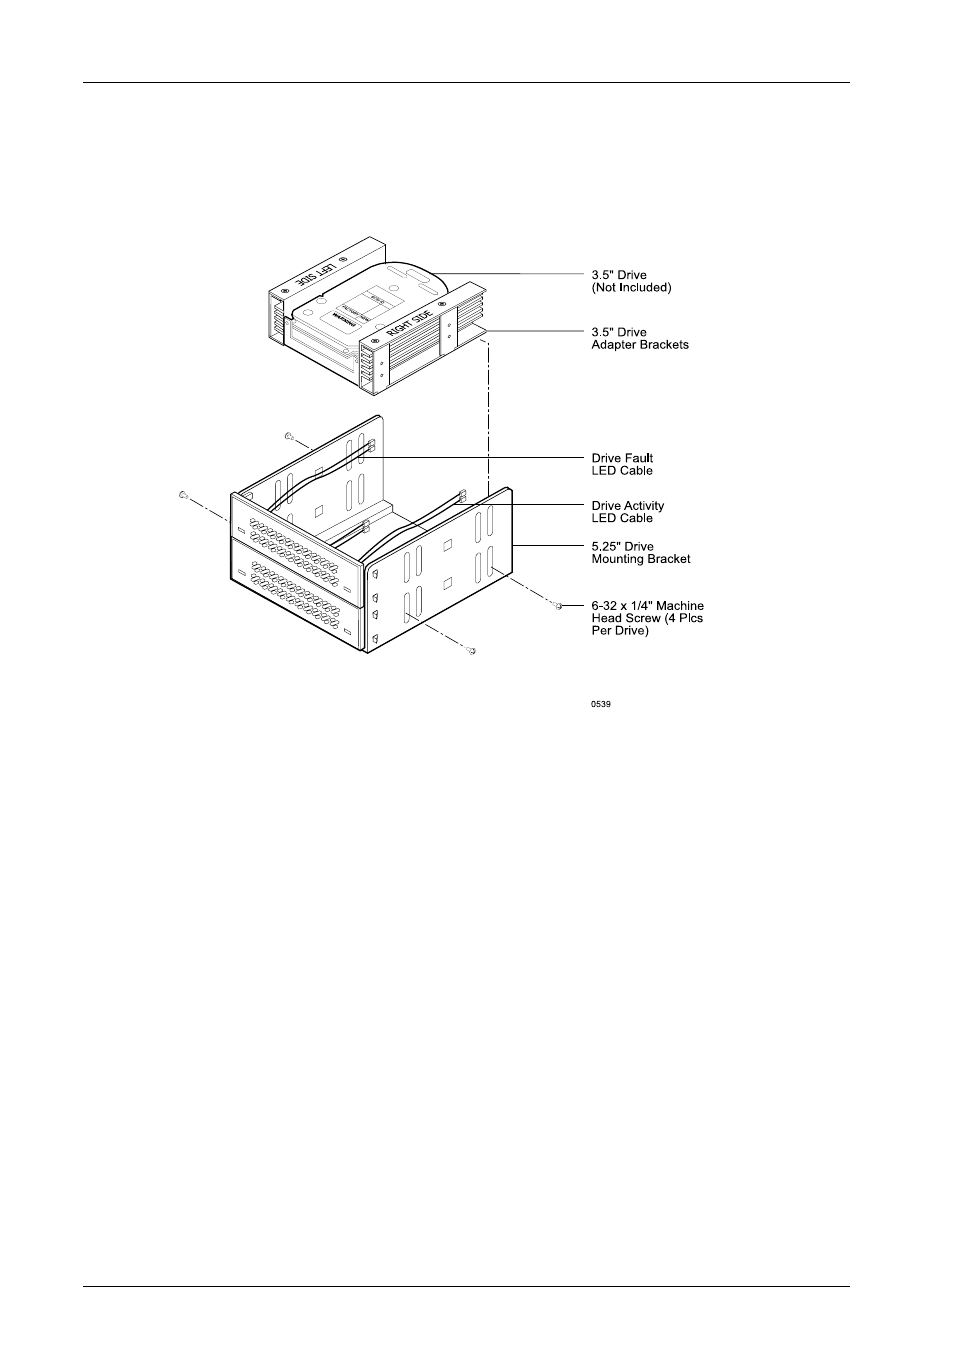
Figure 12: Installing the Drive into the Drive Mounting Bracket
(DS100 2-Bay Shown)
NOTE: Do not fully tighten the screws that fasten removable media devices into the drive
mounting bracket at this point. The screws will be tightened after the drive bezel
clearance has been checked with the cover.
8. After the drive(s) have been fastened into the mounting bracket, carefully insert the
bracket back into the DS100 chassis (Figure 13). Be careful that no cables are pinched.
Position the screws on the bottom of the mounting bracket through the slots on the
bottom of the DS100 chassis so that the bracket can slide freely. Do not tighten the
drive mounting bracket screws at this point.
9. Slide the drive mounting bracket as far as it will go toward the front of the DS100 chassis
to allow access for attaching cables at the rear of the DS100.
10. Connect the I/O cable(s) to the drive(s). Verify that the Pin 1 indicator on the cable is
properly aligned (refer to the drive manufacturer's documentation for more informa-
tion).
7. Install the drive(s) into the drive mounting bracket using four (4) #6-32 x 1/4" screws
(Figure 12). Do not fully tighten the screws on removable media devices.