Electrical connections, Star-pak, Power plug – Star Headlight & Lantern STAR-PA RSK966P User Manual
Page 5: Enable plug, All 6 heads on and off together, Heads/4-heads separate activation, Pair separate activation
-2-
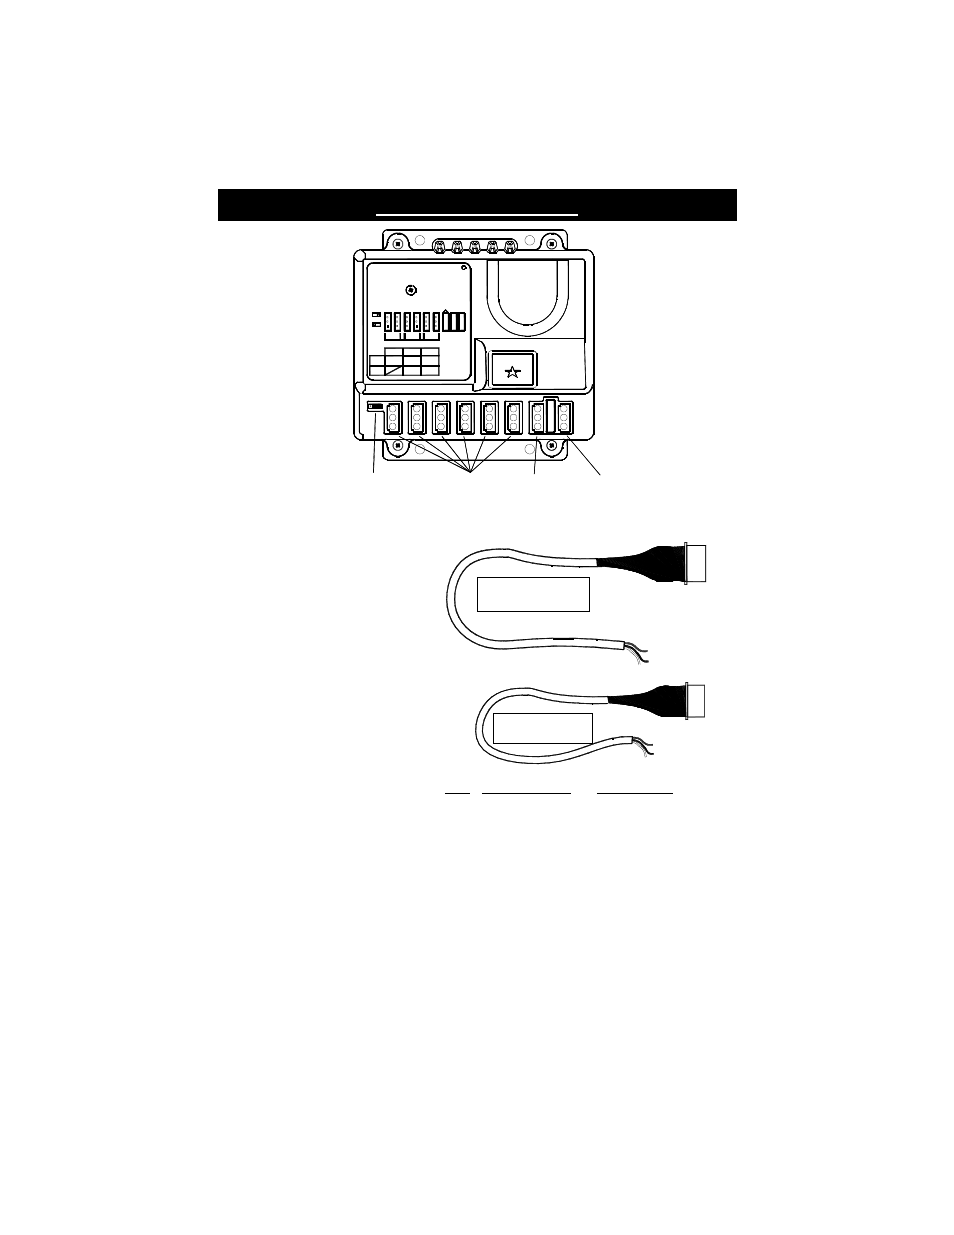
Red = Enable Heads 5 & 6 Enable Heads 5 & 6
Black = Enable Heads 3 & 4 Enable Heads 1, 2, 3, & 4
White = Enable Heads 1 & 2 High/Low Option Switching
ENABLE PLUG FOR
RP966 AND RP996
E
N
A
B
L
E
P
L
U
G
Wire Jumper Set For Jumper Set For
Color 3-Pair Head Select High/Low Option
POWER PLUG FOR
RP966 AND RP996
Red = Power
Black = Ground
White = Pattern Select
P
O
W
E
R
P
L
U
G
Electrical Connections
P
O
W
E
R
F
U
S
E
E
N
A
B
L
E
STROBE HEADS
POS 2
POS 1 1+2 3+4 5+6
B
1 4 5+6
A
LOW
HI
C
STATUS
PATTERN
SELECT
STROBE POWER SUPPLY
STAR-PAK
POS 2
POS 1
RP966/RP996
3-4
1-2
5-6
A
B
C
I
15
I
P
-
+
+
+
+
R
STROBE
OUTLETS
POWER
PLUG
ENABLE
PLUG
HIGH/LOW - HEAD
SELECT JUMPER
POWER Plug
The power plug is included with your
power pack and comes complete with
an 8-12” wiring harness. This will be
connected to the outlet on your pack
labeled POWER.
ENABLE Plug
These strobe packs also utilize another
plug, identical to the Power Plug, which
plugs into the jack labeled ENABLE.
The connection of the ENABLE wires
will allow you to set the pack up in a
number of different configurations.
Here are the different configurations
you may choose from when installing
the RP966 and RP996 packs:
•
All 6 Heads On and Off Together
(High Power Only)
•
All 6 Heads On and Off Together
(Low Power Only)
•
All 6 Heads On and Off Together
(High/Low switching Option)
•
2-Heads/4-Heads Separate Activation
(High Power Only)
•
2-Heads/4-Heads Separate Activation
(Low Power Only)
•
2-Heads/4-Heads Separate Activation
(High/Low Switching Option)
•
3-Pair Separate Activation
(High Power Only)
Decide which configuration will work best for you, set your jumper accordingly (see next
page), and proceed to the appropriate section to connect the wires from the POWER and
ENABLE connectors.