Southbend SL-Series User Manual
Page 13
OWNER’S MANUAL 1199740 REV 1 (10/14)
PAGE
13
OF44
G
AS
C
ONVECTION
O
VENS
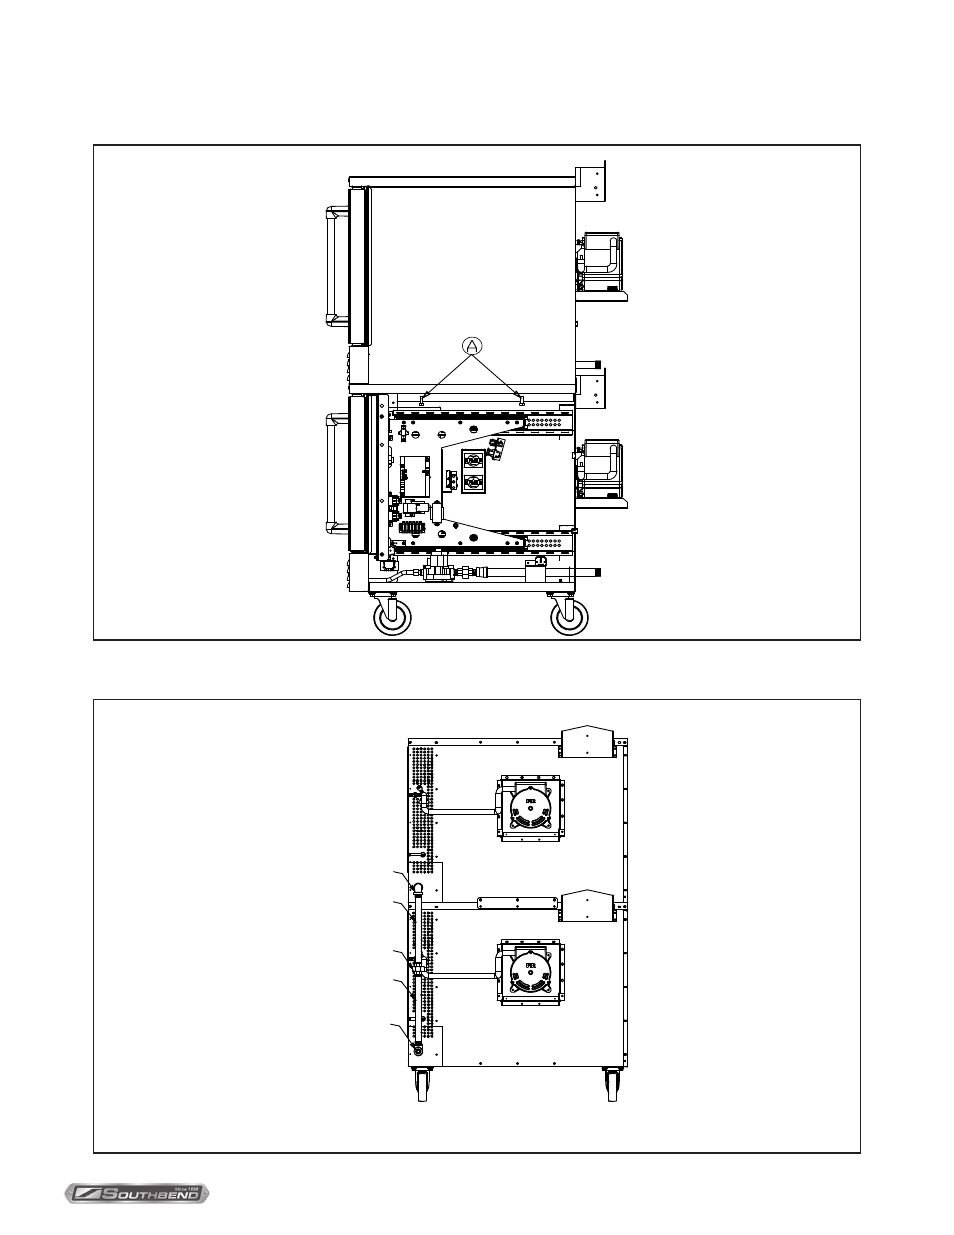
7. Insert two bolts (items “A” in the following diagram) up through the top of the lower oven and screw them into the
threaded holes in the bottom of the top oven. Tighten these bolts and the screws that you did not tightened in
the previous step.
8. Assemble the gas piping shown in the following drawing. Be sure to check all connections for leaks once the oven
has been installed.
A
3/4" ELBOW
3/4" TEE
3/4" UNION
3/4" PIPE
3/4" PIPE
I
NSTALLATION
This manual is related to the following products: