Southbend SL-Series User Manual
Page 12
OWNER’S MANUAL 1199740 REV 1 (10/14)
PAGE
12
OF 44
G
AS
C
ONVECTION
O
VENS
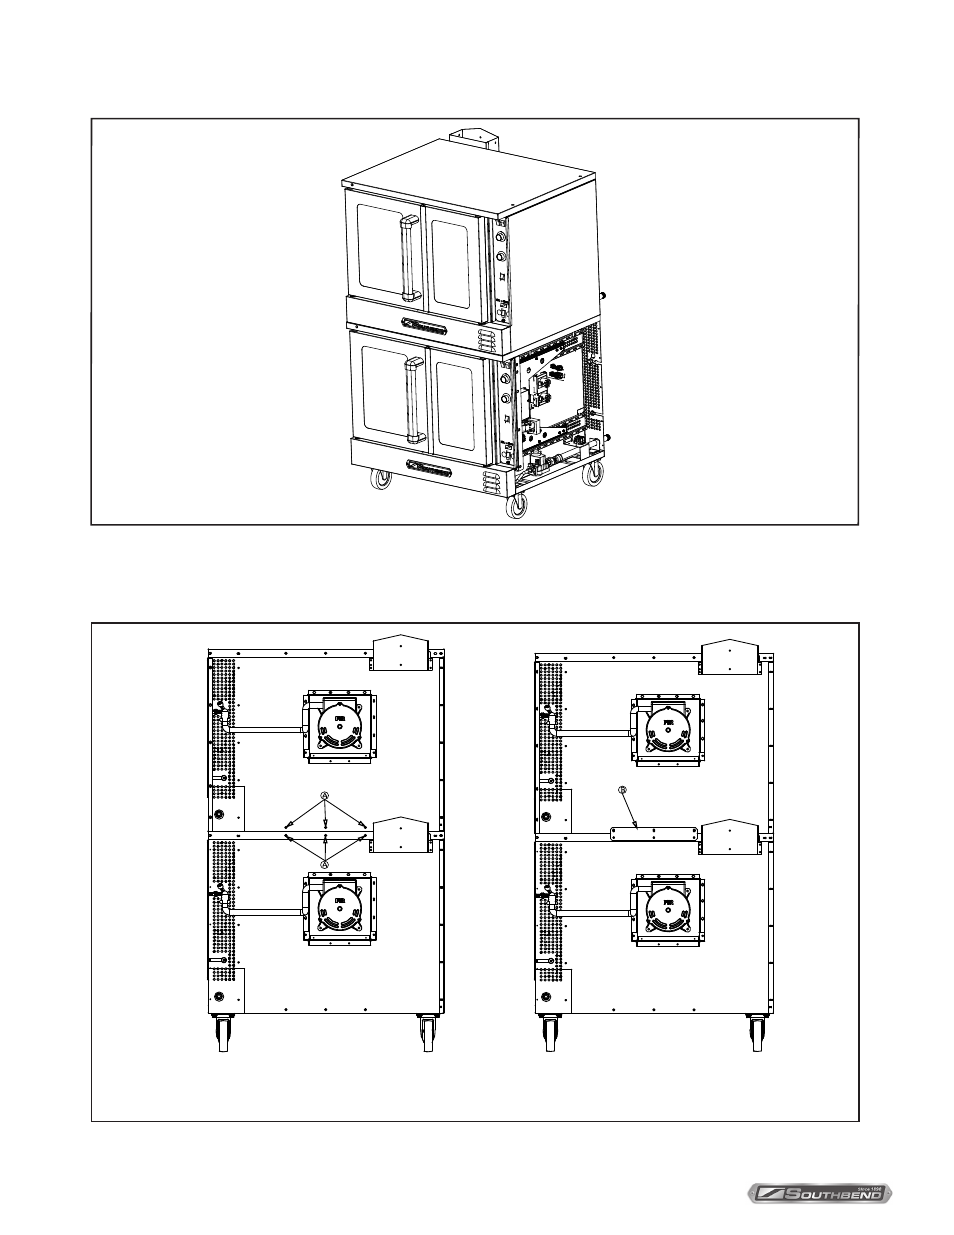
5. Lift the top oven and position it on top of the lower oven, as shown in the drawing below.
6. Move to the rear of the ovens and remove the six screws shown as items “A” in the left-hand drawing below.
Position the tie bracket (item “B”) as shown in the right-hand drawing below. Re-insert the screws that
you just removed through the holes in the tie bracket, but do not tighten them yet.
I
NSTALLATION
This manual is related to the following products: