ParkZone PKZ3980 User Manual
Page 8
14
15
Your J-3 Cub RTF comes pre-bound to the included MLP4DSM
transmitter. If you should need to re-bind your airplane follow the
simple directions below.
Setting the Airplane for Binding:
1. Make sure the flight battery is disconnected from the
receiver unit and the transmitter is turned off.
2. Plug in the flight battery into the airplane. When the LED
on the receiver begins to flash (can be seen by looking
through the opening at the rear of the battery cavity),
then immediately proceed to instructions for your
transmitter below.
Note: Although the transmitter included in your J-3 RTF is
4-channel capable, the airplane is a 3-channel aircraft
with proportional throttle, elevator, and rudder control.
For this reason, the rudder control is on the right stick.
Binding is the process of programming the receiver of the
control unit to recognize the GUID (Globally Unique Identifier)
code of a single specific transmitter. It will be necessary for
you to ‘bind’ your chosen Spektrum DSM2 technology equipped
transmitter to the receiver for proper operation. The following is
a list of some of the Spektrum DSM2-equipped transmitters and
modules that will bind to the receiver of the J-3 Cub.
ParkZone Vapor/Ember 2 Transmitter
E-flite LP5DSM
E-flite MLP4DSM
JR 12X 2.4
JR X9303 2.4
Spektrum DX5e
Spektrum DX6i
Spektrum DX7/DX7se
Note: The Spektrum DX6 (SPM2460) is equipped with
DSM (not DSM2) technology and is not compatible
with the receiver of the J-3 Cub BNF.
Transmitter and Receiver Binding
Transmitter Specific Binding
Instructions
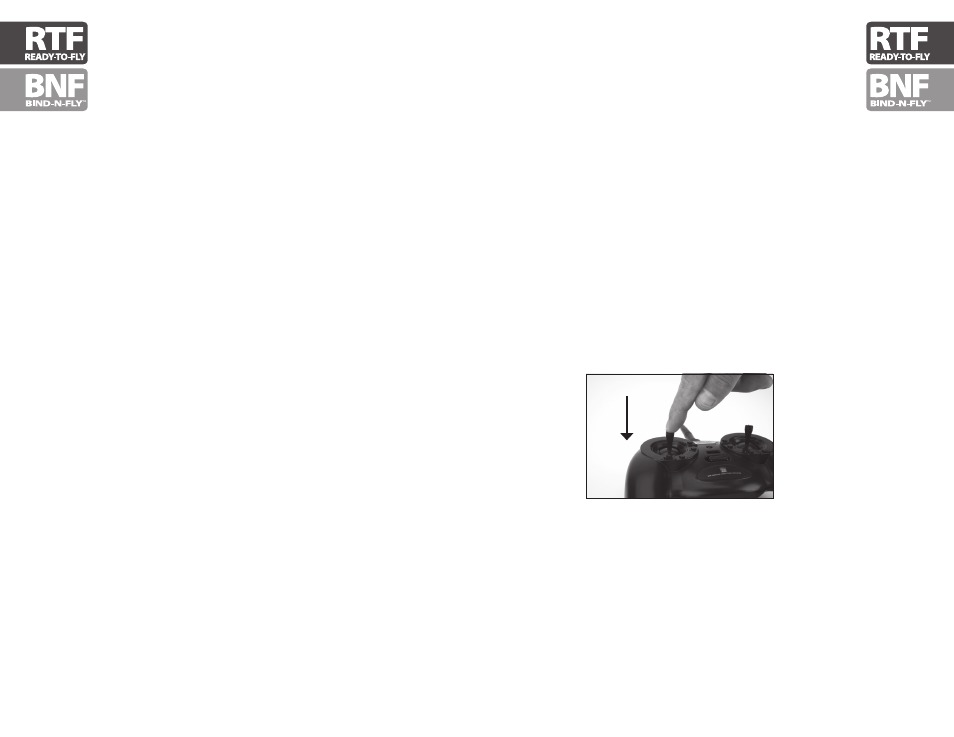
MLP4DSM, Vapor, Ember2, P-51 Transmitter:
1. When you see the LED on the receiver begin to flash while
looking through the opening at the back of the battery
cavity of the J-3 Cub, push the left stick of the transmitter
inward into the case (NOT pulling down on throttle stick)
until you hear it click.
2. While pushing the stick in, power on the transmitter, re-
lease stick once the transmitter is powered on. The trans-
mitter will beep and the LED on the face of the transmitter
will pulse.
3. Once the transmitter stops beeping it will take a second
or two to connect with the airplane.
Note: It can be difficult at times to see the LED blink
(indicating you are in bind mode), therefore slowly
count to five once you have connected the battery and
the airplane should enter bind mode at that time.
DX5e:
1. To bind your J-3 to the DX5e, move the sticks and
switches on the transmitter to the desired failsafe positions
(low throttle and neutral control positions).
2. Pull and hold the Trainer Switch on the transmitter while
turning the transmitter on. Release the trainer switch once
the LEDs on the front of the transmitter flash.
3. The LED on the receiver will go solid red and the system
will connect after several seconds.