Step 16 – Mighty Mule FM702 User Manual
Page 22
18
At this stage of the installation, the openers should be installed on the
gate leaves and the open and closed position stops should be in place.
Check List
• The gate leaves are plumb, level, and swing smoothly on their hinges.
• After measuring with the 4
1
/
2
" x 4
1
/
2
" setback template, the post bracket assemblies
were bolted to the fence posts.
• Plates or other supports were added for the gate brackets (if necessary).
• The openers are level and mounted on the centerline of the gate.
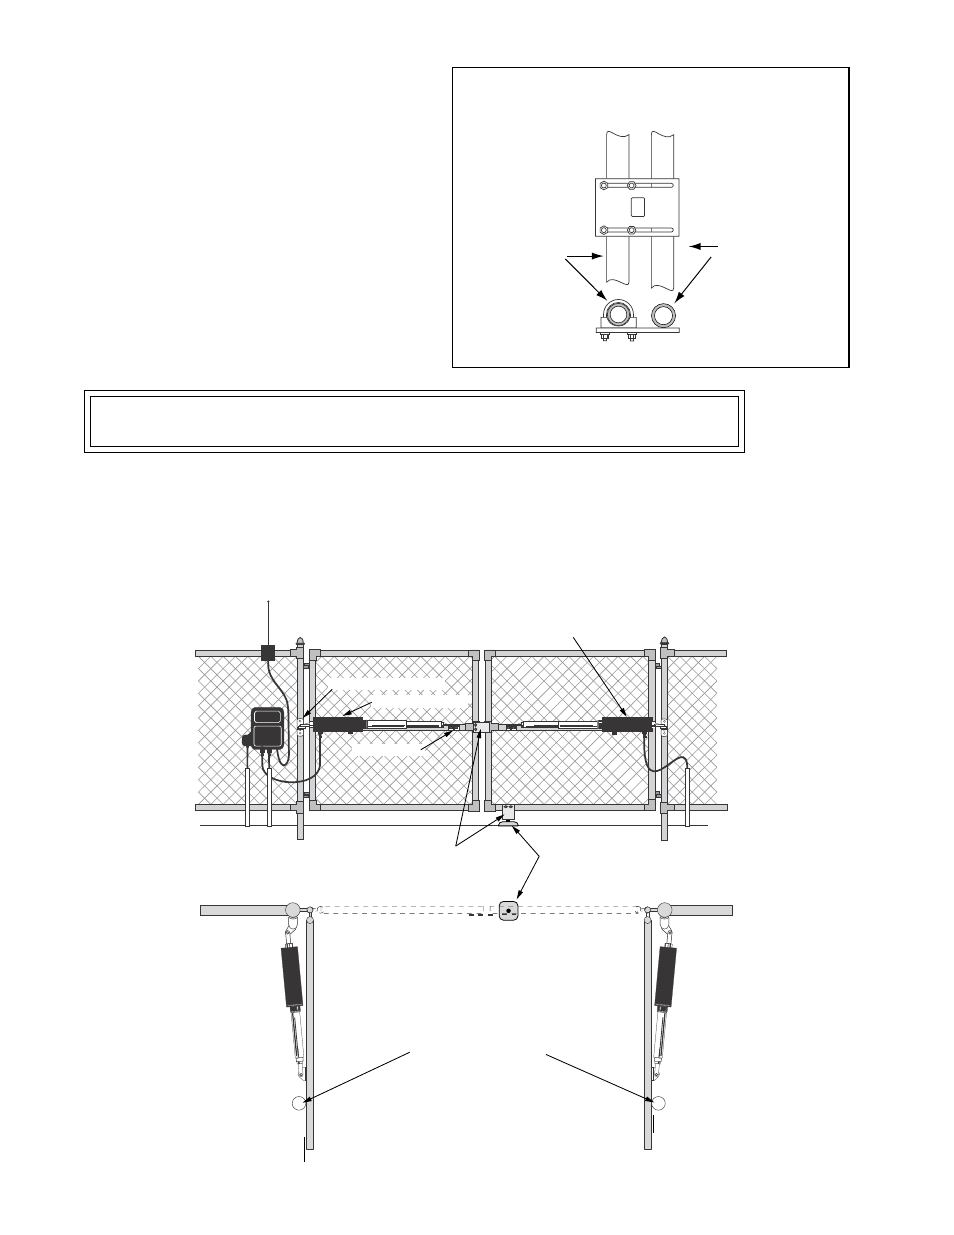
Closed Position Stop Plate mounted
horizontally on metal post with U-bolts.
SECOND Gate Frame
FIRST Gate Frame
TOP VIEW
FRONT VIEW
Step 16
Attach the remaining closed position stop plate to the
FIRST gate leaf.
Remove hairpin, clevis pin, and washer from front
mount and close the gate leaf. Fasten this closed
position stop plate (horizontally) to the end of the gate
frame on the gate centerline, but do not tighten it
completely. Slide the stop plate toward the frame of the
SECOND gate leaf until they touch (see illustration at
right). Once you have moved the stop plate to the
correct position, tighten its hardware completely.
Use the appropriate hardware for your type of gate (use
U-bolts if you have a tube or chain link gate; wood or
lag screws for wood gates; etc.). This hardware is not
provided.
Post Bracket Assembly
Gate Bracket
First Gate Opener
Closed Position
Positive Stop Plates
Open Position Stop Posts
Second Gate Opener
Closed Position Ground
Stop Post