Step 5, Step 6, Step 7 – Mighty Mule MM-SL2000B User Manual
Page 19: Installing the chain, Quick release pin chain master link chain bracket, Gate
SL-2000B Instruction Manual 04.26.12
7
Step 5
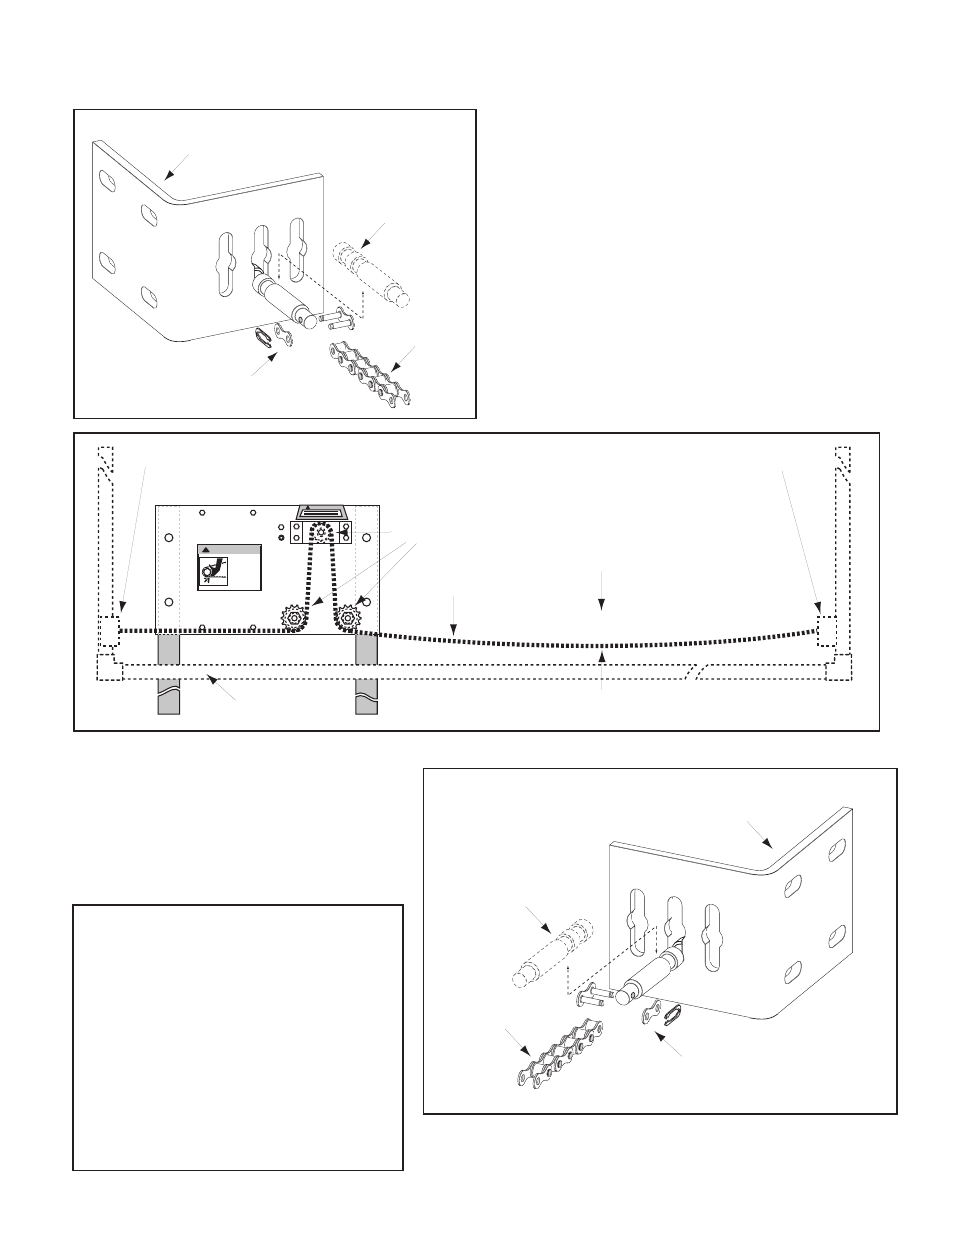
After the concrete has hardened, remove the
string from the quick release pins. Attach the
chain to one quick release pin with a master link
(see Illustration F). Run the chain through the
chain sprockets (see Illustration G).
Quick Release Pin
Chain
Master Link
Chain Bracket
Quick Release Pin
Chain
Master Link
Chain Bracket
Allow 1" of slack for every 10' of chain
Sprockets
Chain
Chain Bracket
• Fingers, hands, and
loose clothing may be
dragged into chain
sprockets.
• Fingers and hands can
be injured by rotating
sprockets.
• Keep hands, fingers,
and loose clothing
away from chain and
sprockets.
WARNING
!
WARNING
!
Chain Bracket
Gate
Step 6
Pull the chain to the second chain bracket.
(see Illustration G). Do not pull chain tight; a
tight chain will interfere with the operation of
the operator. Mark the chain where it meets
the second quick release pin.
Step 7
Drive the pin out of the chain link using
a tool such as a punch or chain break.
Connect the chain to the second quick
release pin using a master link (see
Illustration H).
Illustration F
Illustration G
Illustration H
TO OPEN THE GATE MANUALLY:
1. LIFT the quick release pins UP, then
PULL them OUT of the chain brackets
(see illustration).
2. Lay the chain down and manually slide
the gate to the desired position.
To prevent unauthorized removal of
the quick release pins, install pin locks
(see accessory catalog) above the quick
release pins in both chain brackets.
Installing the Chain