4 vacuum sensor – Martin Christ Epsilon 2-6D LSCplus User Manual
Page 36
Freeze-dryer EPSILON 2-6 LSCplus
5 Set-up and connection
36
Version 10/2012, Rev. 1.6 of 16/12/2014 • sb
Translation of the original operating manual
Pos: 103 /20 0 Ch rist/3 61 G T-BA L abo r-Pilot (PROJEKTE)/Epsilo n Sta nda rd/0 50 Aufs tellun g u nd Ansc hluss/0 50- 004 0 Vak uu mmess sond e - Übe rschrif t-- -- --- -- --- --- -- --- -- --- --- -- --- @ 2 6\m od_ 1405 058 078 325 _68. docx @ 19 098 7 @ 2 @ 1
5.4 Vacuum sensor
Pos: 104 /20 0 Ch rist/3 61 G T-BA L abo r-Pilot (PROJEKTE)/Epsilo n Sta nda rd/0 50 Aufs tellun g u nd Ansc hluss/0 50- 004 1 Vak uu mmess sond e Epsilo n (a uß er 2-4 ) - Text @ 2 5\m od_ 1404 984 626 856 _68. docx @ 18 570 7 @ @ 1
NOTE
Please refer to the separate operating manual of the vacuum sensor!
In order to protect the vacuum sensor against transport damage, it comes
supplied in its original packaging. Prior to commissioning the freeze-dryer,
the sensor must be installed.
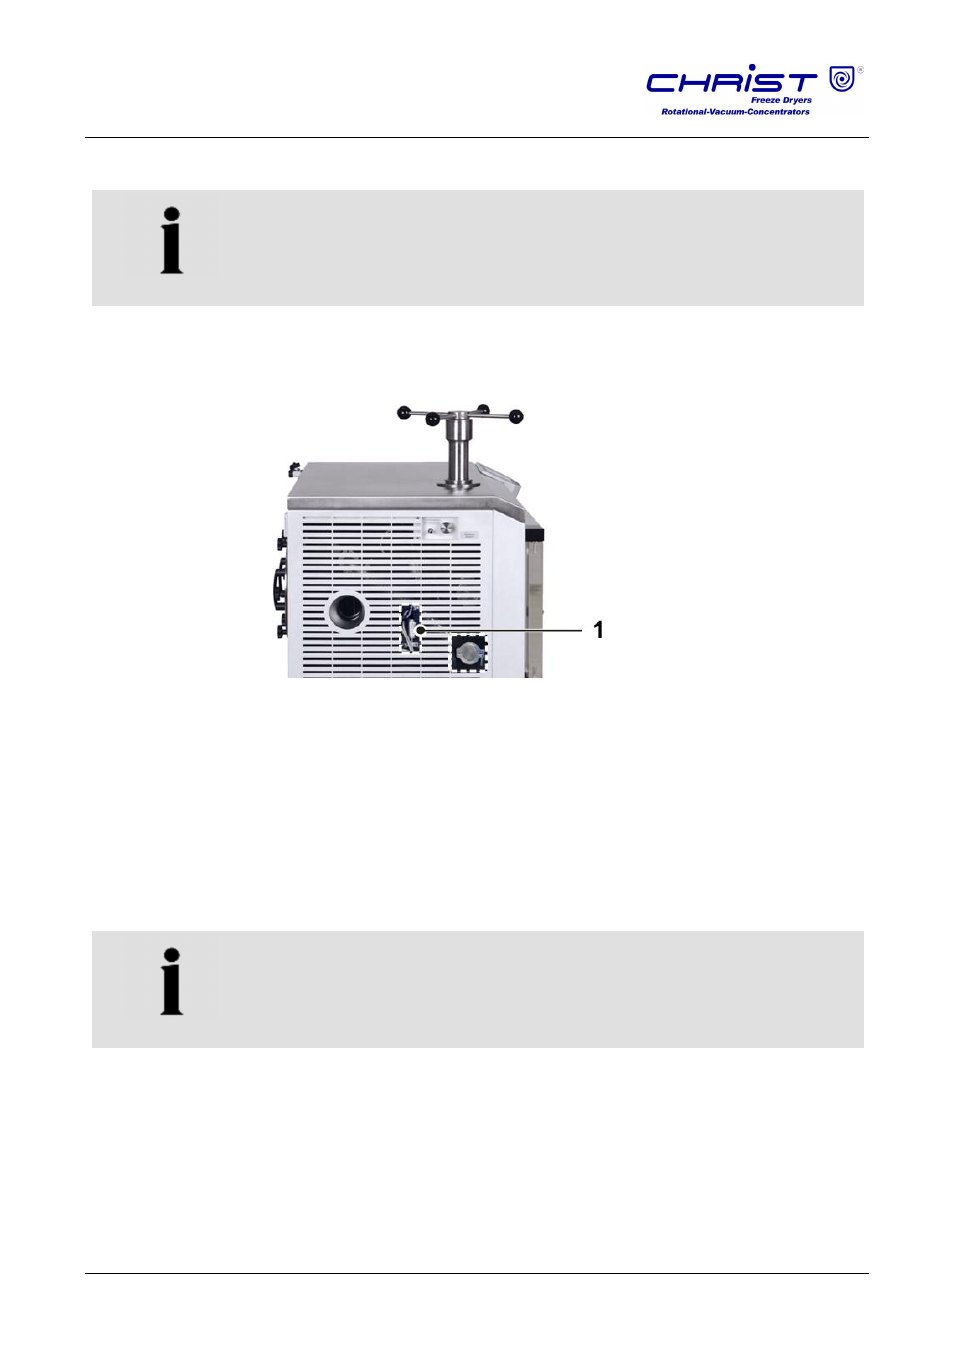
1
Vacuum sensor
Fig. 18: Position of the vacuum sensor (here: Epsilon 2-6D LSCplus)
• Switch the unit off by actuating the mains power switch.
• The screws for the left-hand side panel are located at the back of the
unit. Loosen the screws and take the panel off diagonally towards the
back.
• Take the vacuum sensor out of its original packaging and fasten it to the
connector with a clamping ring (DIN16KF) and a centring ring (both
included in the scope of supply).
• Plug the connector (installed on the unit) onto the vacuum sensor and
hand-tighten the screw on the connector.
NOTE
It is absolutely essential to comply with the manufacturer’s instructions in
the separate operating manual of the vacuum sensor!