Setup, Removing simman essential bleeding left arm – Laerdal SimMan Essential Bleeding User Manual
Page 25
25
SETUP
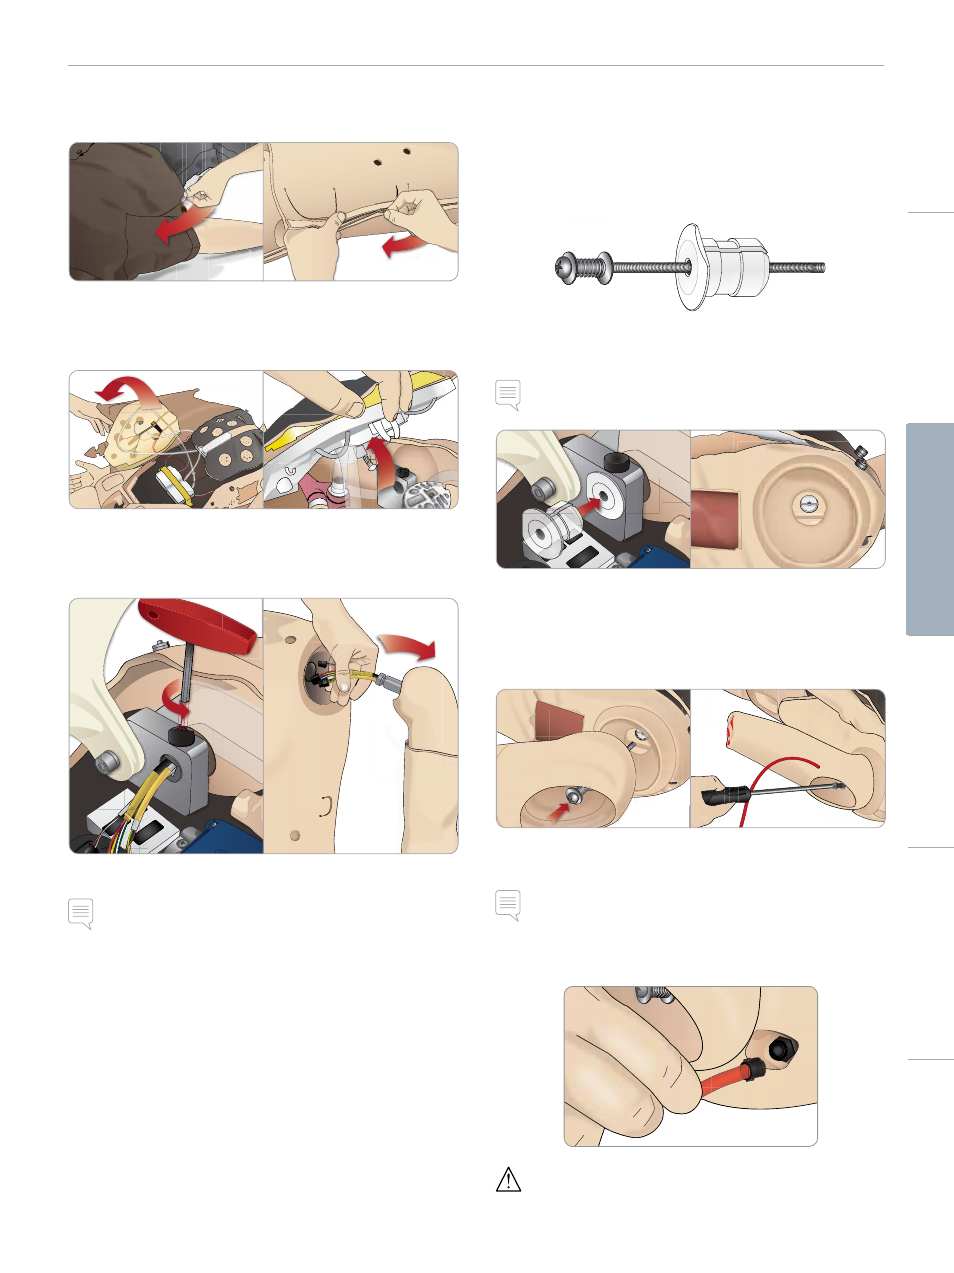
Removing SimMan Essential Bleeding Left Arm
1 Unzip the clothing zippers on the right side. Remove the shirt.
2 Unzip the zippers on the left side of the torso. Open the Torso
Skin to one side.
3 Open the Stomach Foam to one side.
4 Lift the hinged Chest Plate to access the arm bolt.
5 Unscrew the left Arm Screw with the allen key and disconnect
all arm cables.
LA PULSES
BP
LA
CONV
P
B
L
BP
PULSES
L
L
LA
B
6 Remove the arm with cables from the arm socket.
Note: Do not unscrew the Arm Screw fully.
Attaching SimMan Essential Bleeding
Amputation or Gunshot Arm
The Arm Adapter and Adapter Screw are designed to attach an
Amputation or Gunshot Arm to the SimMan Essential Bleeding
Patient Simulator.
1 Fit the Arm Adapter into the hole in the arm bracket from inside
of the torso.
Note: Ensure that the flat edge of the adapter is facing the chest
hinge.
LA PULSES
BP
LA
CONV
BP
U
PU
PU
PU
L
A P
ULS
PU
A P
U
2 The Adapter is now in place and the Trauma Arm can now be
connected with the Adapter Screw.
3 Thread the Adapter Screw through the Amputation Arm and
align the screw with the hole in the Arm Adapter.
4 Secure the Adapter with one hand from inside the torso. Screw
the Adapter Screw using the Phillips screwdriver.
Note: Tighten screw as desired to simulate more or less range of
motion in the arm.
5 Connect the red tube from the Amputation Arm to the nearest
blood port on the torso.
Caution: Do not over rotate arm. Over rotating the arm may cause
the red vinyl tubing to disconnect.
Cautions
and
W
arnings
Featur
es
Setup
Maintenance
Spar
e Par
ts
Tr
oubleshooting