Hanna Instruments HI 96711 User Manual
Page 11
20
21
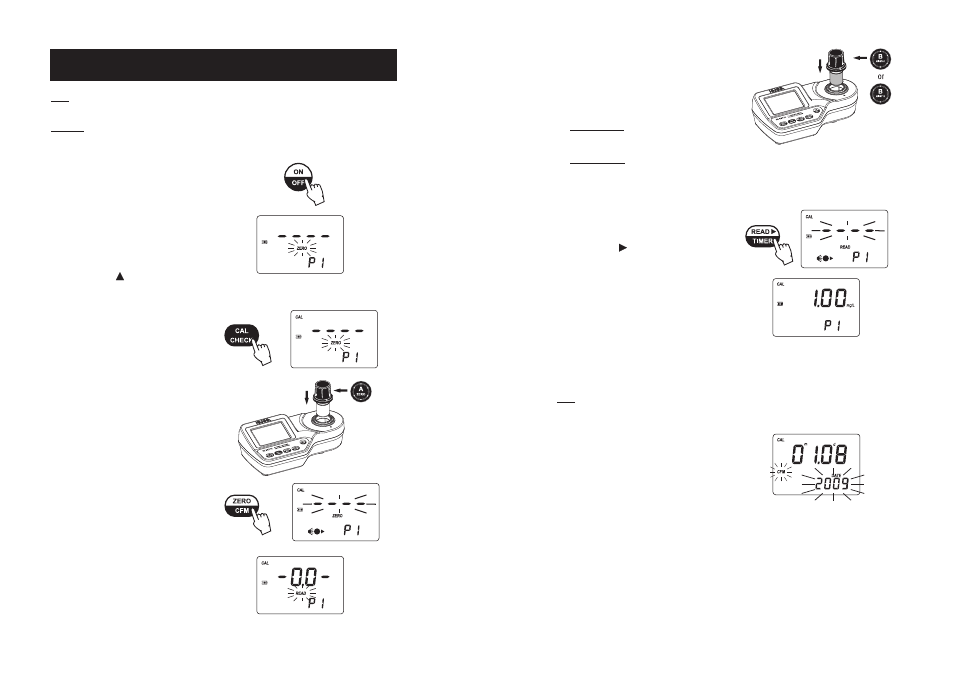
• Remove the cuvette.
• Place the specific CAL CHECK
TM
Standard
Cuvette B into the cuvette holder, for:
Free Chlorine:
B, HI 96701-11
or
Total Chlorine:
B, HI 96711-11
• Ensure that the notch on the cap is
positioned securely into the groove.
• Press READ/ /TIMER and the lamp,
cuvette and detector icons will appear on
the display, depending on the
measurement phase.
• After measurement the instrument will
show for three seconds the CAL CHECK
TM
Standard value.
Note:
If the display shows “STD HIGH”, the
standard value was too high. If the
display shows “STD LOW”, the
standard value was too low. Verify
that both CAL CHECK
TM
Standard
Cuvettes, A and B are free from
fingerprints or dirt and that they are
inserted correctly.
• Then the date of the last calibration (e.g.:
”01.08.2009”
) appears on the display,
or “01.01.2009 if the factory calibration
was selected before. In both cases the
year number is blinking, ready for date
input.
CALIBRATION PROCEDURE
Note:
It is possible to interrupt calibration procedure at any time by pressing CAL CHECK or
ON/OFF
keys.
Warning
: Do not calibrate the instrument with standard solutions other than the HANNA CAL
CHECK
TM
Standards, otherwise erroneous results will be obtained.
When calibrating, only the selected range is affected.
• Turn the meter on by pressing ON/OFF.
• When the beeper sounds briefly and the
LCD displays dashes, the meter is ready.
• To change the range, simply press
RANGE/GLP/ .
• Press and hold CAL CHECK
for three
seconds to
enter
calibration mode. The
display will show “CAL” during
calibration procedure. The blinking
“ZERO”
asks for instrument zeroing.
• Place the CAL CHECK
TM
Standard Cuvette
A into the cuvette holder and ensure that
the notch on the cap is positioned securely
into the groove.
• Press ZERO/CFM and the lamp, cuvette
and detector icons will appear on the
display, depending on the measurement
phase.
• After a few seconds the display will show
“-0.0-”
. The meter is now zeroed and
ready for calibration. The blinking
“READ”
asks for reading calibration
standard.