Step-by-step directions, Method 1: ceiling supported, Band-bracket connections – DuraVent DuraTech 5-8 User Manual
Page 7: Wall supports/re-supports
7
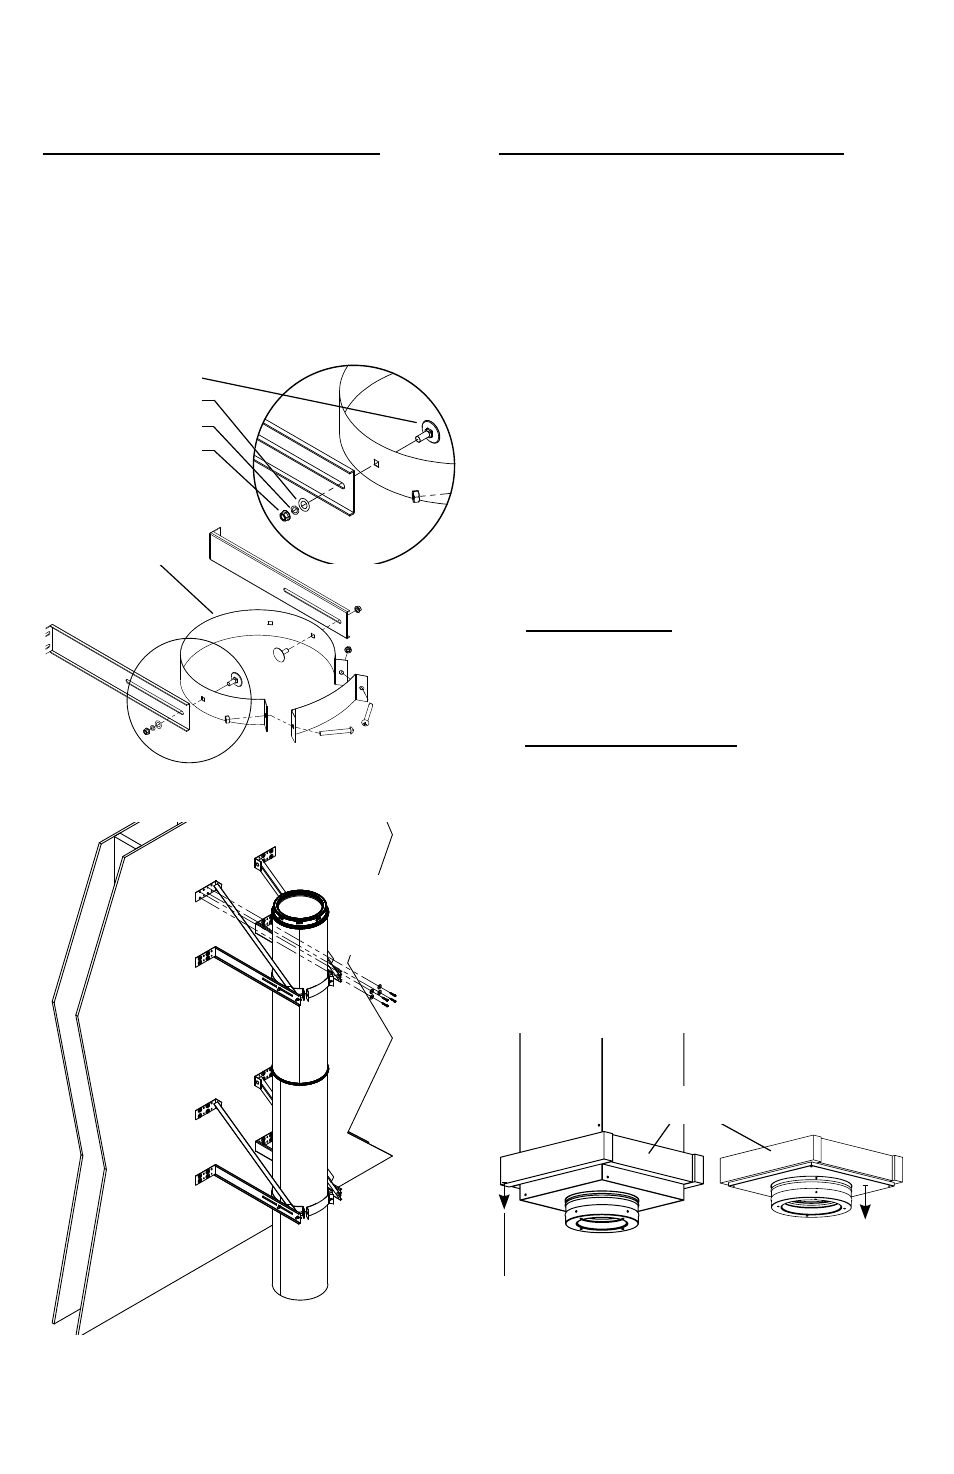
BAND-BRACKET CONNECTIONS
For Universal components, use the carriage
bolt through the band and through the leg.
Use (1) flat washer, (1) locking washer, and (1)
nut per side to secure to carriage bolt (Fig.5).
Ensure carriage bolts are directly across from
each other.
Figure 7
WALL SUPPORTS/RE-SUPPORTS
Wall Supports, Re-Supports, and Tee Supports
can be used interchangeably (Fig.6) to support
the chimney on vertical runs.
STEP-BY-STEP DIRECTIONS
There are five general types of DuraTech
Chimney installations- Review the step-by-step
directions before beginning your installation.
1.Ceiling-supported (p.7)
2.Roof-supported (p.14)
3.Tee-supported-through-the-wall (p.16)
4.Masonry Fireplace (p.20)
5.Zero-Clearance Fireplace (p.21)
METHOD 1: CEILING SUPPORTED
1. Place Appliance: Position the appliance
according to the manufacturer’s instructions.
The flue outlet collar should be placed
between the rafters or joists above, if possible.
2. Frame Support Opening: Drop a plumb bob
to the center of the appliance’s flue outlet and
mark this center point on the ceiling. Refer
to Table 1 for specific framing and clearance
dimensions. Mark appropriate cutting lines
around the center point. Cut a square hole in
the ceiling for the Support Box. Frame a level,
square opening centered over the hole which
you have cut. (Fig.7 and 8).
ROUND MUST EXTEND
MIN 3” BELOW
FINISHED CEILING
Figure 5
CARRIAGE BOLT
FLAT WASHER
LOCKING WASHER
NUT
UNIVERSAL
SUPPORT BAND
Figure 6
MOUNTING
HARDWARE- #8
WOOD SCREWS
WITH WASHER
EXTENDED
WALL SUPPORT
JOISTS & FRAMING
PER TABLE 1
SQUARE SUPPORT
BOX
ROUND SUPPORT
BOX- SQ TRIM
SQUARE MUST
EXTEND MIN 2” BELOW
FINISHED CEILING
(MIN POINT IF ANGLED)