Method 5: zero-clearance fireplace installations, Chimney sizing chart – DuraVent DuraTech 5-8 User Manual
Page 21
21
Anchor Plate with a high-temperature (1000ºF)
sealant. Secure Anchor Plate with at least (4)
1/4” x 4” masonry anchors (Fig.31). It is very
important that the Anchor Plate is level. Be sure
to maintain a 1” min. clearance to combustibles
from the Anchor Plate.
3. Attach Chimney: Twist lock the first Chimney
Section clockwise onto the Anchor Plate.
4. Finish Chimney: Install the rest of the
chimney as directed in the Ceiling Supported
Installation section, Steps 4 through 10
Refer to Fig.1, Fig.30 for chimney height
requirements. Always maintain at least 2” of
clearance to combustible materials, and enclose
the chimney where it passes through occupied
areas. Use a Wall Strap for every 8’ of chimney
height.
METHOD 5: ZERO-CLEARANCE
FIREPLACE INSTALLATIONS
1. Manufacturer’s Instructions: Carefully read
and comply with the manufacturer’s installation
instructions for your fireplace. Be sure that
DuraTech is approved for use with your
appliance.
2. Anchor Plate: Attach an Anchor Plate to
the fireplace top with (4) 5/8” sheet metal
screws (Fig.32). Check with the appliance
manufacture about the use of high temperature
sealants.
3. Chimney Sections: Attach a Chimney
Section to the Anchor Plate by twist-locking
clockwise.
4. Completion: Install the remainder of the
chimney as instructed for a standard Ceiling-
Supported installation, (using a Firestop
Radiation Shield in the 1st floor ceiling instead
of the Support Box). Always maintain at least
Figure 30
T
W
H
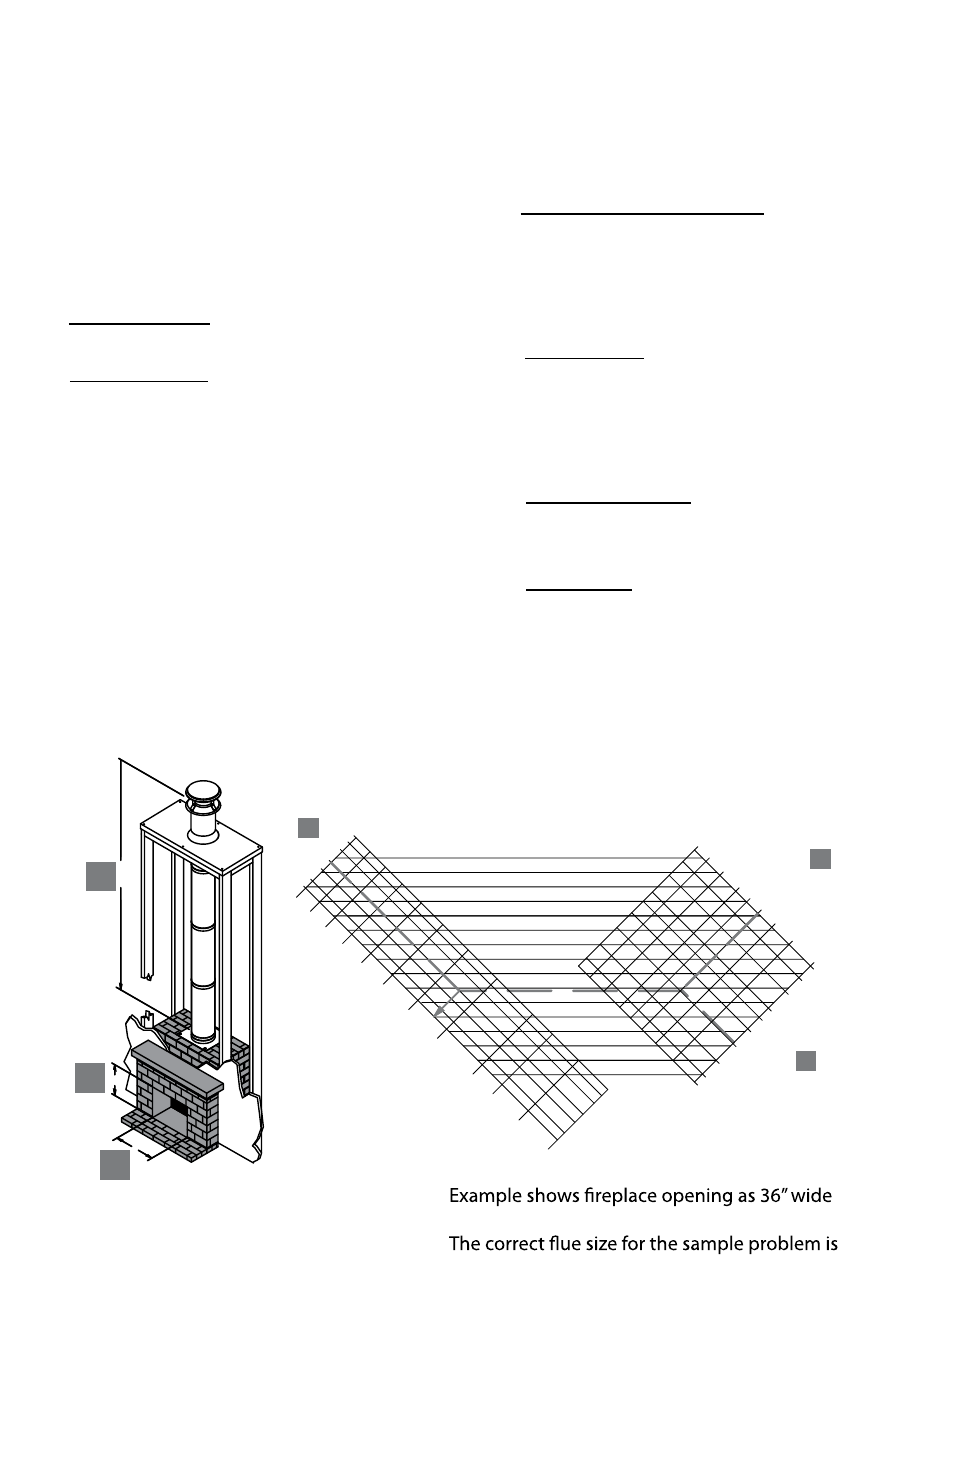
and 30” high, and the chimney height as 20’.
12” diameter pipe.
Dotted line represents sample problem.
CHIMNEY SIZING CHART
FOR FIREPLACE INSTALLATIONS
T
W
H
T
H
8
7
6
30
16
14
20
8
10
15
12
10
50
40
30
24
48
60
36
42
72
HEIGHT
36
30
42
24
48
18
WID
TH
18
20
22
24
20
18
60
72
84
84
HEIGHT(FEET)
CHIMNEY
FIREPLACE
OPENING (INCHES)
CHIMNEY
PIPE
DIAMETER
(INCHES)