3xLOGIC VISIX Camera User Manual
Page 27
Installation Manual
| VISIX PTZ Network Camera
10225 Westmoor Drive, Suite 300, Westminster, CO 80021 | www.3xlogic.com | (877) 3XLOGIC
27
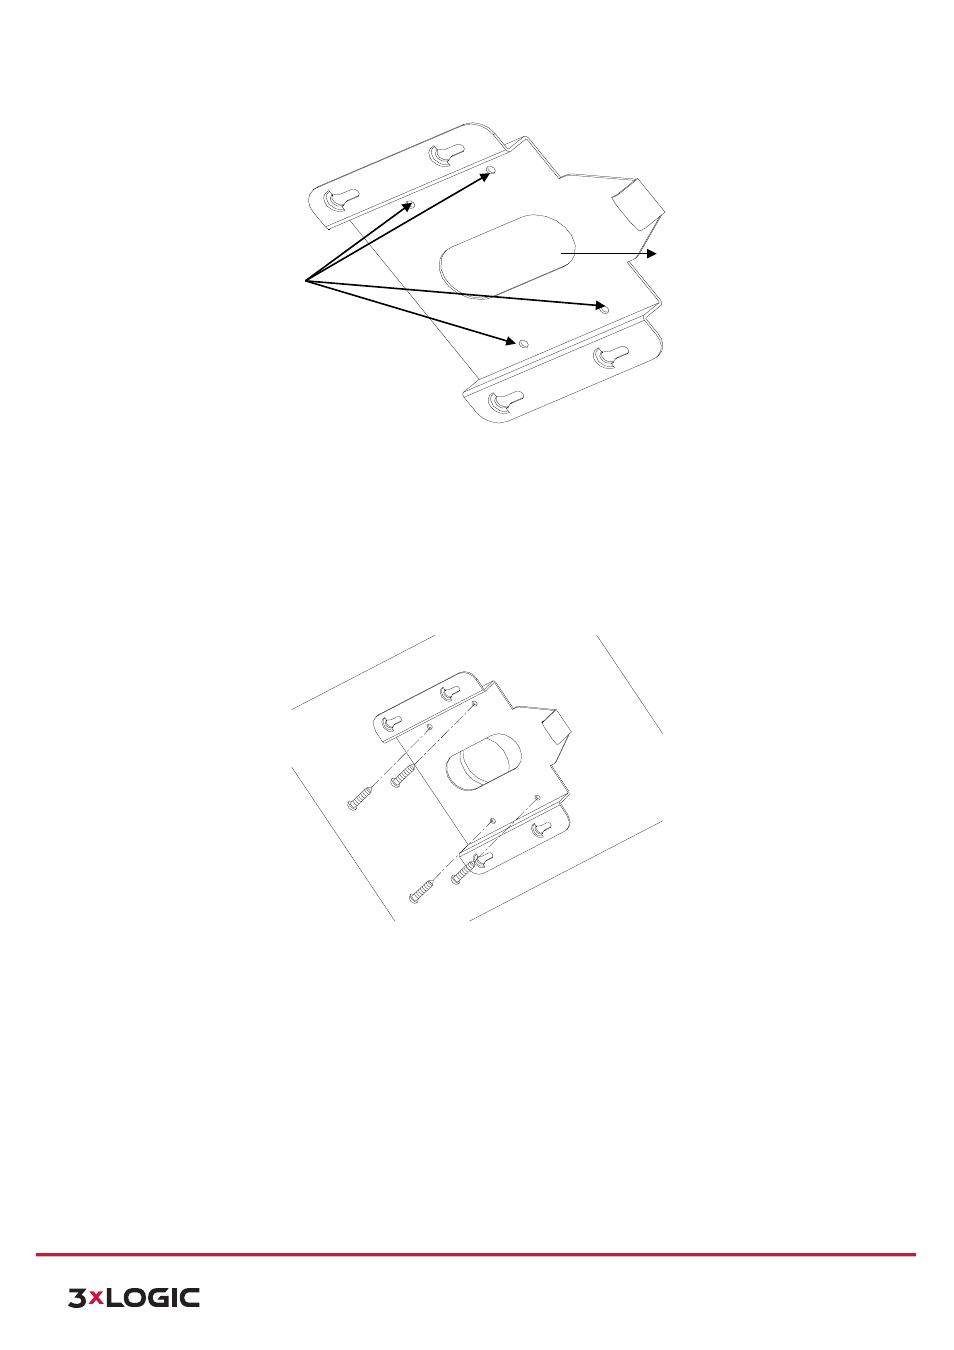
Figure 2-‐26 Mark the Screw Positions
6) Secure the mounting base to the ceiling with set screws.
!
If the speed dome is installed on a wooden wall, use the self-‐tapping screws to secure the mounting base.
!
If
the
dome
is
installed
to
the
cement
wall,
drill
three
Φ5
mounting
holes
onto
the
wall
according
to
the
hole
locations,
and
then
insert
the
cement
screws
into
the
holes
and
finally
use
self-‐tapping
screws
to
secure
the
mounting
base
to
the
wall.
Figure 2-‐27 Secure the Mounting Base
7) Install the speed dome to the mounting base.
Steps:
1) Route
the
cables
for
the
speed
dome.
Align
the
bottom
of
the
speed
dome
with
the
mounting
base.
2) Line
up
the
direction
of
arrow
with
the
spring
end
of
the
mounting
base.
3) Push
the
speed
dome
upwards
and
then
forwards
in
the
direction
of
arrow.
When
the
speed
dome
is
placed
in
position, the spring will automatically snap into the lock clip firmly. Refer to the following figure.
Screw Holes
Cable Hole