3xLOGIC VISIX Camera User Manual
Page 23
Installation Manual
| VISIX PTZ Network Camera
10225 Westmoor Drive, Suite 300, Westminster, CO 80021 | www.3xlogic.com | (877) 3XLOGIC
23
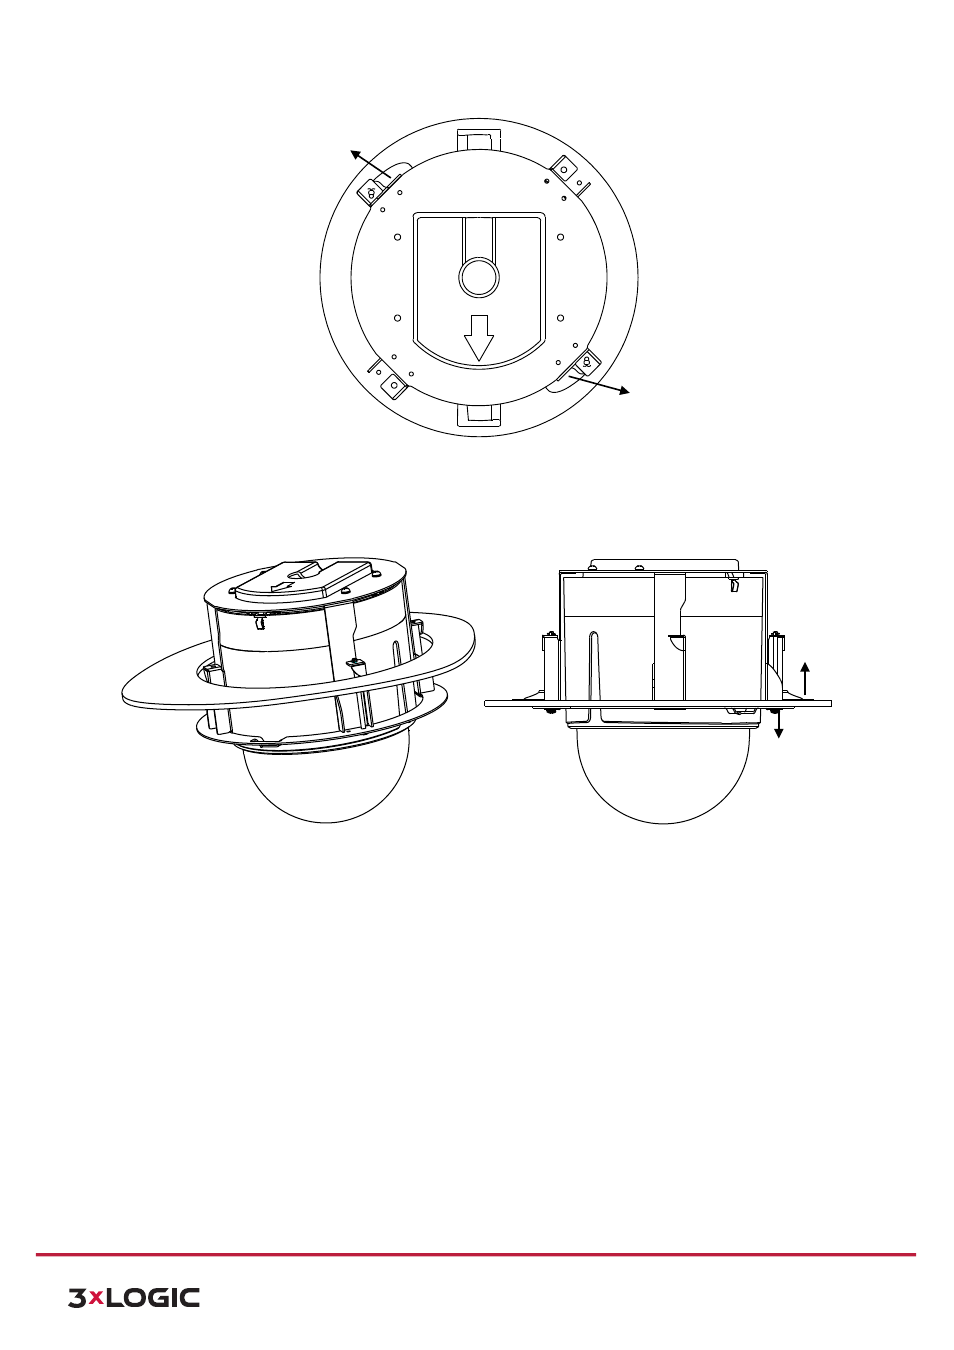
Figure 2-‐19 Locks and Lock Screws
2)
Push the back box into the mounting hole in the ceiling
3)
Tighten
the
lock
screws
with
the
screwdriver
and
the
locks
will
automatically
rotate
outwards
to
secure
the
in-‐
ceiling
mount
to
the
ceiling.
Figure 2-‐20 Install the back box
4)
Install the trim ring.
Steps:
1) Attach the trim ring to the lower dome and align the triangular notch of the trim ring with the arrow label on
the in-‐ceiling mount.
2) After having firmly placed the trim ring to the ceiling, rotate the trim ring in the direction of arrow to secure
the trim ring in place.
NOTE:
!
Please remove the protective film on the lower dome after the installation is finished.
!
In order to obtain clear video images, please wear the anti-‐static gloves when you install the speed dome.
Lock
Lock
Lock
Lock Screw