Installation manual | visix ptz network camera, Figure 2-‐3 drill mounting holes, Figure 2-‐4 secure the mount – 3xLOGIC VISIX Camera User Manual
Page 14
Installation Manual
| VISIX PTZ Network Camera
10225 Westmoor Drive, Suite 300, Westminster, CO 80021 | www.3xlogic.com | (877) 3XLOGIC
14
!
The wall must be thick enough to install the expansion screws.
!
Please
make
sure
that
the
wall
is
strong
enough
to
withstand
more
than
8
times
the
weight
of
the
dome
and
the
mount.
Steps:
1) Drill 4 screw holes in the wall according to the holes of the mount, and then insert M8 expansion screws (not
supplied) into the mounting holes.
Figure 2-‐3 Drill Mounting Holes
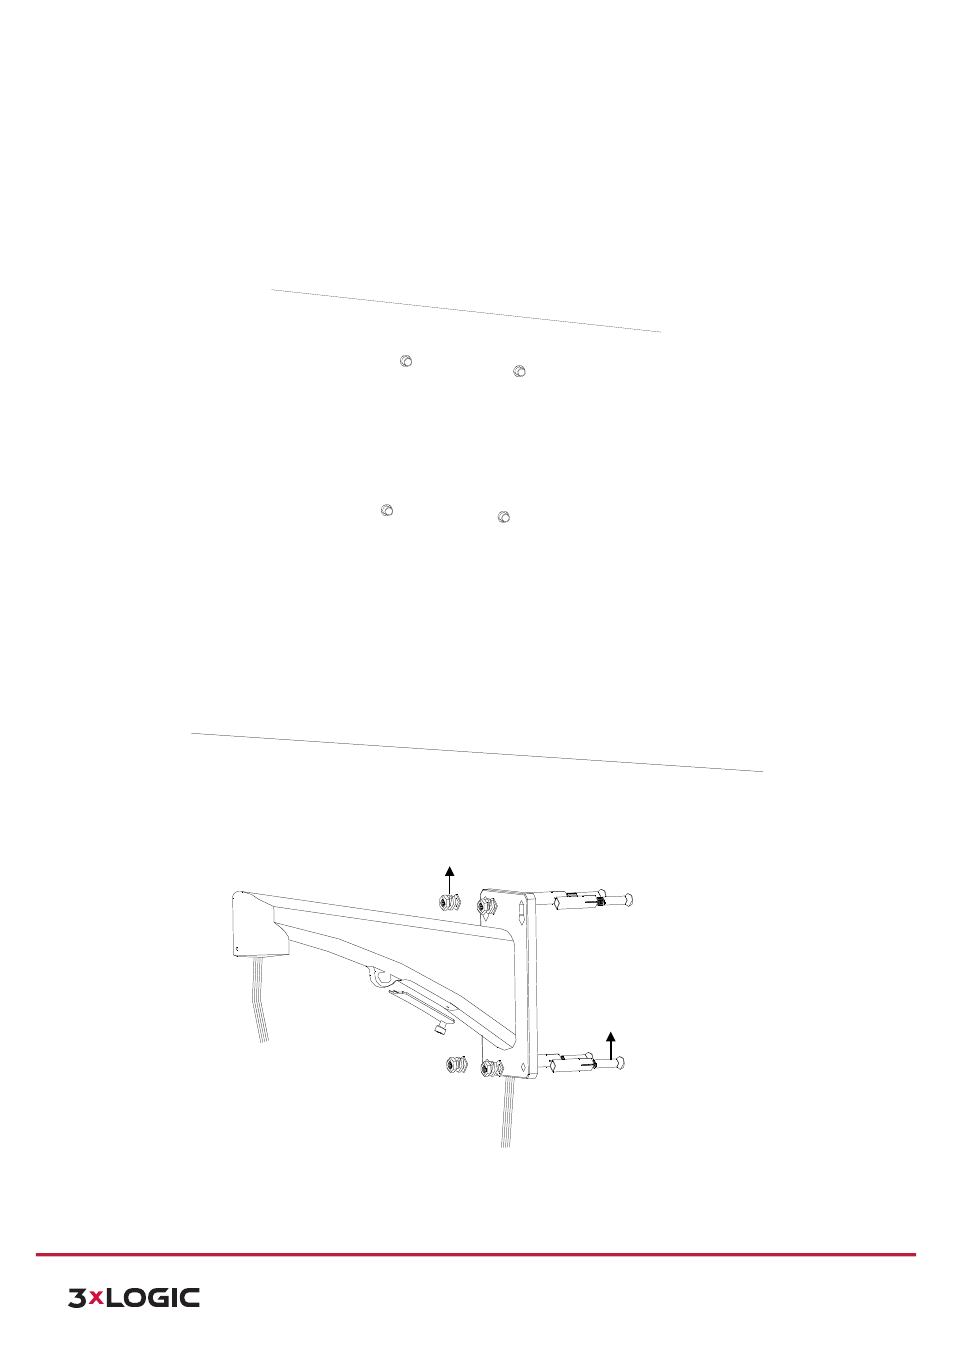
2) Attach the gasket(not supplied) then wall mount to the wall by aligning the 4 screw holes of the mount with
expansion screws on the wall.
3) Secure the wall mount with 4 hex nuts and washers.
Figure 2-‐4 Secure the Mount
Nuts and Washers
Expansion Screws