Bolens 19967-1 User Manual
Page 7
Attention! The text in this document has been recognized automatically. To view the original document, you can use the "Original mode".
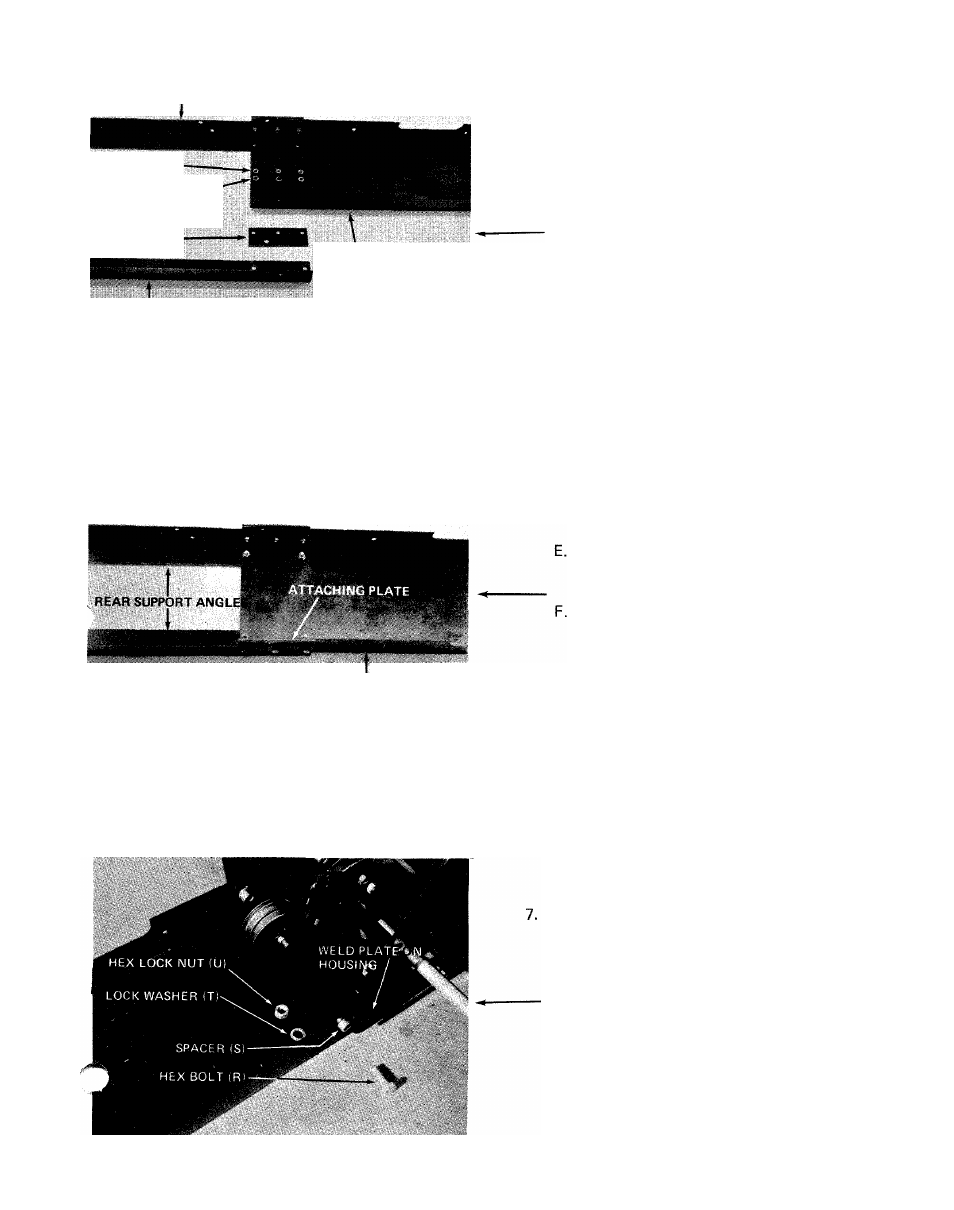
REAR SUPPORT ANGLE L.H.
HEX NUT (I)
LOCK WASHER (H)
ATTACHING
PLATE
REAR SUPPORT
ANGLE R.H.
FIGURE 8
FRONT SUPPORT
CHANNEL
■HEX BOLT (G)
6.
Preassemble the front support channel and the
rear support angles as follows;
A.
Place the front support channel on a work
bench or the floor. Place the rear support
angles in position as shown in figure 8.
B.
Place the attaching plates between front
support channel and rear support angles. See
figure 8.
C.
Place hex bolts (G) through holes in side of
rear support angles, attaching plates and front
support channel. See figure 8.
D.
Secure hex bolts (G) with lock washers (H)
hex nuts (I). Make only finger tight. See
figure 8.
Raise front support channel up and secure
the bottom four holes with hex bolts (G),
lock washer (H) and hex nuts (I). See figure 9.
Tighten all ten bolts and nuts with 9/16"
wrench and adjustable wrench.
FRONT SUPPORT CHANNEL
FIGURE 9
Assemble the front support channel to the snow
thrower housing. Place the front support channel
between weld plates on housing. On one side,
place spacers (S) between channel and housing
and secure with hex bolts (R), lock washers (T)
and hex lock nuts (W). See figure 10. Just start
nuts on by hand. Using a drift pin or punch on
by hand. Using a drift pin or punch on the other
side, line up spacers (S) between channel and
housing and secure in same manner. An adjustable
wrench and a 3/4" wrench is required.Tighten
securely.
FIGURE 10