Bolens 19967-1 User Manual
Page 6
Attention! The text in this document has been recognized automatically. To view the original document, you can use the "Original mode".
IDLl ri PULLEY 'A,
HUH Sll
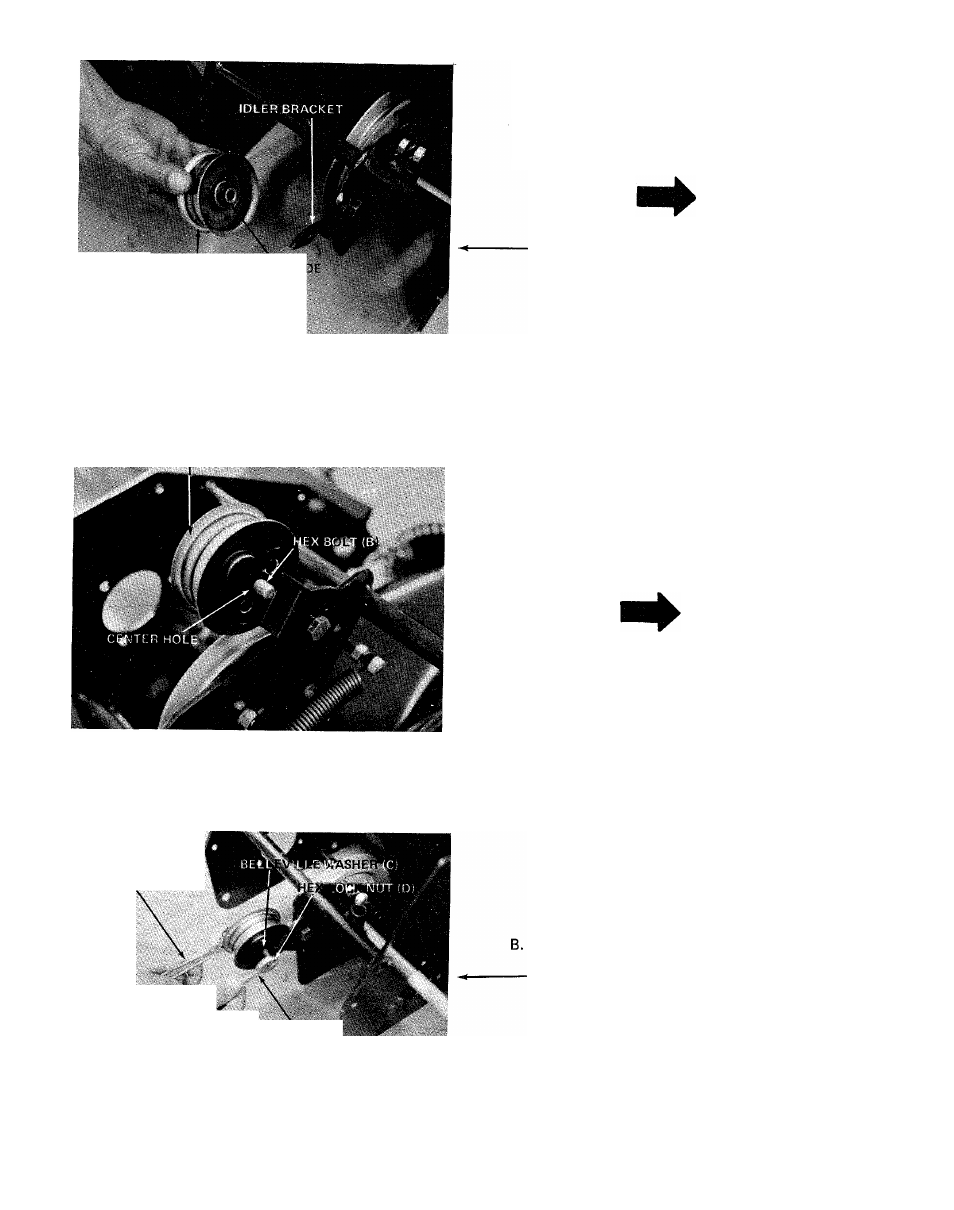
5.
Assemble the idler pulley (A) to the idler bracket
on snow thrower housing.
NOTE
Hub side of idler pulley must be
assembled towards the idler bracket.
See figure 5.
FIGURE 5
IDLER PULLEY (A)
A.
FIGURE 6
Place hex bolt (B) through idler pulley (A)
and through center hole on idler bracket. See
figure 6.
NOTE
The idler bracket has three holes for
belt tension adjustment. Normally, the
center hole on the idler bracket is used
when assembling the idler pulley. When
the belt is assembled to the snow
thrower (Step numbers 11, 12 and
13), the idler pulley may be moved to
the top hole if the belt is too tight.
ADJUSTABLE
WRENCH
■
Secure idler pulley (A) and hex bolt (B) to
idler bracket with belleville washer (C) and hex
lock nut (D). An adjustable wrench and a 9/16"
wrench is required. See figure 7. Tighten securely.
9 1G" WRENCH ^
FIGURE 7