I. passive starter disable, Passive arming wnn passive door locking, Vibration / melody mode – Bulldog Security DELUXE 500 User Manual
Page 8: Passive starter disable
Attention! The text in this document has been recognized automatically. To view the original document, you can use the "Original mode".
REMOTE START OPERATION
H. SILENT ARMING / DISARMING:
Pressing the transmitters
i
and
3
buttons at tbe same time will arm or disarm your securtty system. No chirping
sound will be heard, arm / disarm confirmraon will be through the vehtcles
parking lights only.
I. PASSIVE STARTER DISABLE:
The purpose of this feature Is to protect the vehicle from being stolen at all
times, r^ardless of whether or not the alarm is armed.
The vehicles starter will be disable 60 seconds after the Ignition is turned
off. Once the key is turned off. the LED will flash fast tor 60 seconds.
After the 60-second timer has elapsed, the LED will flash slowly (one-half
its normal armed rate) to indicate the
passive starter disable
ts activated
and the system will not respond to any trigger input except the Ignition
b-Igger.
J. PASSIVE ARMING
Active arming / disarming is controlled by your security ^sterns remote
transmitter.
The
security
system
Is
equipped
with
an
optional
"Passive
Arming feature",
which allows the security system to arm 30 seconds after
the last door is dosed. Operation Is as follows.
sINon and exit the vehide.
1. "rxim the Ignition key to the "OFF" posit
2. After all doors are dosed, the security systems LED will flash fast for 30
seconds. If you re-open any door hood or truck, the security systems
LED will stop flashing. It will begin flashing again once these are closed.
3.
After the 30-second bmer has elapsed, the security s^m will automatically
"ARM". The siren will chir^j^l^time and the parking lights will flash [1]
time and then remain "Oh
' 10 seconds.
PASSIVE ARMING WnN PASSIVE DOOR LOCKING:
The vehides doors will automatically lock after the passive aiming cycle has
been completed.
PASSIVE ARMING BY-PASSi
While the system disarmed, Press the
button twice, the security system will respond with [1] chirp and LED will
turn
"ON".
The security system will remain in this temporary state for as
long as you wish. To exit passive by-pass, press the transmitters B or 3
buttons and the system will return to normal status.
8
Trensmittar
Button
Description
Operation
F-¥(Z-sec.)
Program Count Down Timer [d]
(10-Mlnute/20M/30 H/lHour/
1.5IV2.0H)
Press within 3 seconds
"let the buttons start
counting down then Ô flashes
F - (2-sec.)
Enable/DlsaUe Beep Sound (H)
While Pressing Button
1. Screen Lamp ON:
Press and hold the
F butten
one second, with
one melody sound and the LCD screen lamp will turns on for 5
seconds.
2.
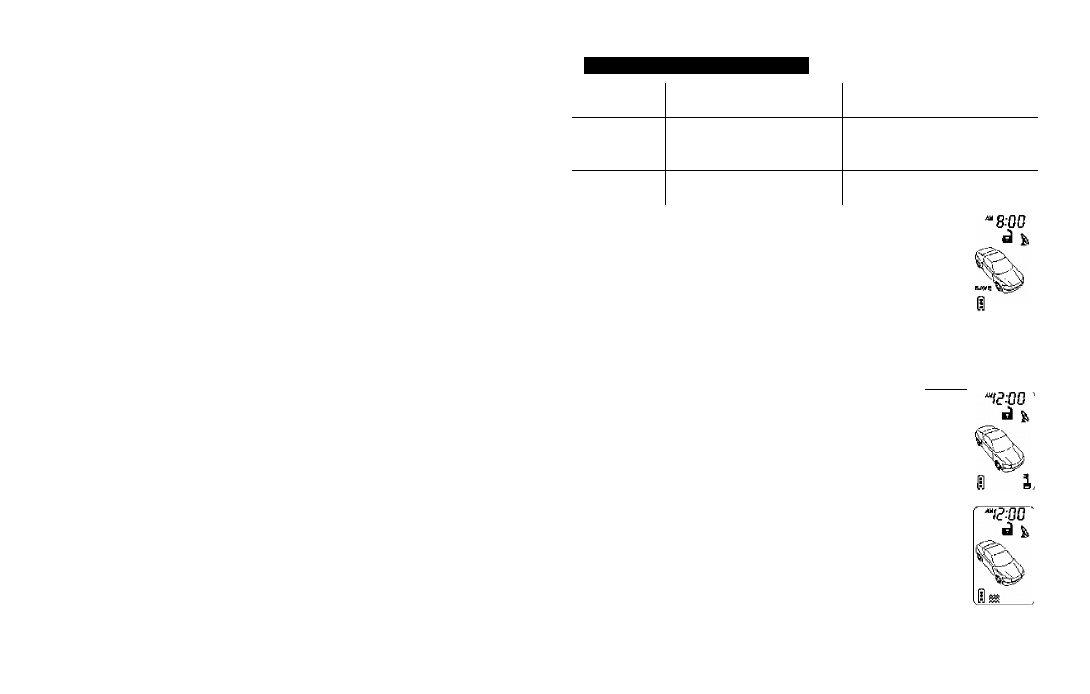
Power Save Mode:
While the power save mode, the LCD remote
transceiver uses '0' current to save the battery txiwer.
Entry:
Press & hold the
F button
for 5 seconds, with one melody
sound and
SAVE
icon on the LCD screen to indicate entry the "power
save mode".
Exit:
Press any button of the LCD remote transmitter to
exit the "Power Save Mode".
3. Clear the Flash Icon and Melody Sound:
Press the
F button
3 times within
3 seconds will dearths flash icon and melody sound on the LCD screen transceiver
Stop The THgger Melody Sound:
While triggering the alarm the LCD screen will
alert user through melody sound and flashing trigger icon, press any button on
the LCD remote transmitter to stop the melody sound only.
5.
Button Lock:
It Is useful If you want to disable the transmission
function of the remote control temporarily to prevent from any
Inadvertent pressing of buttons by others. Press the
F
button
first, within 3 seconds press and hold the II (i)
button
for 2 seconds
to acbvate or cancel the button lock function, the i icon will dis
played on the LCD screen to show the LCD remote transmitter is on
*^Button Lock".
6. Vibration / Melody Mode:
It Is useful when you are In a noisy place and difficult to hear
beep sound from the remote control as the remote control In
this mode, vibrates if your security system is triggered.
Press the
F button
first, within 3 seconds press and hold
the 3 (^)
button
for 2 seconds to select the mode of
vibration or melody, the ^ icon will displayed on the LCD
screen to show the LCD remote transceiver is on vibration
mode.
21