About your bowflex ultimate, 2 attachments, Part b – Bowflex Ultimate 2 User Manual
Page 12: Using the bowflex ultimate, 2 squat attachment
10
Part B
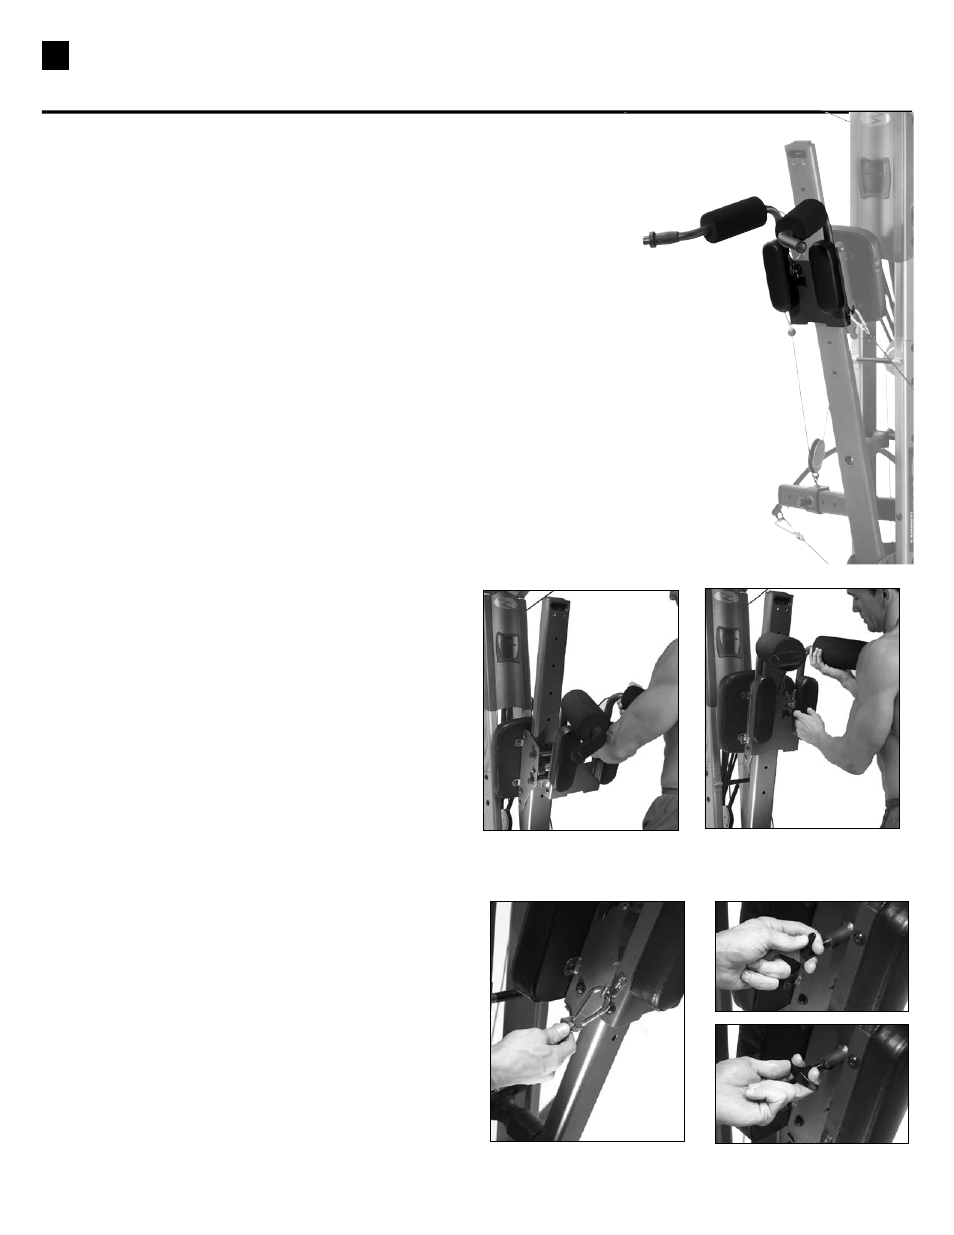
Attach the Squat Frame
Make sure the Seat Rail Securing Device locks
securely into the seat rail. Hook the lower hooks on
the squat attachment onto the lower posts on the
sliding seat frame, then rotate the squat frame up
until it locks into position.
Before attaching the cables you must position the
squat attachment into the lowest position on the
seat rail. To do this, pull the spring lock seat pin out
to the unlocked position and pull out on the release
handle and rotate it forward to allow the squat
attachment to slide along the seat rail. Now push
up slightly on the squat attachment to release the
safety lock and slide the squat attachment down to
the lowest position. Pull out on the release handle
and rotate it back to the locked position. Finally,
slide the squat attachment up until it locks into the
lowest hole on the bottom of the seat rail. Now you
can extend the cables from the sliding pulleys on
the chest bar to the hooks on the sides of the squat
attachment and add Power Rod
®
resistance.
Use the squat attachment by squatting under the
handlebars with the shoulder pads resting on your
shoulders. Now pull out on the release handle and
rotate it forward to allow the squat to slide freely
along the seat rail.
Safety
• Always wear shoes
with non-skid
soles when
using the low
pulley/squat attachment.
• Always adjust cable travel and
tension of the squat harness in
such a manner that it will not
cause a hazard.
• Always check fasteners, snap
hooks, cables and pulleys before
each workout to ensure proper
functioning.
Using the Bowflex Ultimate
®
2 Squat Attachment
1) Hook the Squat Attachment
to the Sliding Seat
2) Fold Squat Attachment up.
Squat Attachment will
lock into place
3) Attach the cables
4) Unlock the Seat Pin
About Your Bowflex Ultimate
®
2 Attachments