Christie Digital Systems XENON CONSOLE User Manual
Page 28
S L C S e r i e s X e n o n C o n s o l e
6-4
CHRISTIE DIGITAL SYSTEMS
August 7, 2003
6.3. O
P T I C A L
A
L I G N M E N T A N D
A
D J U S T M E N T
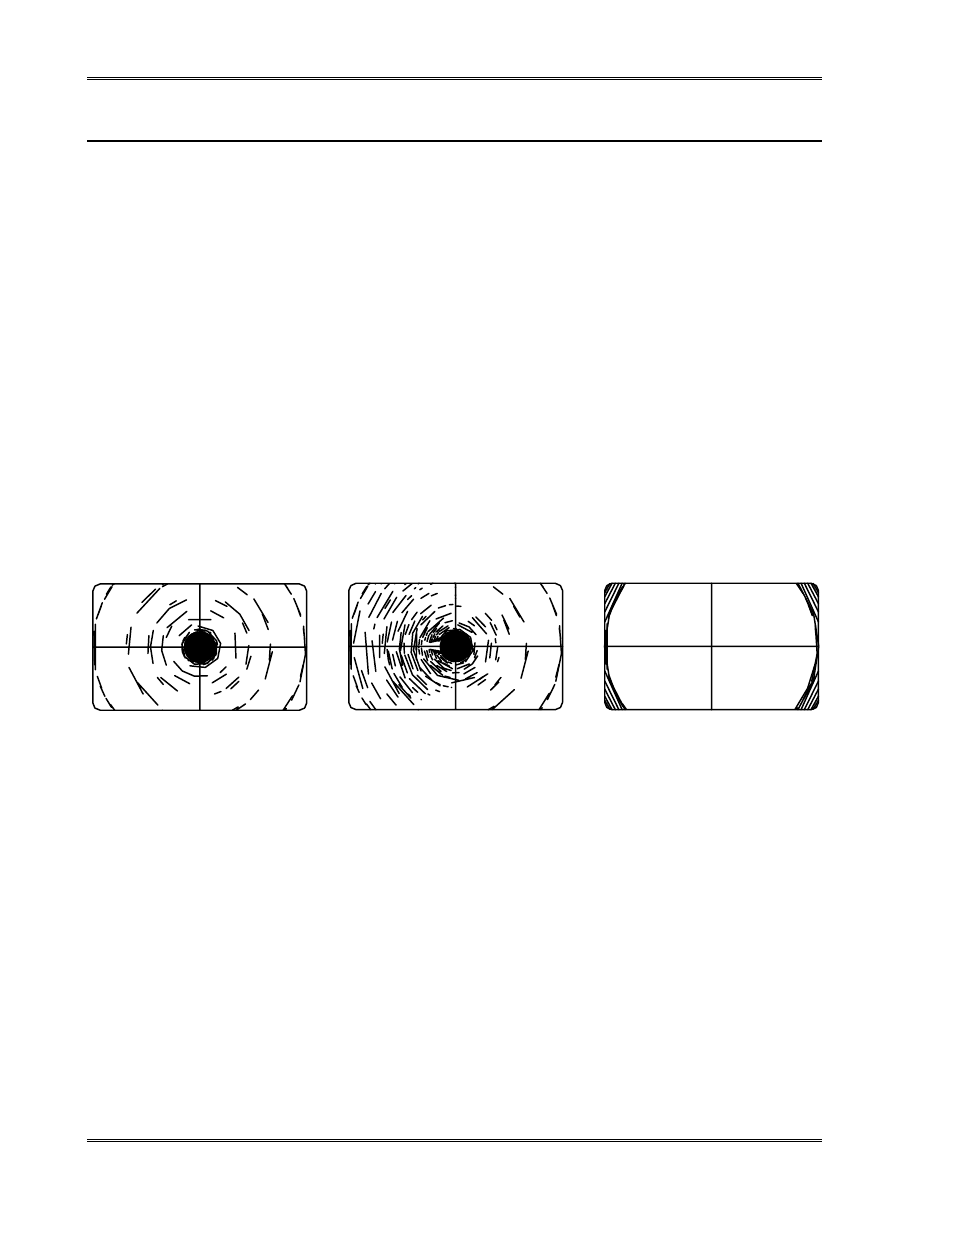
Repeat this procedure every time a lamp is changed. (See illustrations in Figure 6-2.)
1. After lamp has been started and operated as described in Section 6.2, open douser.
Observe dark spot projected on screen.
2. Using control panel (Figure 6-1), adjust lamp focus until dark spot is clearly defined.
3. Center dark spot using vertical and lateral adjustments (Item 9 in Figure 6-1).
4. Move lamp forward. Light intensity should be equal on both sides of dark spot. If light
intensity is not equal on both sides of dark spot, use vertical and/or lateral adjustments to
balance light intensity.
5. When light intensity is balanced, move lamp back through FOCUS. Light intensity
should again be equal on both sides of dark spot.
If light intensity is not equal on both sides of dark spot, recheck Section 5.1 (Mechanical
Alignment) and repeat Steps 1 – 5.
6. Close the douser and replace the projector lens in the projector.
7. Again open the douser and make final lamp adjustments, if necessary, to obtain
maximum and uniform light on the screen.
C o r r e c t p i c t u r e
w it h o u t p r o j e c t o r l e n s
i n s t a l l e d .
L a m p c e n t e r i n g t o o
f a r t o l e f t ; c o r r e c t
w it h L e f t / R i g h t l a m p
a d j u s t m e n t .
C o r r e c t l y c e n t e r e d
b r i g h t s p o t w i t h s c o p e
l e n s a n d a p e r t u r e
p l a t e .
Figure 6-2: Optical Alignment of Xenon Lamp