Christie Digital Systems XENON CONSOLE User Manual
Page 18
S L C S e r i e s X e n o n C o n s o l e
4-4
CHRISTIE DIGITAL SYSTEMS
August 7, 2003
4 . 2 . 2 . D
O O R
P
A N E L S
All three door panels are removable for easier access to the interior of the console during
installation and maintenance.
To remove door panel:
1. Unlock key-lock.
2. Open door.
3. Push down on spring-loaded pin hinge.
4. Remove panel.
To install door panel, reverse the above procedure.
4 . 2 . 3 . V
E N T I N G
It is necessary to vent hot exhaust air from console to the outside of the building.
1. Connect a eight-inch inner-diameter, flexible, fireproof ducting material to exhaust duct
(Item 1 in Figure A-2) on top of lamphouse.
2. Ensure that there are no obstructions in ducting, and that air intake openings of console
are unobstructed.
If ozone-free lamps are used, a short, vertical exhaust stack may be used, provided local
codes do not require the exhaust to be vented directly outside.
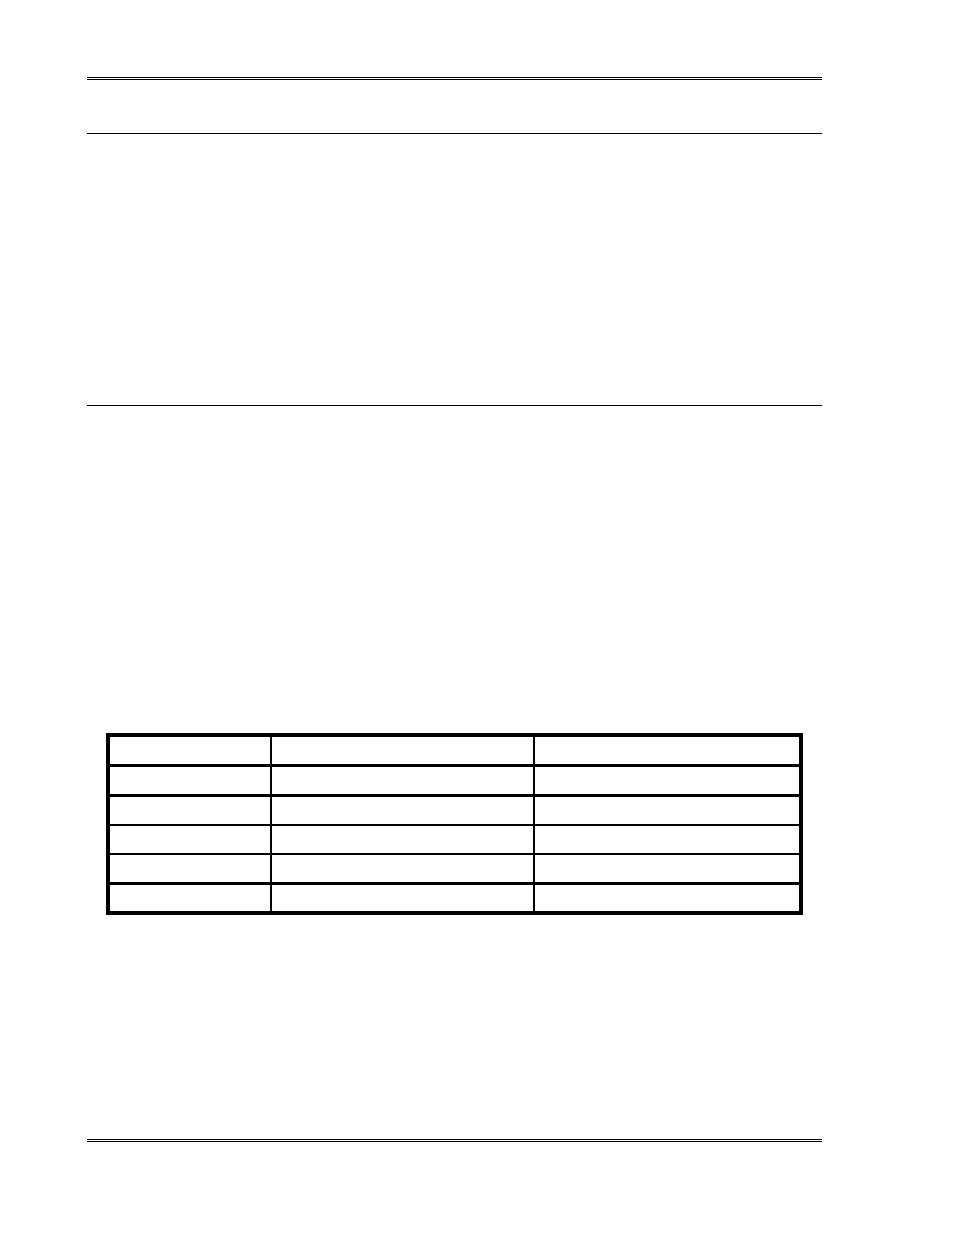
External exhaust air extraction is required. Minimum and maximum exhaust airflow
requirements for all SLC series models are shown in Figure 4-3.
Model Minimum
Exhaust
(ft
3
/min) Maximum
Exhaust
(ft
3
/min)
SLC 20
300
400
SLC 30
350
450
SLC 40
450
550
SLC 45, SLC 45R
550
750
SLC 70
750
900
Figure 4-3: Minimum and Maximum Exhaust Airflow Requirements for SLC Consoles