MTD 312-980I000 User Manual
Page 6
Attention! The text in this document has been recognized automatically. To view the original document, you can use the "Original mode".
12
.
Flat
Washers
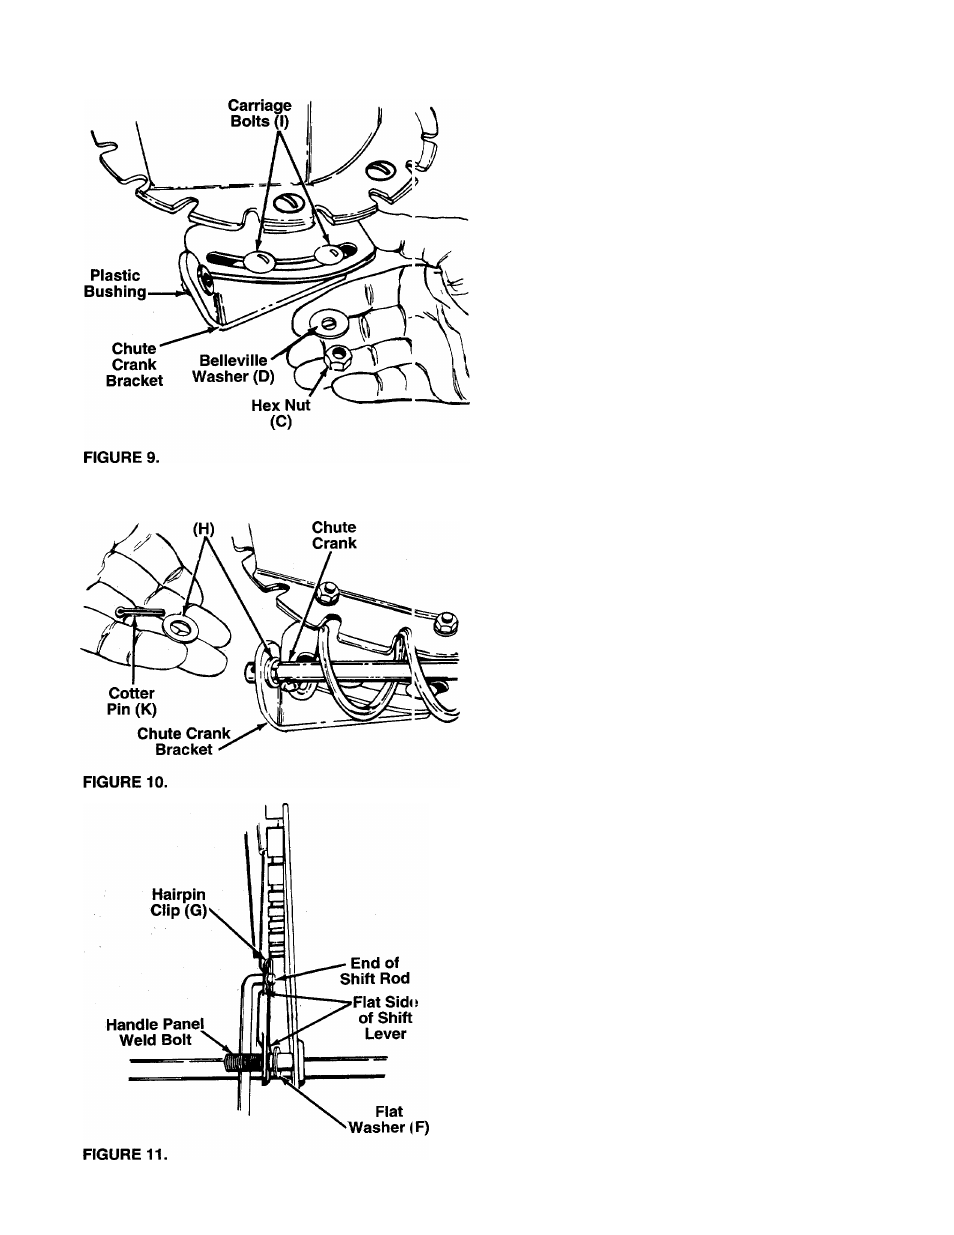
Attach chute crank bracket to the extension on
the left side of the chute opening (bracket goes
beneath the extension) as shown in figure 9.
Secure with carriage bolts (I), belleville washers
(D) (cupped side of washers goes against the
bracket) and hex nuts (C). Tighten finger tight
only at this time.
13. Place one flat washer (H) on the end of the chute
crank, then insert the end of the crank into the
hole in the plastic bushing in the chute crank
------ bracket. See figure 10. Place the other flat wash
er (H) on the end of the chute crank, and insert
cotter pin (K) into hole in the end of crank. Secure
by bending the ends of cotter pin in opposite
directions.
14. Adjust the chute bracket so that the spiral on the
chute crank fully engages the teeth on the chute
assembly. Tighten the nuts on the chute crank
bracket securely. Tighten the hex nuts on the
eyebolt at the handle panel.
15. Thread shift knob (Z) onto the shift lever (R).
16. Place one flat washer (F) over the weld bolt on
the handle panel. Place shift lever (R) through
slot in handle panel, with the flat side of shift lever
against bracket on handle panel. Place the hole
in the end of the shift lever over the handle panel
------ weld bolt. See figure 11.
17. Place the shift lever in the fastest forward position
(5th speed). Push the shift rod all the way forward
(assembled to the ferrule in step 3). Thread the
shift rod in or out of the ferrule as necessary until
the end of the rod lines up with the hole in the
shift lever. Insert end of rod into hole in shift lever
and secure with hairpin clip (G). See figure 11.