MTD 312-980I000 User Manual
Page 5
Attention! The text in this document has been recognized automatically. To view the original document, you can use the "Original mode".
Hex Bolt (A)
Belleville
Washer (B)
FIGURE 6.
Slide the slotted end of the handles under the
belleville washers on the self-tapping screws
which were loosened in step 4.
Secure the upper hole in the handles with belle
ville washers (B) (cupped side against the han
dles) and hex bolts (A). See figure 6. Do not tight
en at this time.
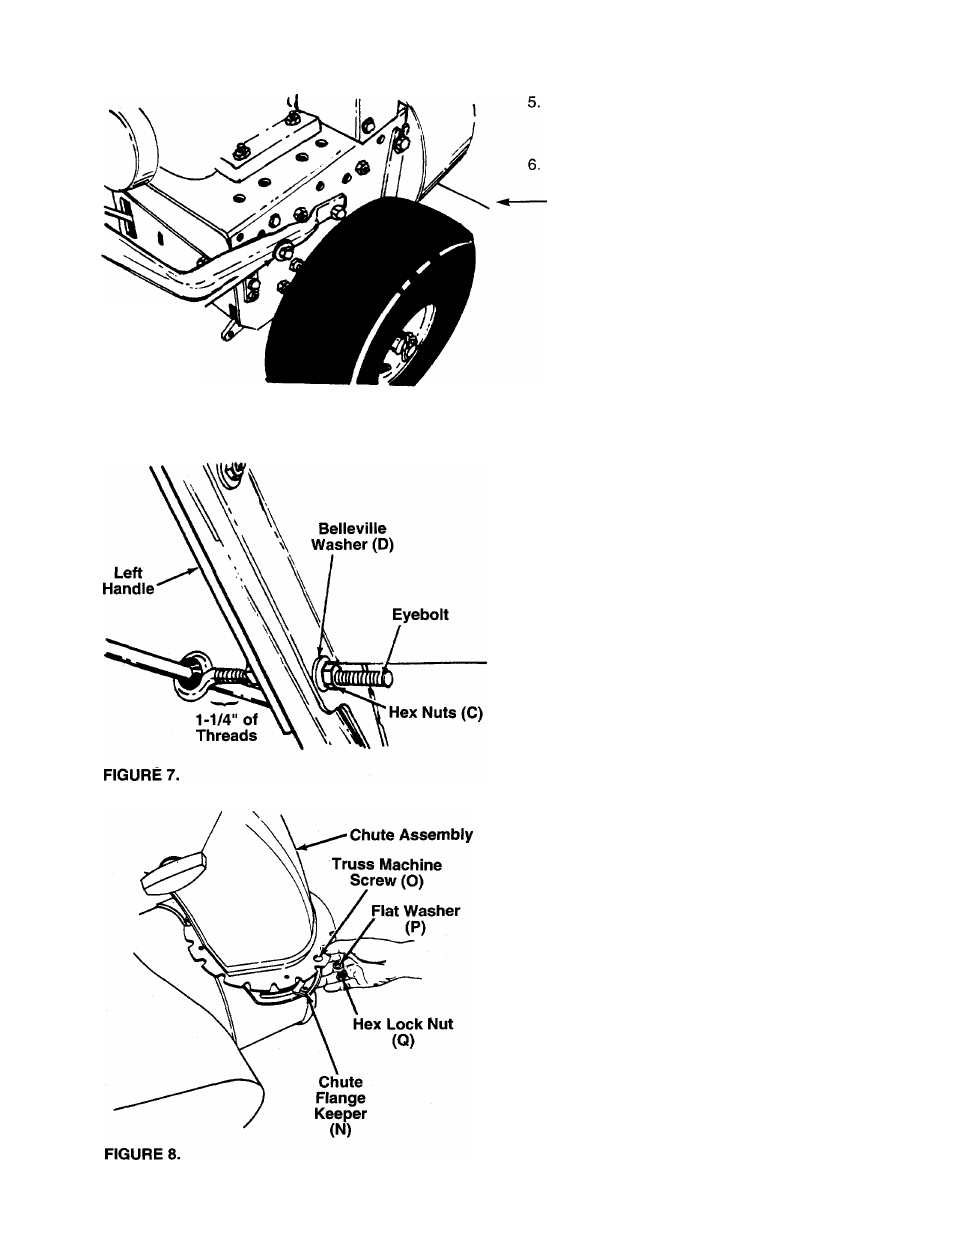
7. Thread one hex nut (C) onto the eyebolt on the
chute crank assembly until there is approximately
1-1/4" of threads showing between the nut and
—the head of the eyebolt. See figure 7.
8. Place the eyebolt into the lower hole in the left
handle and handle panel. See figure 7. Secure
with belleville washer (D) (cupped side against
the handle panel) and hex nut (C). Do not tighten
until after attaching the other end of the chute
crank (step 14).
9. Tighten securely all bolts and nuts on the handle
panel and all four bolts which secure the handles
to the frame.
10. Grease the chute opening using a multi-purpose
automotive grease or equivalent.
11. Place chute assembly over chute opening, with
the opening in the chute assembly facing the front
of the unit. Place chute flange keepers (N)
beneath lip of chute assembly. Secure with truss
machine screws (O), flat washers (P) and hex
-------lock nuts (Q) as shown in figure 8. Tighten with a
7/16" wrench, then back off 1/4 turn to allow
easier movement.