Operating tips, Adjustments, Chute assembly adjustment – MTD 312-980I000 User Manual
Page 12: Skid shde adjustment, Drive and auger clutch adjustments, Shift rdd adjustment, Carburetor adjustment, Drive wheels, Figure 22
Attention! The text in this document has been recognized automatically. To view the original document, you can use the "Original mode".
OPERATING TIPS
NOTE: Allow the engine to warm up for a few minutes
as the engine will not develop full power until it reach
es operating temperature.
A
WARNING: Temperature of muffUir and
surrounding areas may exceed I50°F.
Avoid these areas.
1. For most efficient snow removal, remove snow
immediately after it falls.
2. Discharge snow downwind whenever possible.
Slightly overlap each previous swath.
3. Set the skid shoes 1/4" below the scraper oar for
normal usage. The skid shoes may be adjusted
upward for hard-packed snow. Adjust dow nward
when using on gravel or crushed rock.
4. Be certain to follow the precautions listed under
“To Stop Engine” on page 11 to prevent possible
freeze-up.
5. Clean the snow thrower thoroughly afte' each
use.
ADJUSTMENTS
A
WARNING: NEVER attempt to clean
chute or make any adjustments while
engine is running.
CHUTE ASSEMBLY ADJUSTMENT
The distance snow is thrown can be adjusted by
adjusting the angle of the chute assembly. The sharp
er the angle, the shorter the distance snow is tirown.
See figure 22.
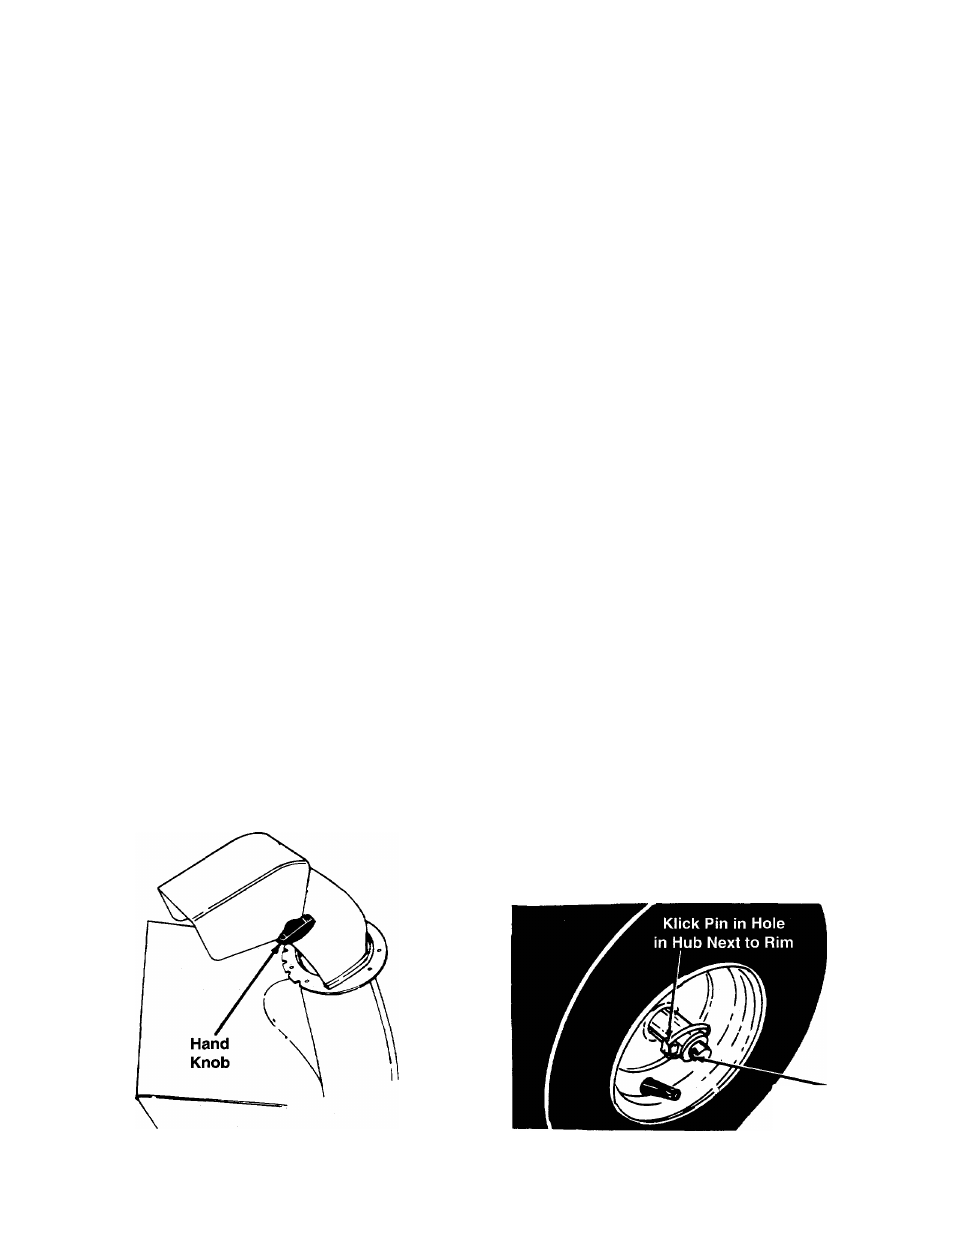
To adjust chute assembly, loosen the hand knob.
Pivot the top of the chute assembly to pcsition
desired. Retighten the hand knob.
SKID SHDE ADJUSTMENT
The space between the shave plate and the ground
can be adjusted. Refer to step number 24 of the
Assembly Instructions.
DRIVE AND AUGER CLUTCH ADJUSTMENTS
To adjust the drive or auger clutch, unhook the spring
from the drive or auger bracket. Refer to steps 21 and
22 under Assembly Instructions for proper adjust
ment.
SHIFT RDD ADJUSTMENT
To adjust the shift rod, remove the cotter pin which
secures the shift rod to the shift lever. Adjust as speci
fied in step number 17 under Assembly Instructions.
CARBURETOR ADJUSTMENT
A
WARNING: If any adjustments are made
to the engine while the engine is running
(e.g. carburetor), keep clear of all moving
parts. Be careful of heated surfaces and
muffler.
Minor carburetor adjustment may be required to com
pensate for differences in fuel, temperature, altitude
and load.
Refer to the separate engine manual packed with
your unit for carburetor adjustment information.
DRIVE WHEELS
The snow thrower is equipped with a differential which
makes the unit easy to maneuver. It may be adjusted
for two different methods of operation. The adjust
ment is made by placing the klick pins in one of two
different holes on each side of the unit. See figure 23.
1. Differential Action—Place klick pin in the outside
hole in the axle. This position allows easy maneu
vering when blowing light to medium snow.
2. Straight Axle Action—Place klick pin in the hole in
the hub next to the rim on the right wheel. This
position should be used when blowing heavy
snow or when greater traction is needed (icy sur
faces, etc.). The unit will be more difficult to
maneuver.
Outside Hole
in Axle
FIGURE 22.
FIGURE 23.
12