Changing the friction wheel – MTD 312-980I000 User Manual
Page 16
Attention! The text in this document has been recognized automatically. To view the original document, you can use the "Original mode".
8. To Remove Drive Belt:
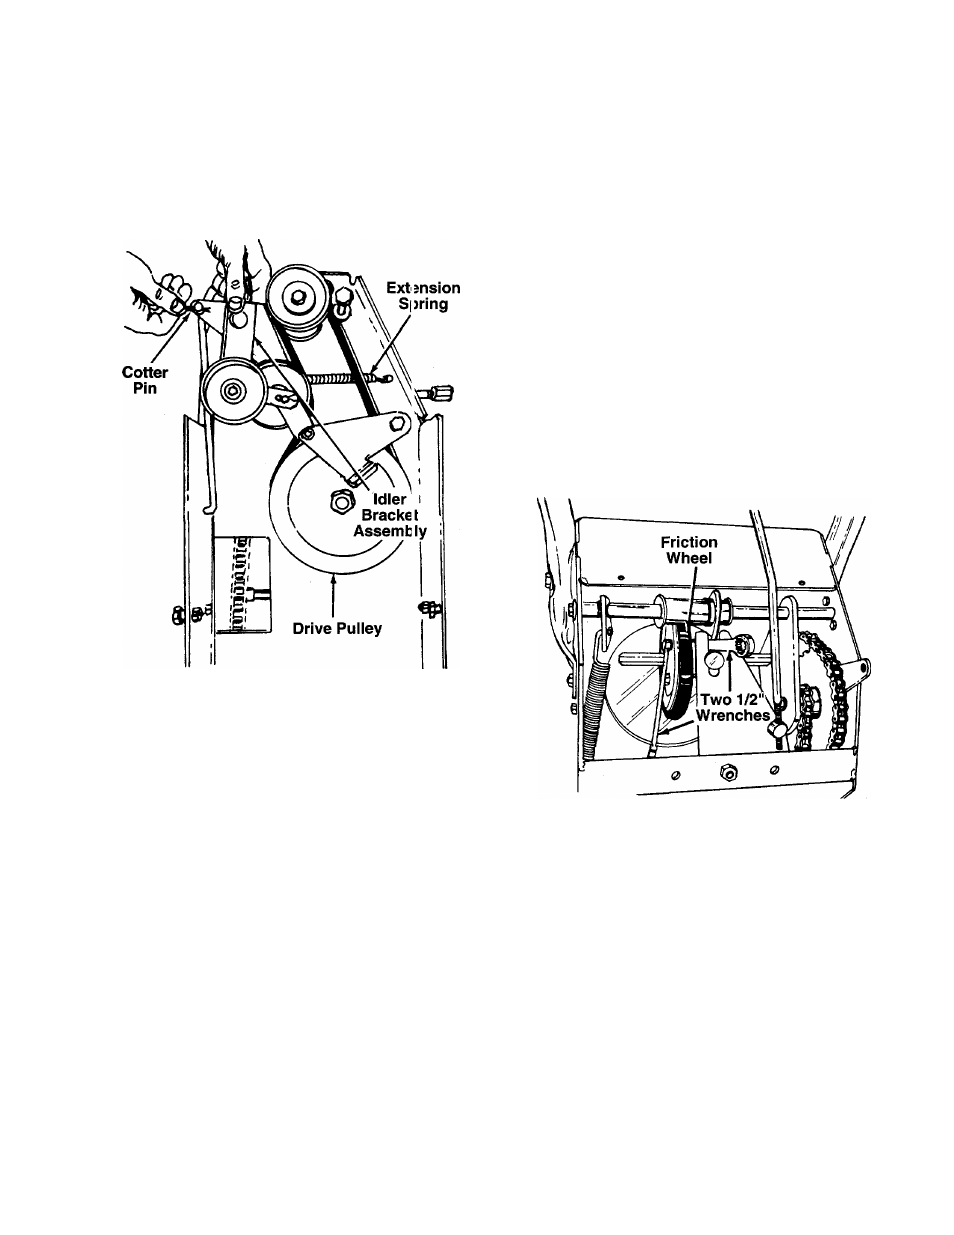
a. Remove the cotter pin which holds the linkage
rod to the idler bracket assembly. See figure
35.
b.
Unhook extension spring from tho engine
plate. See figure 35.
13. Reassemble belt cover and chute crank.
14. Remove plastic film from gas cap.
FIGURE 35.
c. Remove drive belt from the engine pulley and
bottom drive pulley.
d. Replace belt and reassemble in reverj e order.
9. Reassemble the two halves of the unit, "wo peo
ple are required.
NOTE: If the two halves do not reassemb'e easily,
the idler pulley and/or the brake shoe may t e behind
the large pulley.
10. Secure the two halves with the two sciews and
lock washers.
11. Slip the auger drive belt over engine pulloy.
12. Reassemble the large shoulder bolt, spacer and
belleville washer as shown in figure 30. Belleville
washer goes on shoulder bolt between the idler
bracket assembly and engine plate (cuf ped side
toward engine plate).
NOTE: Shoulder of the bolt must go throjgh both
sides of idler bracket assembly.
Changing the Friction Wheel
1. Tip the snow thrower forward and let it rest on the
housing or optional drift cutters.
2. Remove the four self-tapping screws holding the
rear cover.
3. Slide out the rear cover.
4.
Using two 1/2" wrenches, loosen and then
remove the three hex nuts and lock washers
holding the friction wheel to the friction wheel
adapter. See figure 36.
FIGURE 36.
5. Slide the friction wheel off the end of the hex
shaft. See figure 37.
NOTE: It may be necessary to strike the friction wheel
with a soft hammer to knock it loose.
6. Assemble the new friction wheel so the cupped
side is towards the friction wheel adapter.
7. Fasten the friction wheel to the friction wheel
adapter with the three lock washers and hex nuts.
Tighten each nut in rotation until they are finger
tight. Spin the wheel to see that it is not cocked on
the hub. Then tighten using two 1/2" wrenches.
16