Attaching tongue to reservoir tank, Installing the hitch, Attaching the wedge, beam and cylinder assembly – MTD 242-630-000 User Manual
Page 6
Attention! The text in this document has been recognized automatically. To view the original document, you can use the "Original mode".
8. Check the assembly of the wheels. There should
be no side to side play, and the wheel should
spin freely.
9. Place hub caps in position on wheels, and tap on
with a soft hammer or mallet.
ATTACHING TONGUE TO RESERVOIR TANK
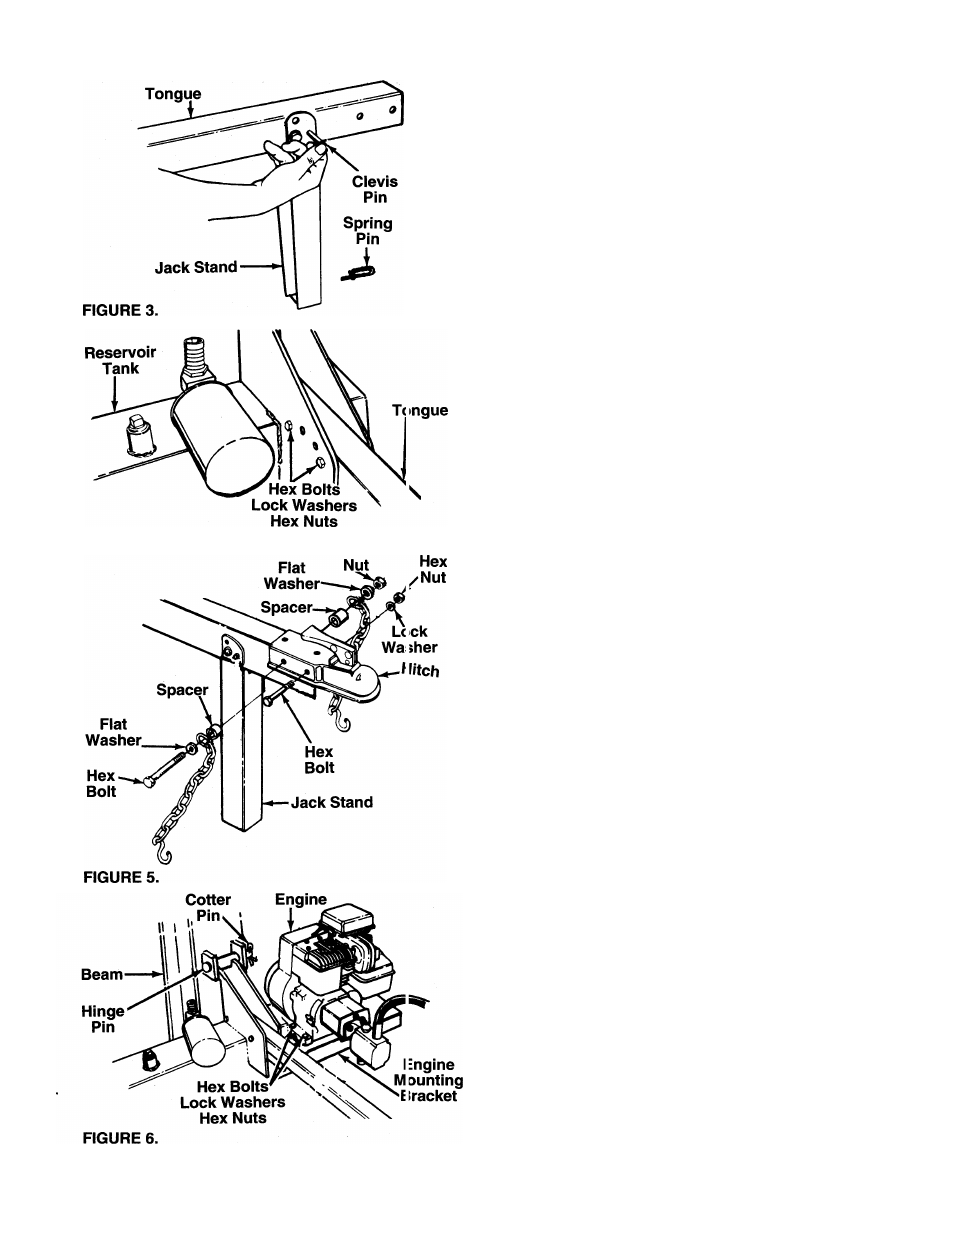
1. The tongue is shipped with the jack stand already
attached to the tongue. The jack stand is in the
transport position. Remove the spring pin and cle
vis pin. Pivot the jack stand to the operating posi
tion (90°), and secure with the clevis pin and
spring pin. See figure 3.
2. Remove the two hex bolts, lock washers and hex
nuts on the front of the reservoir tank. Two 9/16"
wrenches are required. Place the tongue in posi
tion, and secure with hardware just removed. See
— figure 4.
FIGURE 4.
Hex Lock
INSTALLING THE HITCH
1. Using two 9/16" wrenches, remove the hardware
which is assembled through the sides of the hitch.
Do not remove the flat washer, chain and spacer
from the one hex bolt.
2. Place the hitch in position on the end of the
----- tongue as shown in figure 5. Using hole closest to
the jack stand, insert the hex bolt (with hardware
attached) through hitch and tongue.
3. Place the other spacer, safety chain and flat
washer on the hex bolt. Secure with hex lock nut.
4. Secure front of tow hitch to tongue with the other
hex bolt, lock washer and hex nut just removed,
using the forward hole in hitch and tongue.
5. Tighten both bolts and nuts securely using two
9/16" wrenches.
ATTACHING THE WEDGE, BEAM AND CYLINDER
ASSEMBLY
1. Stand the wedge, beam and cylinder assembly
upright.
2. Remove the cotter pin from the hinge pin, located
on top of the reservoir tank assembly. Move the
reservoir tank assembly in position against the
------beam. See figure 6.
3. Insert hinge pin just removed through welded
brackets on beam and reservoir tank assembly.
Secure with cotter pin, bending the ends of the
pin in opposite directions.