Hydraulic lift, Warning, Hydrostatic transmission – Troy-Bilt GTX 20 User Manual
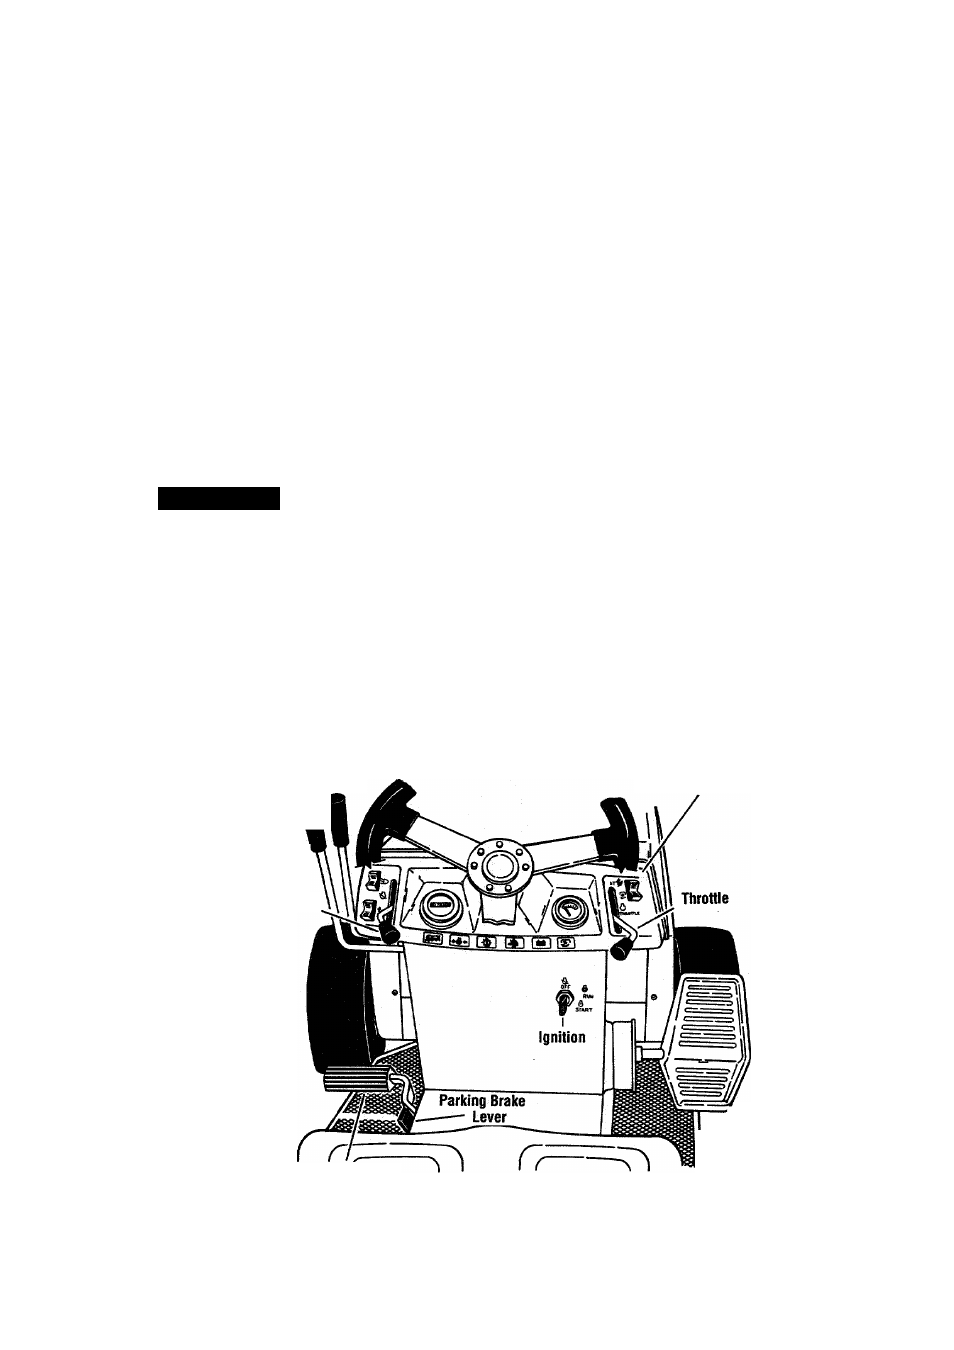
Page 17: Travel pedal, Attachment lift lever auxiliary hydraulic lever j, Operation (continued)
Attention! The text in this document has been recognized automatically. To view the original document, you can use the "Original mode".
Operation (continued)
Hydraulic Lift
Pull hydraulic lift lever (Fig. 6-1) back to
lift attachment. Push lever forward to
lower attachment. When lever is released,
it will return to neutral, except when
pushed fully forward to "FLOAT" position.
Auxiliary hydraulic lever (GTX 20):
Pull
lever back to activate auxiliary hydraulic
lift attachment. Push lever forward to
reverse direction.
Use “FLOAT' position to allow attachment
to follow ground contours.
WARNING
BEFORE USING AHACHMENT LIFT,
MAKE SURE AHACHMENT IS
COMPLETELY HOOKED UP. MOVE
ATTACHMENT THROUGH COMPLETE
LIFT RANGE SLOWLY TO ENSURE NO
INTERFERENCE. ADJUST IF NEEDED.
Hydrostatic Transmission
For maximum performance when using
attachments, operate engine at full speed
(full throttle). Control ground speed with
travel pedal.
The hydrostatic transmission provides an
infinite choice of travel speeds. Avoid fast
travel speeds when using attachments.
Slower speeds work best when
performing tasks such as snowthrowing,
mowing and tilling.
Warning light (GTX 20):
The "Oil
Temperature" light activates when
hydraulic fluid in transmission is
overheated. If light is activated, disengage
attachment/PTO drive switch (Fig. 6-1)
and shut off tractor engine. Allow
transmission to cool down. Make sure
cooling fins are clear of debris.
2-Speed models (GTX 20):
Change
speeds with transmission lever (Fig. 6-1).
Tractor must be completely stopped when
shifting.
Use "HIGH" range (0-9 mph) for transport
and mowing.
Use "LOW" range (0-3.3 mph) for heavy
load conditions such as tilling,
snowthrowing or plowing.
Travel Pedal
Controls forward and rearward movement.
Press travel pedal (Fig. 6-1) at top (with
toe) to move forward. Press pedal at
bottom (with heel) to move in reverse.
To stop or slow down when moving
forward: Press pedal at bottom (with
heel).
To stop or slow down when in reverse:
Press pedal at top (with toe).
Attachment Lift Lever
Auxiliary Hydraulic Lever
j
Ai
(13062 only)
PTO (attachment drive) switch
Choke Lever
Brake / Neutral Pedal
Travel Pedal
Fig.6-1
17