Garden tractor, Ariens, Dealer assembly and pre-service instructions – Ariens 931015 S-18 User Manual
Page 41
Attention! The text in this document has been recognized automatically. To view the original document, you can use the "Original mode".
ARIENS
GARDEN TRACTOR
DEALER
ASSEMBLY AND PRE-SERVICE INSTRUCTIONS
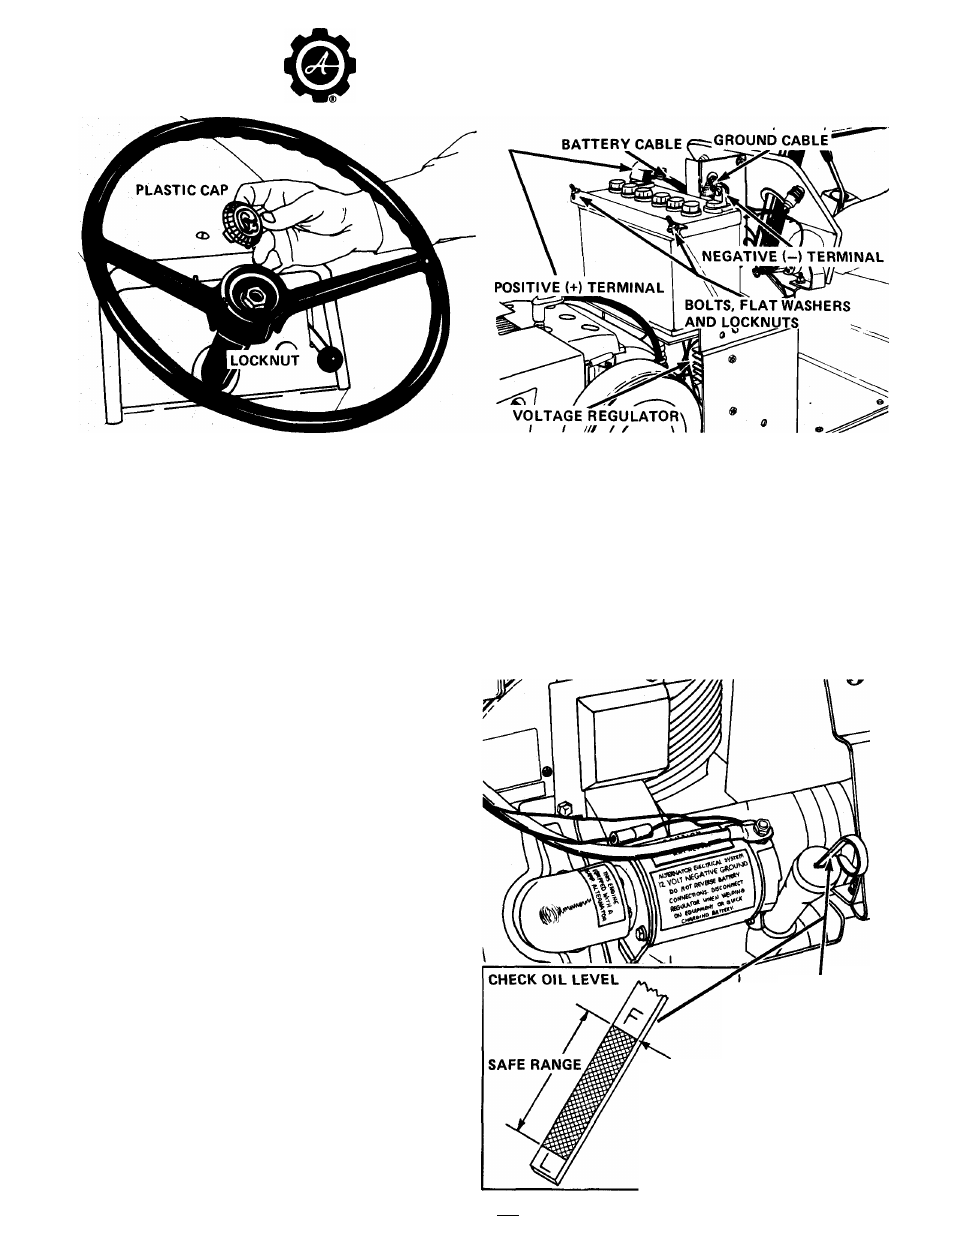
Figure 1A
STEERING WHEEL
Install steering wheel on the column as shown in Figure 1 A.
Secure with nut provided. Place the plastic cap firmly in the
steering wheel hub.
SERVICE BATTERY
Remove the battery from the tractor. This will prevent
any accidentally spilled electrolyte from damaging the tractor.
Electrolyte is not furnished with the tractor. Use only
battery grade sulphuric acid electrolyte with 1.265 specific
gravity plus or minus 0.005 corrected to 80° F.
Prepare battery as follows:
1. Remove vent plugs.
2. With battery removed from the tractor, fill each cell with
electrolyte until electrolyte level rises to split ring at the bot
tom of the filler tube. DO NOT OVERFl LL.
Figure 2A
Attach the battery cable to the positive
{+)
terminal and
the ground cable to the negative (—) terminal as shown in
Figure 2A. Tighten the cables to the terminals securely.
Coat the terminals and battery cable ends with a light coat
of grease or petroleum jelly to prevent corrosion.
ENGINE
Fill the engine crankcase (Fig. 3A & 4A). Use Ariens
Gard-N-Yard MS 10W-30 oil when using lawn and garden
attachments and SE 5W-20 when using snow removal attach
ments.
Do not overfill — Oil level must never exceed full mark.
A
CAUTION: Electrolyte contains sulphuric acid which
is harmful to skin, eyes and clothing. Handle with
extreme care, if spillage occurs on body or clothing,
rinse at once with water.
3. After filling cells, wait five to ten minutes and add ad
ditional electrolyte if necessary to bring electrolyte to proper
level.
4. Charge battery with a 12 volt charger for 30 minutes
at 4 to
6
amps.
5. After charging, add electrolyte until level is up to the
split ring in the filler tube. Thereafter, add only clean, dis
tilled water as use and time requires.
6
. Replace vent caps. Clean and dry battery exterior.
INSTALL BATTERY
Place the battery in the battery carrier as shown in
Figure 2Awith the positive (-I-) terminal to the right side of
the tractor.
Secure the battery in place with the battery hold down
bolts, flat washers and locknuts as shown in Figure 2A. Do not
overtighten these bolts.
Q>
DIPSTICK
DO NOT EXCEED
"F" MARK
Figure 3A
Figure 4A
41 -