Applications, Blindstitch, Blindstitch hems – SINGER 6110 User Manual
Page 30
Attention! The text in this document has been recognized automatically. To view the original document, you can use the "Original mode".
applications
r" V V"" V V V"" V ■■ ■''V~'' V V'"" V" V'"" ■ V V V V 'V V
I,.
r’
BLINDSTITCH
<,
):> The blindstitch has many practical and functional uses. Its most common use
<|
j
provides a durable hem finish. However, the creative ways that one might apply «
this stitch are unending.
J
r'
S
i
f
i A..... A „ „ A , . A . A..................... A A............ A......A...... A...... A.......A......A .. .A... „ A........A „ „ A , . . J
Blindstitch Hems
• Pattern Group Selector: c?
1
• Needle Position;
• Stitch Width;
• Stitch Length: 1 to 2.5
• General Purpose Needle Plate
• General Purpose Foot
• Blindstitch Hern Guide
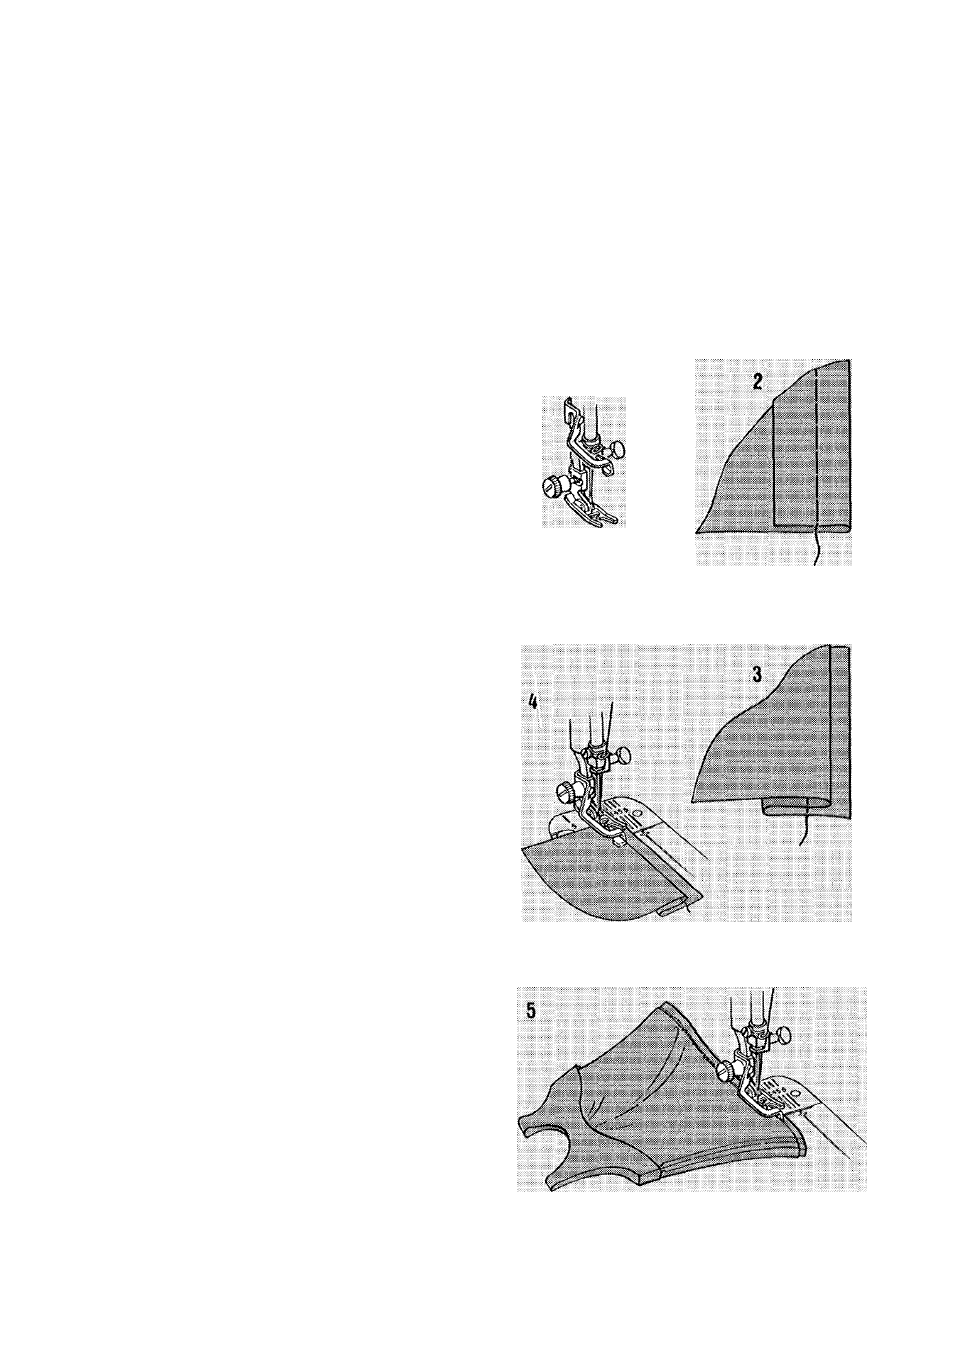
1. Raise foot, loosen screw, and slip blindstitch
hem guide from the front between the screw
and the shank of the foot. Make sure the
underside of the guide clears the slide plate
and the front of the foot. Tighten screw with
coin.
2. Prepare hem in the usual way. It is advisable
to baste the hem. Place the basting at least
1.3 cm
(’/2
inch) below the edge of the hem
allowance to avoid catching the flange of
the guide as you stitch.
3. With the wrong side of the work uppermost,
turn the hem under, creating a soft fold
from the top edge of the hem,
4. Position the hem under the foot with the soft
fold resting against the wall of the guide.
Make sure the flange of the guide is be
tween the soft fold and top of hem. as shown.
5. Lower the foot and stitch so that the straight
stitches fall on the hem allowance and the
zig-zag stitches pierce the soft fold of the
work. Adjust stitch width if necessary. While
stitching, guide the hem edge in a straight
line and feed the soft fold evenly against
the wall of the guide.
!
29