Four-step buttonhole, Four step buttonhole, Step 1 – SINGER 6610 User Manual
Page 39: Step 2
Attention! The text in this document has been recognized automatically. To view the original document, you can use the "Original mode".
6. FOUR-STEP
BUTTONHOLE
Your machine makes buttonholes to any
size you choose In only
four, easy steps.
• You never need to move the fabric or repo
sition the needle.
• Always make a practice buttonhole on a
sample of your fabric.
• Be sure bobbin contains enough thread.
• When making buttonholes on hard-to-
reach areas convert machine bed to free
arm sewing.
• Mark buttonhole position on fabric as indi
cated in pattern.
•
Recommended settings
Stitch Selection:
Buttonhole Stitch
no.1
Stitch Width:
Pre-set
Foot:
Buttonhole (L)
Needle Plate:
General Purpose (A)
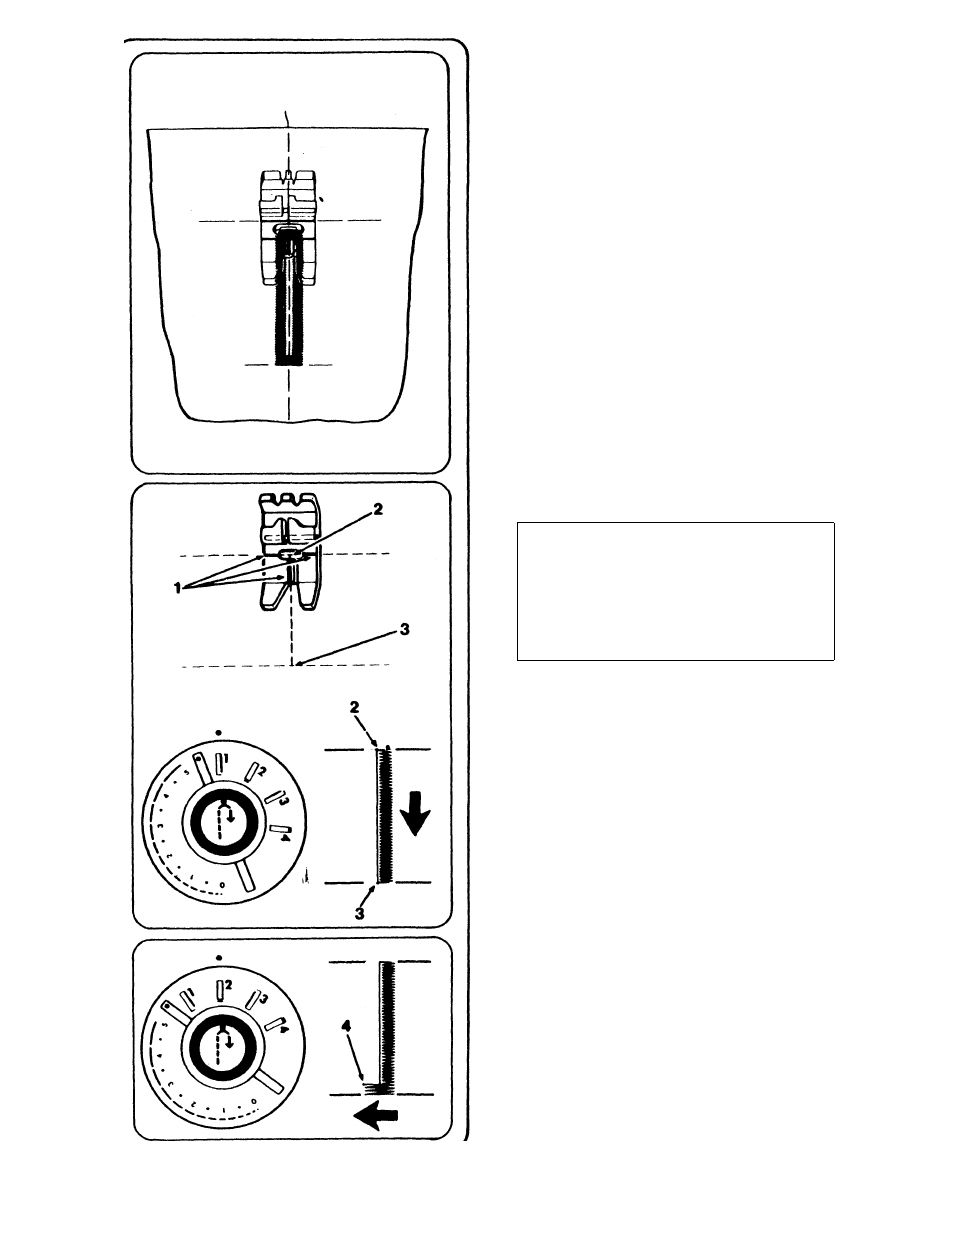
step 1
Raise presser foot.
Place fabric under foot.
Centre 3 red guidelines (1) of foot around
beginning line of buttonhole.
Turn buttonhole dial to the
first buttonhole
symbol for the first step.
Position needle In fabric at point (2) by
turning the hand wheel towards you.
Stitch down to point 3.
step 2
• Raise needle out of fabric,
e Turn buttonhole dial to the second button
hole symbol for the second step,
e Make at least four stitches, ending at
point (4).
34