SINGER W2031 User Manual
Page 9
Attention! The text in this document has been recognized automatically. To view the original document, you can use the "Original mode".
17. How to use the Zigtag Regulators
Fig. 22
Your zigzag sewing machine, by virtue of its design, permits you to do zigzag
sewing and numerous other kinds of work requiring a similar stitch. The controllers
for the zigzag stitch are located on the arm of the machine, as may be.seen on
Fig. 22. Notice lever “A” which adjusts the width of the zigzag seam. For
ordinary straight sewing this lever must be set to the left of O on the dial plate.
By moving this lever gradually to the right toward 4 the machine will sew a zig
zag seam of increasing width, depending on the posi ion of the lever. For the
purpose of reverting to a previously used width of zigzag stitch after having done
some straight sewing, or for special types of work such as sewing buttons or mak
ing tacks, indicators “B” and “C” will be found useful. These indicators serve
as the STOPPERS for lever “A”. To sef “B” ("C”), loosen lock screw “D”
(“E”). hiring it to the left. You then will be able to slide same sideways which,
at the .same time, moves indicator “B” (“C”) to the desired marking. Tighten
lock screw “D" (“E”) by turning it to the right. Thus, when you want to
alternate between narrow and wide zigzag stitch, you use both indicators “B” and
“C”. For example, set indicator “B” at 1 and indicator “C” at 3, tightening
the lock screws. This will assure you of being able to always revert to the same
narrow and wide zigzag seams. You will find this feature especially convenient
when making buttonholes.
( 14 )
18. How to chancre the Presser Foot
1.
Rai.se the needle to its highest position by turning the balance wheel toward you
2.
Raise the pres.ser foot by lifting the presser bar iilter.
3.
Loosen the presser foot thumb screw and remove the fool (Fig. 23),
4. Place the groved side of the desired foot against the flat of the presser bar
5.
Tighten the thumb screw.
mm
Fig. 23
19. To make Buttonholes
2
.
3.
'4,
5.
6
.
7.
8
.
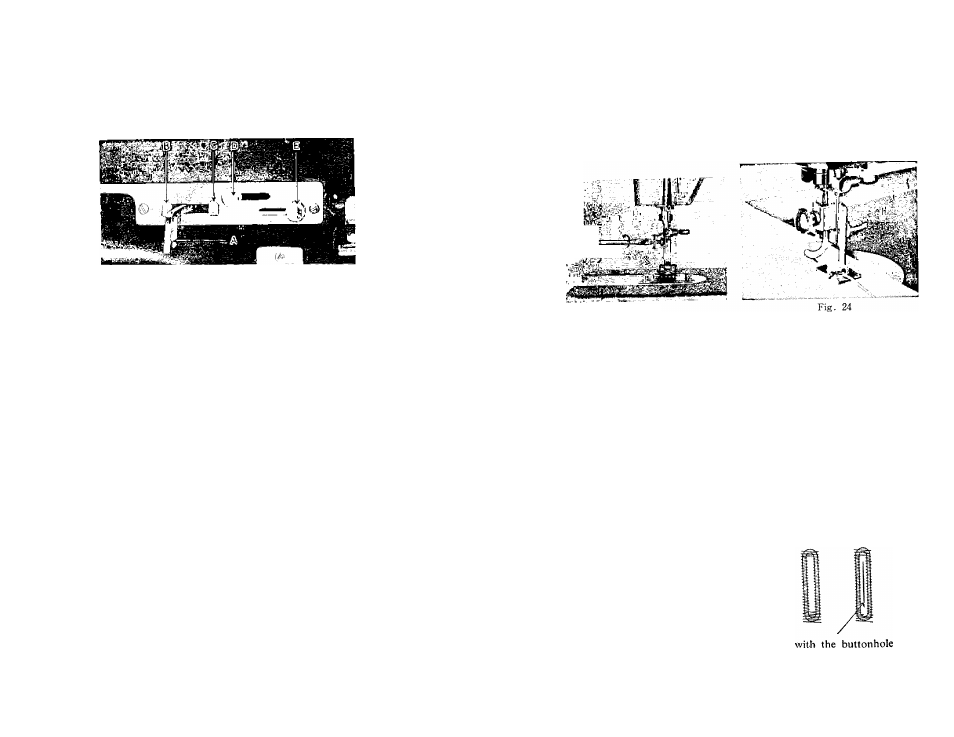
Attach the Buttonhole Fixit.
Set the Zigzag Lever at marking 2 and tighten lock "B .
Set the Stitch at 1 (Page. 9), or near O,
Insert “Gimp" if desired through hole under the foot (Fig. 24).
Sew to desired length and turn the material diametrically as shown in Fig, <
Set the Zigzag Lever at 4, sew several stitches, then reset the^ Zigzag L
at 2 and sew the other side of buttonhole as shown in Fig. 25-C & D.
Set the Zigzag Lever at 4, sew several stitches.
Now you must cut the material between both sides of the seam of the bu
hole with the buttonhole cutter (Fig. 25-F).
A
B
c
D
E
F
Fig. 25
( 15 )