SINGER W2031 User Manual
Page 3
Attention! The text in this document has been recognized automatically. To view the original document, you can use the "Original mode".
1.
To wind the bobbin the balance wheel must te disconnected from the stitching
mechanism. Hold the balance wheel with your left hand and turn the stop
motion knob (Fig. II toward you with your right hand. This will permit the
balance wheel to turn treely while the needle bttr remains motionless.
The balance wheel is now disconnected for the bobbin winding operation.
2.
Place a spool of thread on the spool pin (Fig. 2), Draw thread from the spool
over guide then
down-ward across machine from
left to right.
3.
Pass the thread
through the tension device at the right corner
of the base of
the machine.
4.
Now wind the end of the thread around an empty bobbin seven or eight times
and place the threaded bobbin on the spindle of the bobbin winder.
5.
By pressing on bobbin winder lever, the small rubber wheel is brought in con
tact with the balance wheel. To lock into position, press bobbin winder lever
until a click is heard.
Now .set the machin in motion, and when the bobbin is completely full it will
stop turning automatically. Slip tobbin from spindle. Hold balance wheel
irmly with your left hand and with the rigth hand turn stop motion knot
away from you
until it can not be moved any
further and the needle bar
moves with the turning of the balance wheel.
1 To Wind the Bobbin
Fig. 2
(
2
)
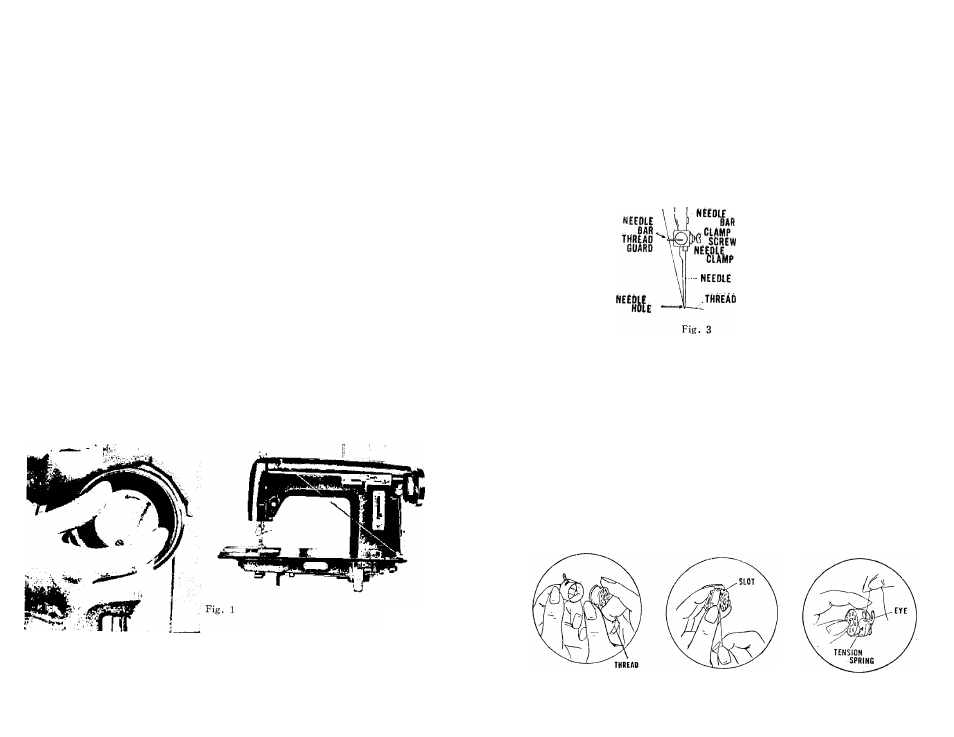
2. Inserting New Needle
1. Turn the balance wheel toward you, raising needle bar to its highest position,
and loosen the needle clamp screw.
.
2.
Hold the needle in the left hand with the point down, and insert the needle
up into the needle clamp as far as it will go, with its flat surface to the right,
then retighten the clamp screw (Fig. 3).,
fliEOLf
FLAT
SURFACE
3. To Thread the Bobbin Case
1.
Hold the bobbin case with your left hand and put the bobbin into the bobbin
case with your right, leaving about two inches of the thread end unwound (Fig.
4). As the bobbin is being inserted in the bobbin case, thread flow is clockwise.
2.
While holding the bobbin case as before, grasp the thread end with your right
hand, and guide it into the cross slot (Fig. 5).
3.
Then pull it through under the tension spring of the bobbin case (Fig. 5) until
it enters the delivery eye (Fig. 6).
Fig. 4
Fig. 5
Fig. 6
( 3 )