SINGER W2031 User Manual
Page 10
Attention! The text in this document has been recognized automatically. To view the original document, you can use the "Original mode".
Notice: You can make the buttonhole without braid or gimp in the same way as
front page.
20.
To sew Buttons
1. Change the presser foot to the Button Foot.
2.
Turn the Drop Feed Knob to “EMBR".
3.
Place material or garment with button under the foot, so that holes in button
line up with oblong hole in the foot (Fig. 26)_.
4.
Adjust the Zigzag Lever so that width
of zigzag stitch permits needle to pass
through center of holes in button.
5.
Sew several stitches and remove mate
rial from machine and snip thread.
Fig. 26
Notice:
When attaching four-holes button, first sew one set of two holes, then
stitch into second set of two holes and lock thread with two or three
plain stitches in last hole as described above.
21.
To make Hem
1. Use the Hemmer Foot.,
2.
Clip the corner of the material td be hemmed, so that it will be easier for
you to insert the material in the hemmer foot.
3.
Feed the clipped edge of the material by curling it into the spiral tongue or
thè- scroll of the foot. '
(
16
)
4.
At first, it might be necessary for
you to lead the material until
beginning of the hem is just be
low the needle.
5.
Fewer presser foot and begin to
sew.
6.
Keep guiding the material, so
that the scroll is filled all the time (Fig. 27).
Notice:
Do not crowd the material into scroll and do not leave scroll only partly
filled by the material. Feed just enough material into the hemmer foot
to fill out the scroll. Instead of a straight stitch, you can also use a
zigzag stitch, width of the zigzag stitch-to be as wide as the hem
itself. Using a long stitch and tight tensions will produce a shell stitch.
Fig. 27
22.
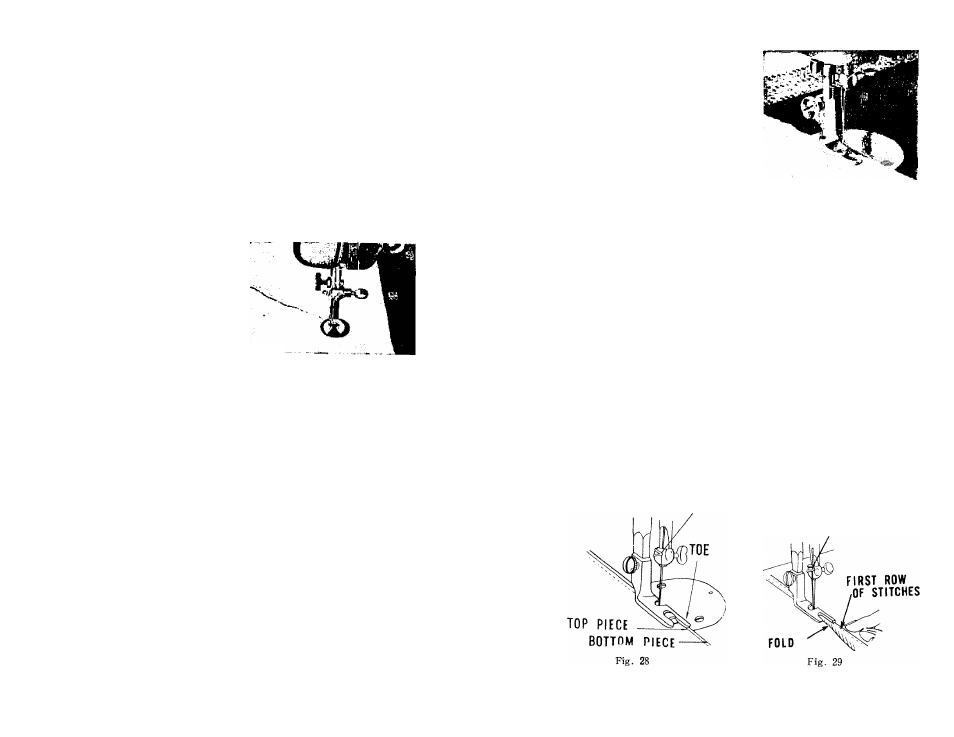
How to do Felling
The hemmer foot can also be used for felling. Proceed in the lollowing manner:
I. Lay two piece.s of doth one top of the other with their RIGHT sides facing
each oihc. The right edge of the bottom piece must extend about 18" beyond
the right edge of the top piece. See Fig. 28,
( 17 )