Installing sewing head in cabinet, Screw driver – SINGER W1366 User Manual
Page 50
Attention! The text in this document has been recognized automatically. To view the original document, you can use the "Original mode".
49
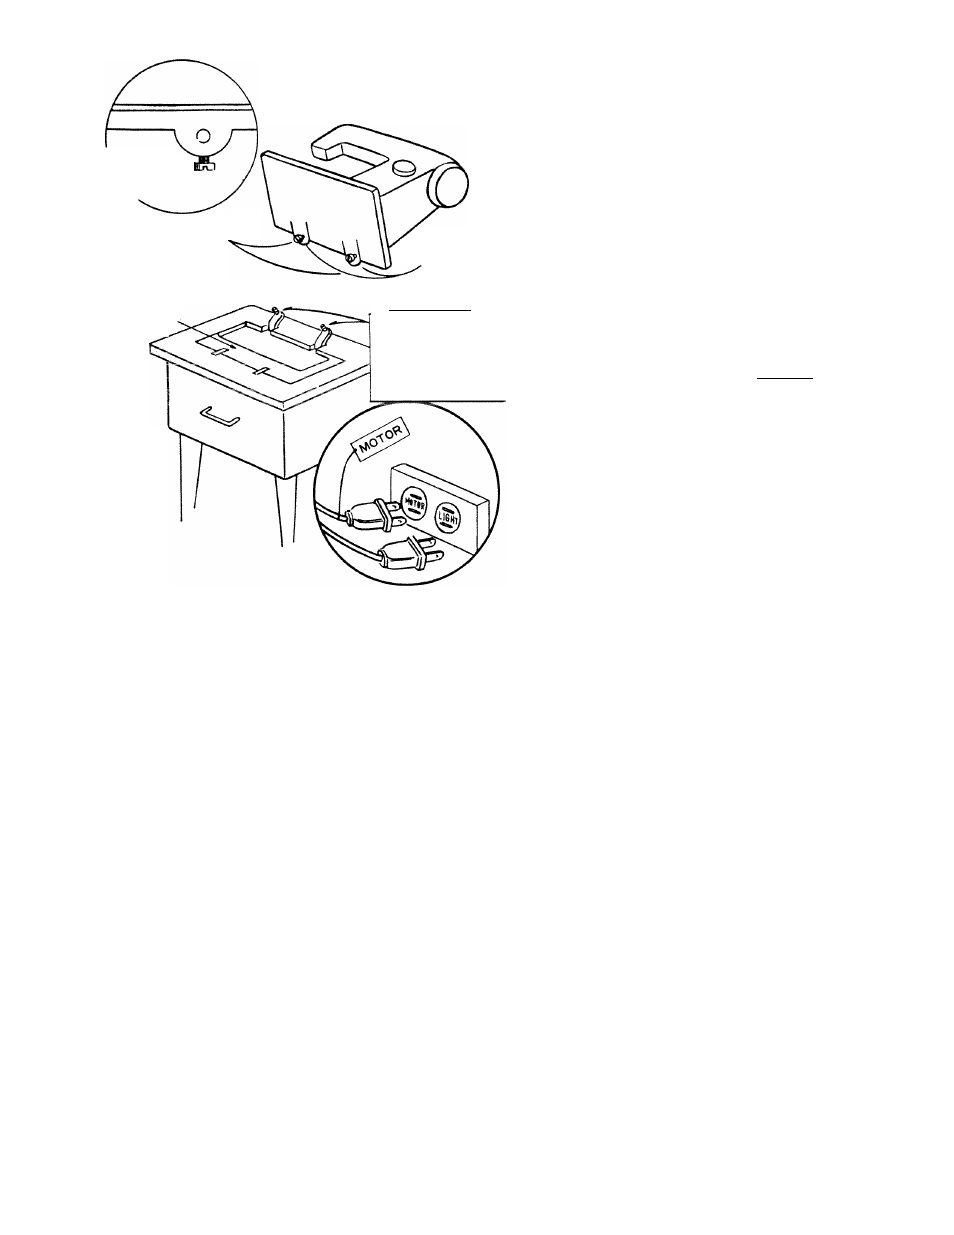
INSTALLING SEWING HEAD IN CABINET
BACK OFF
SET SCREW
TO CLEAR
HINGE HOLE
HEAD HINGE SET
SCREWS
LIFT FLAP
TO LOWER
HEAD INTO
CABINET
HEAD HINGE
HOLES
HEAD HINGES
HINT. STRETCH
A RUBBER BAND
ACROSS THE TWO
HINGES TO HELP
HOLD THEM UP
RIGHT WHILE
MOUNTING THE
SEWING
HEAD.
1.
Loosen both head hinge set screws
until head hinge hole is clear.
2.
Tilt head hinge fingers up and back
as far as they will go.
3.
Carefully slip head onto head hinges
- - making sure fingers are inserted
as far as they can go into head hinge
holes.
4.
Allow the head to rest in its tilted-
back position.
5.
Tighten both set screws securely with
screw driver.
6.
Plug electrical leads into sockets lo
cated inside cabinet. Cord identified
with
"motor"
tag
must
be
plugged
into
socket
marked
"motor".
Un
tagged cord goes to "light" socket.